ACCOUNTING OPTIONS SETUP
In this article we will cover how a user would setup or edit their accounting/invoicing options.
Knowing how to setup your company's accounting options within FieldCentral will help ensure that you are able to invoice customers as needed within the platform.
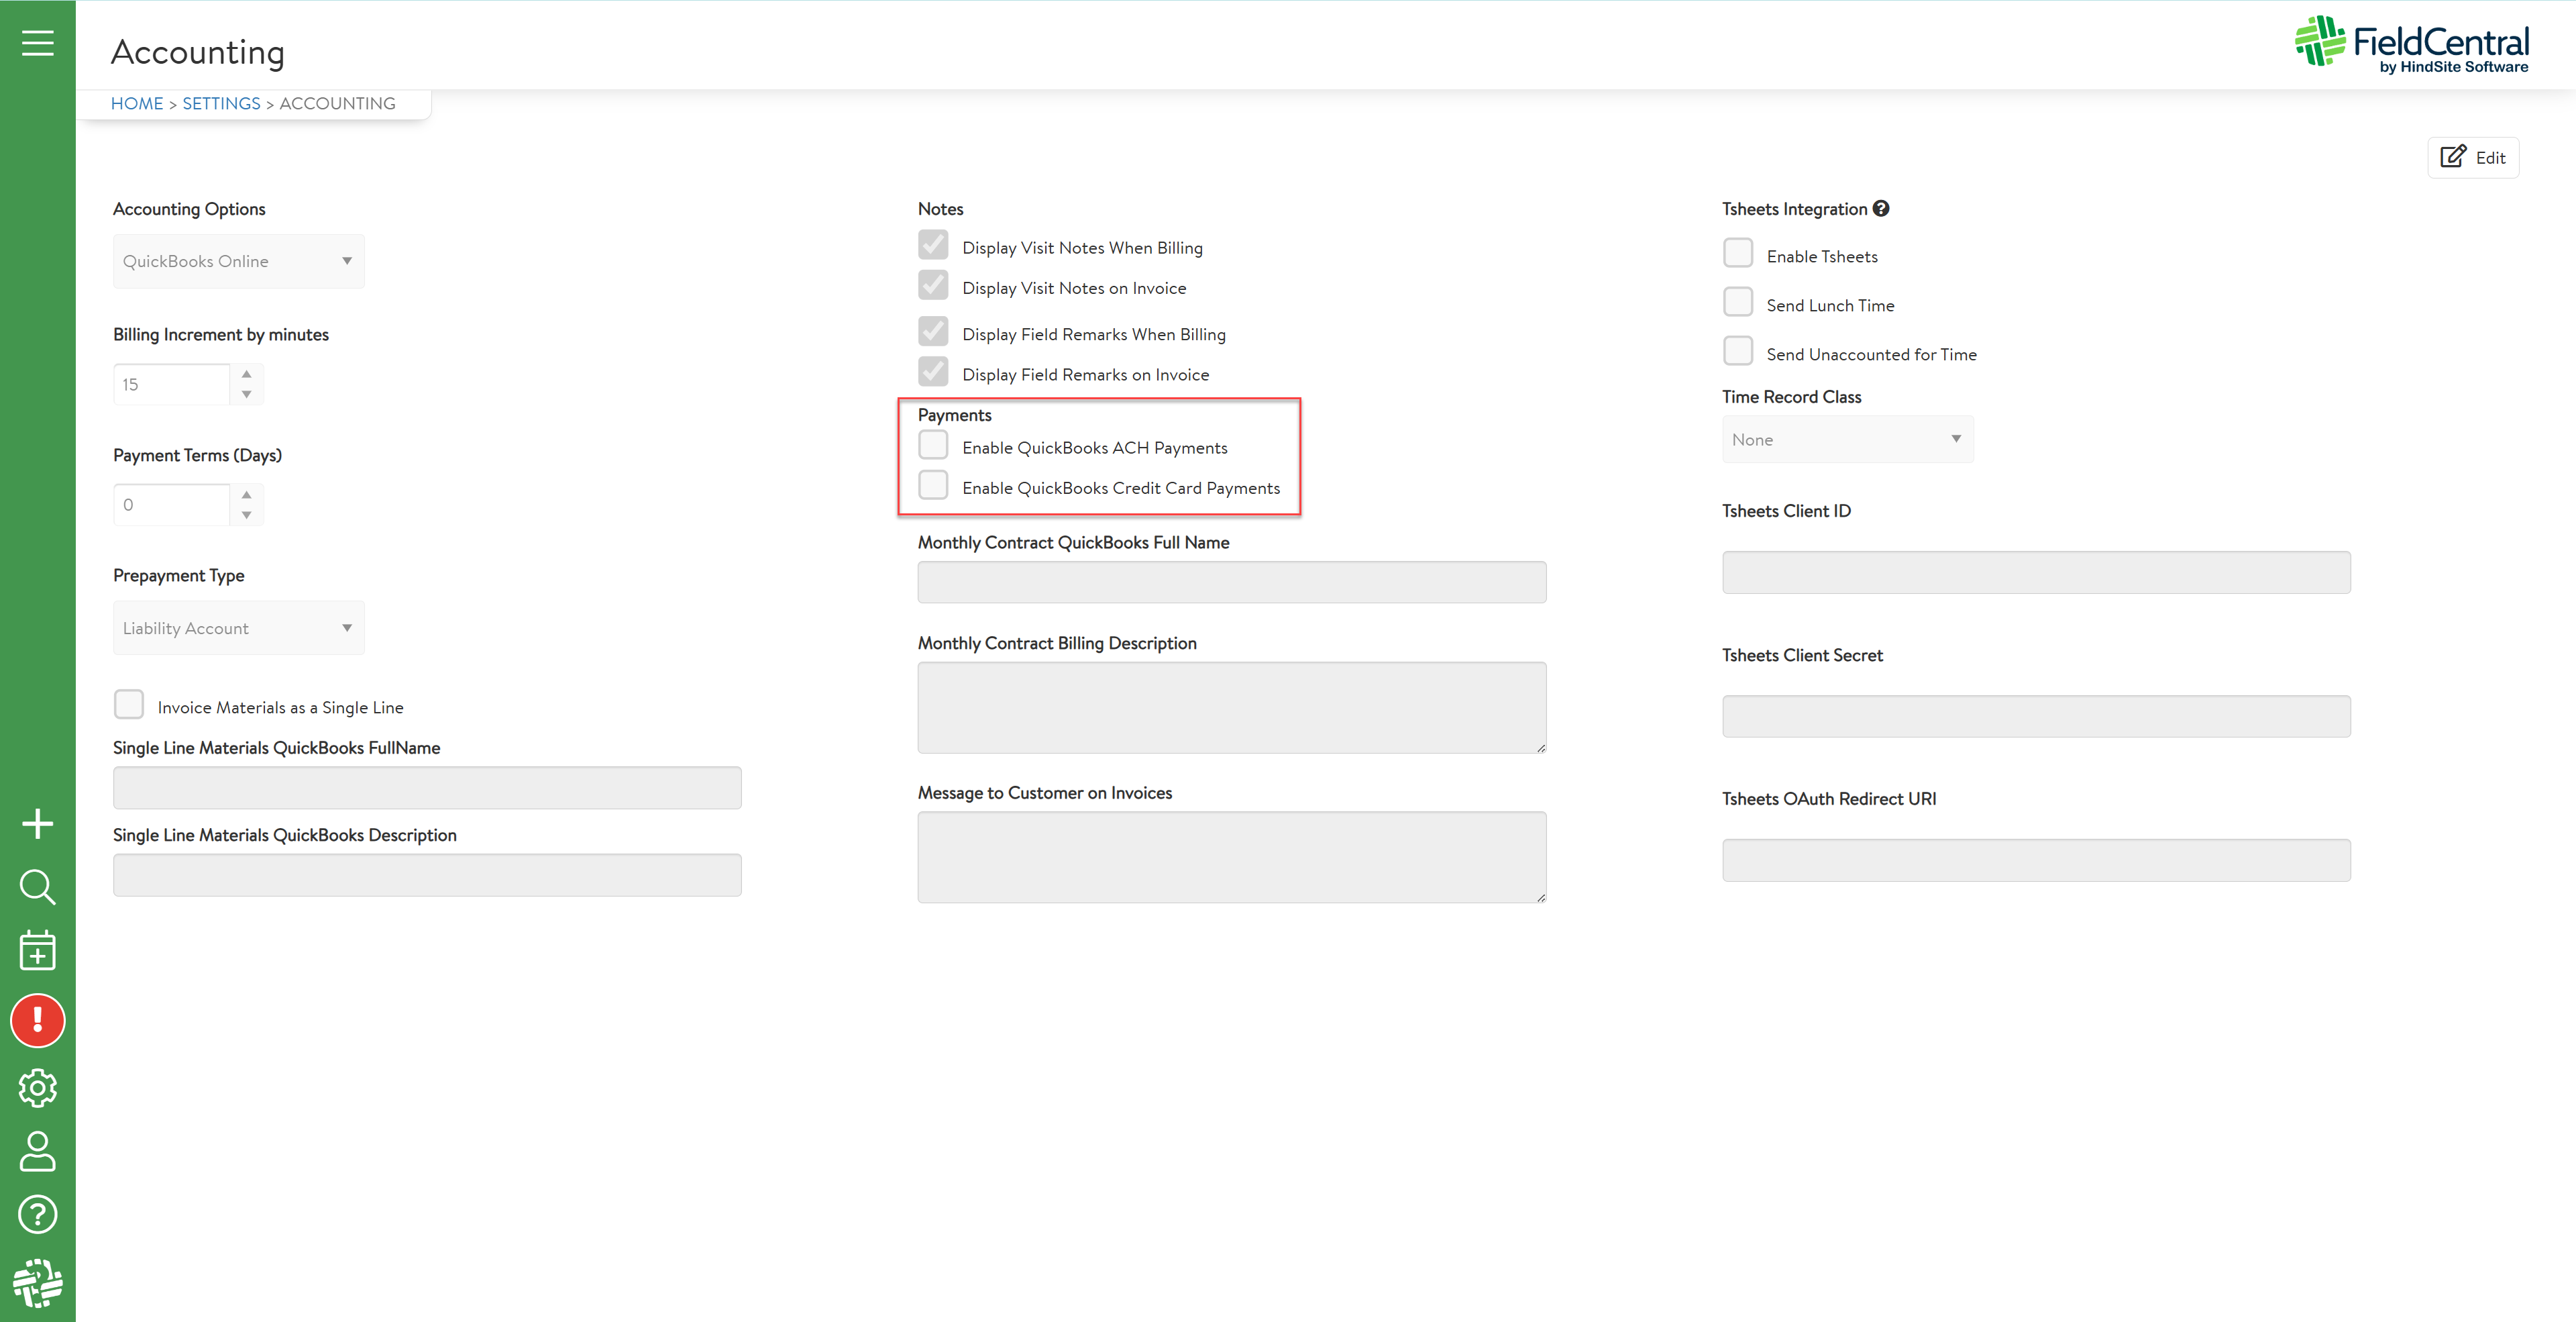
Once you have logged into your FieldCentral web account, navigate to the Settings page via the quick access panel.
Select “Accounting”.
In order to make any adjustments to the page, the user must first select the “Edit” button in the top right corner.
Within Edit Mode, the user is now able to make the desired adjustments as needed.
“Accounting Options” the user will select which type of QuickBooks accounting software is being used (Desktop or Online).
Setup your company's desired billing increments & payment terms. If a payment term of 0 is established here, the invoice would be due upon receipt.
Select the Prepayment type:
Liability Account - Requires payments to be submitted as sales receipts to QuickBooks and allows for the credit from prepayment to be conveyed on the invoice. Click here for more information on the setup required.
$0 Line Item - Any contracted work marked as prepaid would be sent to QB as a $0 line on the invoice.
Then determine if you would like all materials logged on a visit to be grouped together on a single line item vs listed out individually.
Use the checkboxes to confirm if you would like certain notes information to be displayed on invoices or withheld from the customer.
If billing customers monthly, using the “Monthly Contract QuickBooks Full Name” will allow you to establish how those monthly installment charges appear on the invoice. In addition to the ability to edit the description displayed for those monthly installments (QBO option).
If connected to timesheets (Tsheets) the user also has the ability to make adjustments/selections here.
Once all adjustments have been made, be sure to click “Done” in the top right corner to ensure your selections will be saved and implemented.

Need to make adjustments to your accounting settings or haven't set them up to your specific company needs? Be sure to review your accounting setup the next time you login to make sure its just as you need for your customer base.