In this article, we will cover how a FieldCentral user would add Material Categories.
Knowing how to add/set up Material Categories will help ensure data is organized when logging parts/materials for visits and further down the line when running reports on what parts/materials were used and need to be re-ordered.
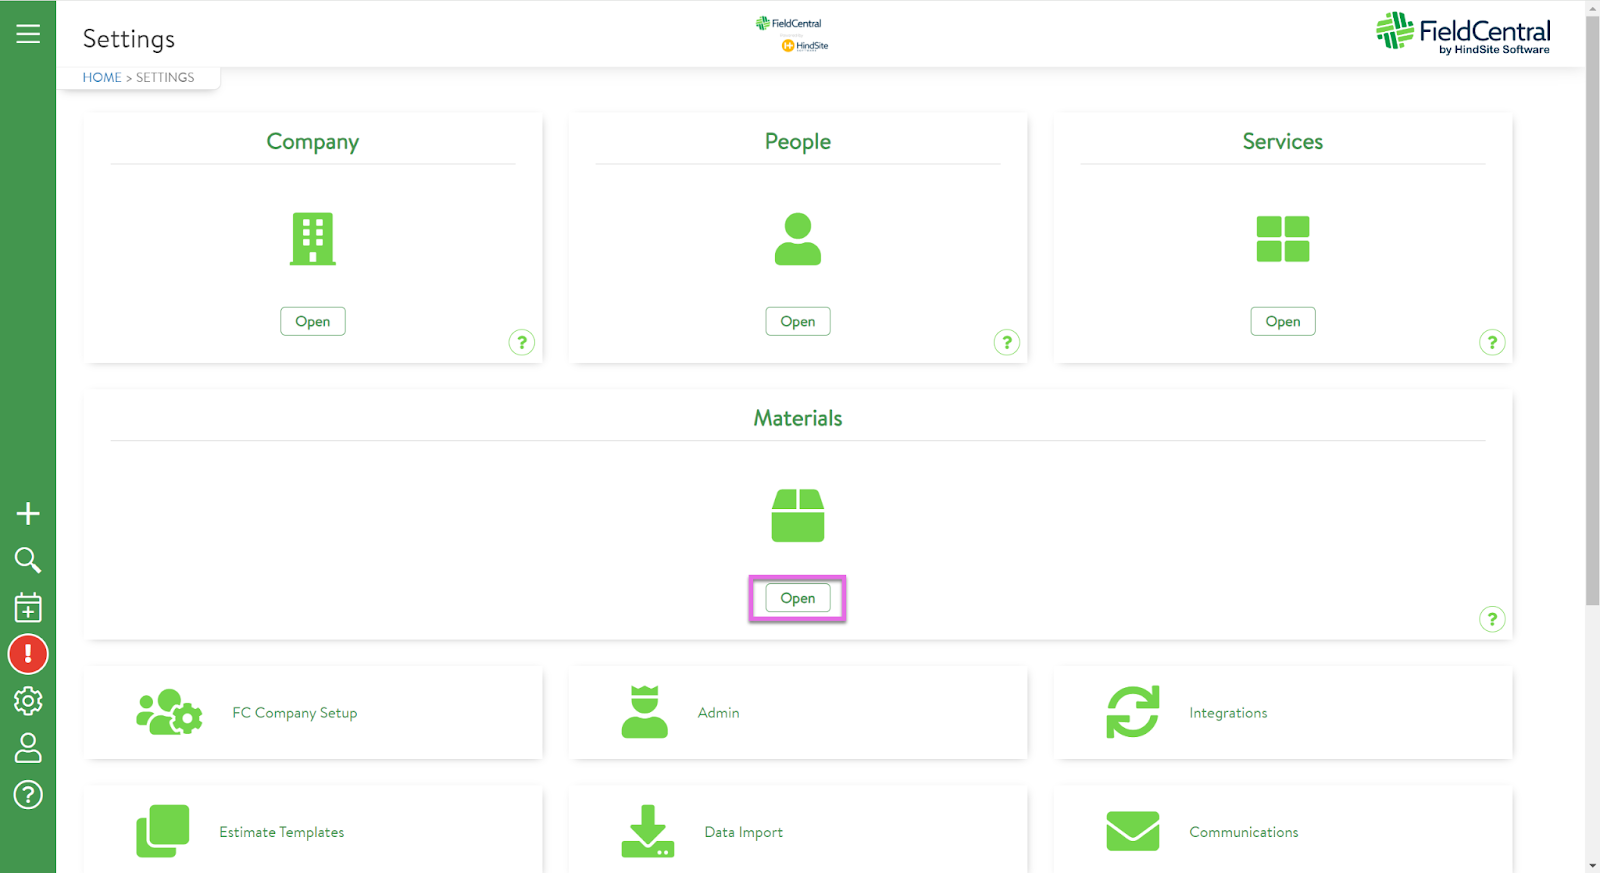
Once you have logged into your FieldCentral web account, navigate to the Setting page either via the Main Menu or the quick access panel.

Select to Open Materials
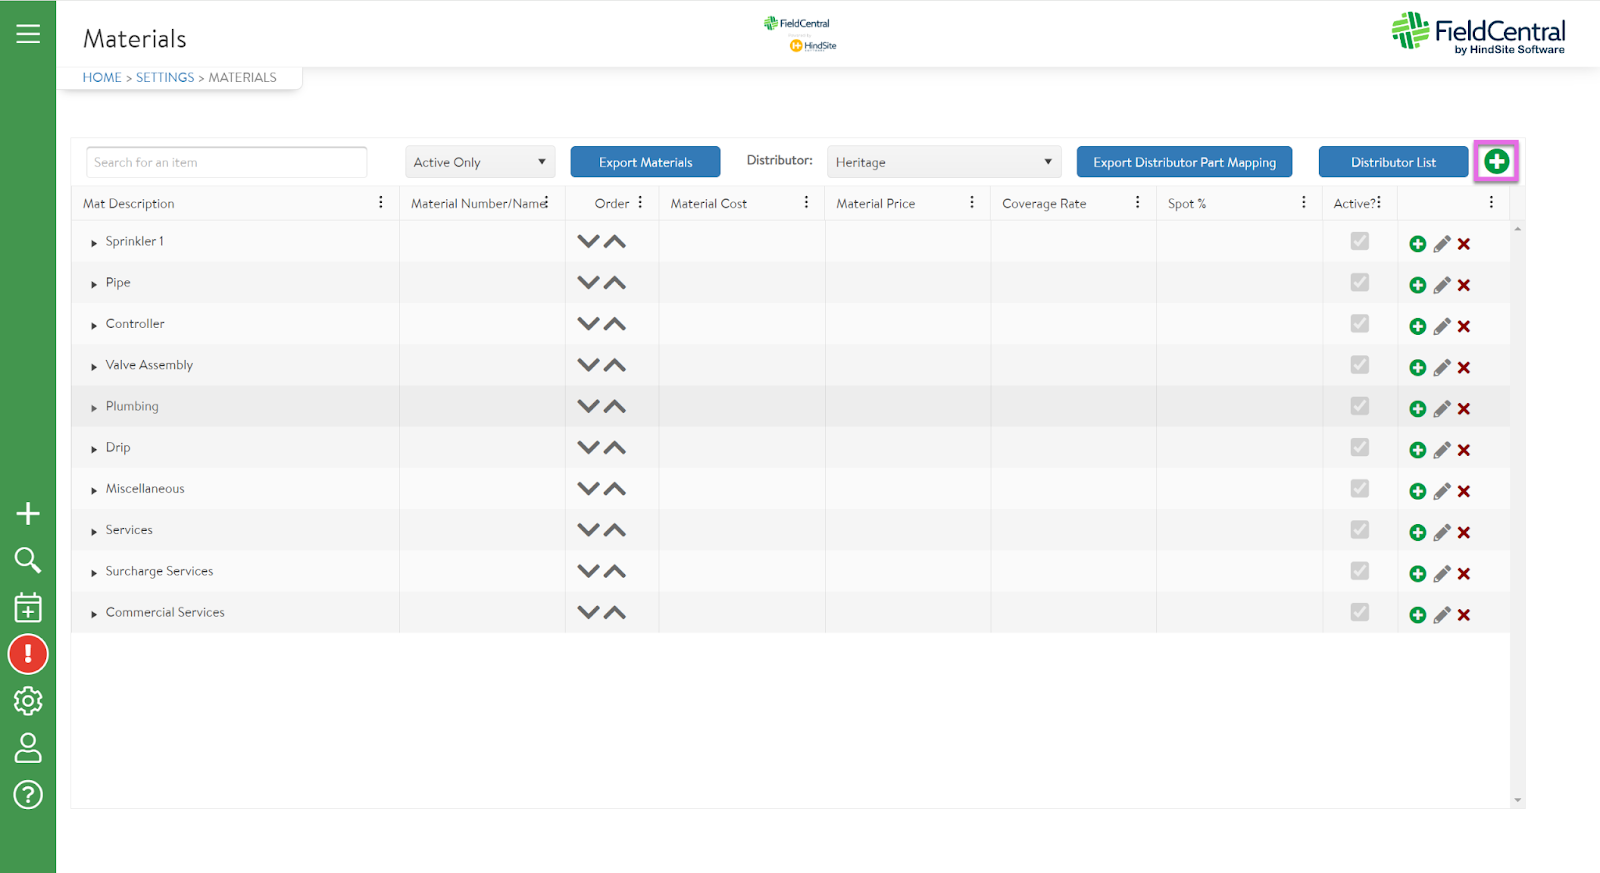
Click the “Add New Materials” green + button on the top right of the page.
The user will select “Category” from the Type Dropdown and then provide the Category a name. “Active” will be selected by default and then the user can select if they would like to disable discounts for the category.
Once all selections have been made, click “Save”.

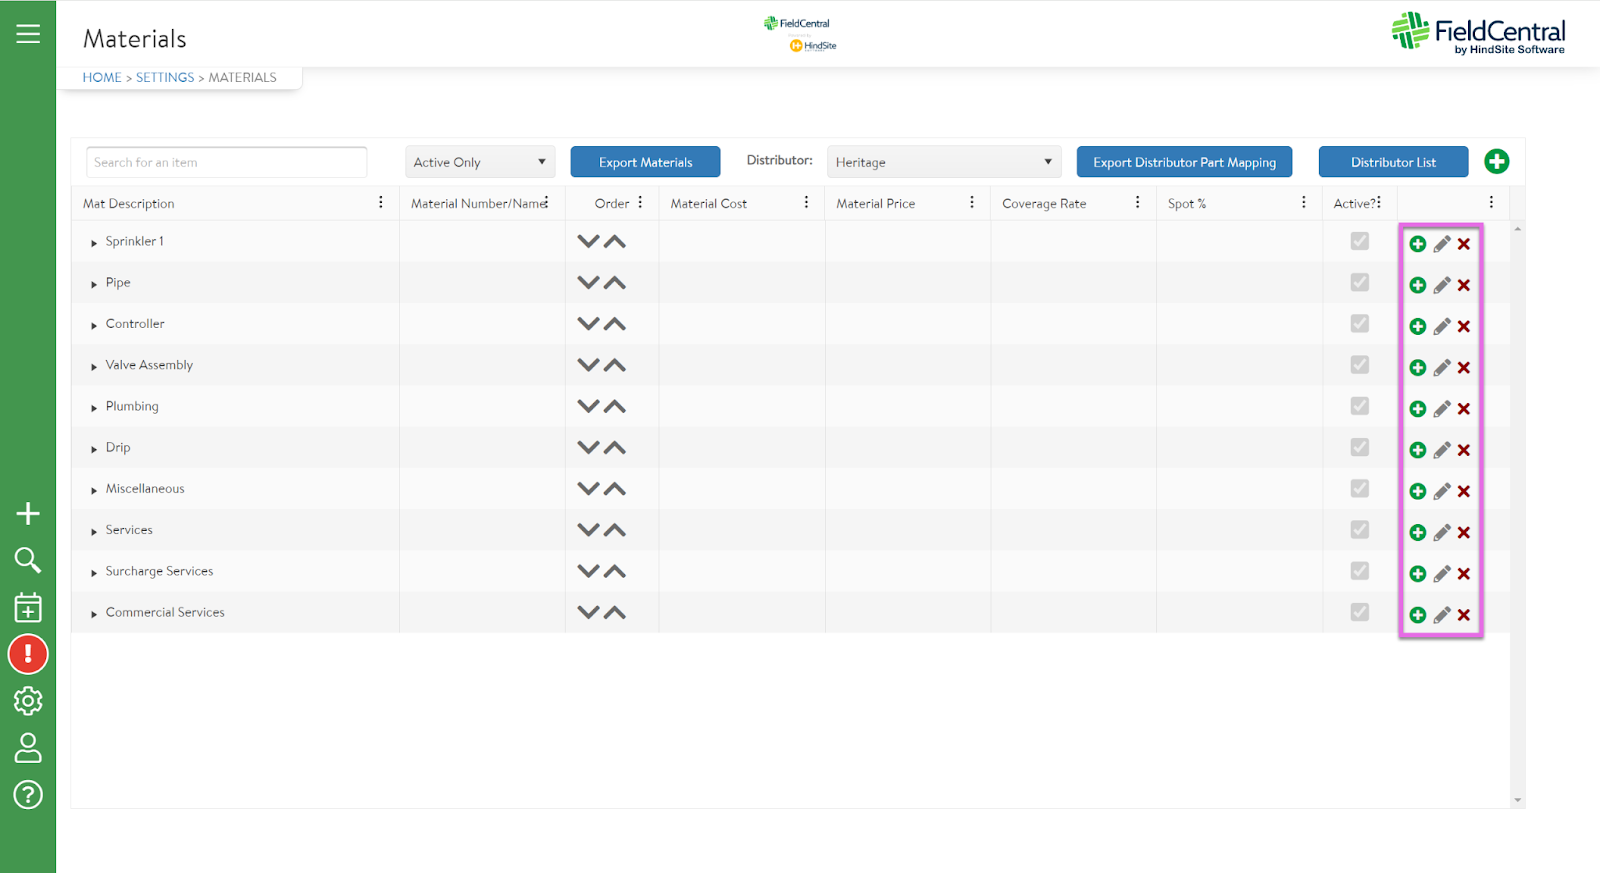
To delete any Material Category, click the X icon for the corresponding material. Users can also edit by using the pencil icon and can use the green + within the material category to quickly add a part to that particular category.
Be sure to setup your Material Categories the next time you login to ensure your materials are organized for use and reporting!