In this article we will cover how a FieldCentral user would add an employee within the People section of their account Settings.
Knowing how to add (and edit) those listed as employees with your FieldCentral web account is key to ensuring that the appropriate technicians/crews/helpers show as available within the Field App. Additionally, this will help ensure accurate billing of your customers for services rendered.
Once you have logged into your FieldCentral web account, navigate to the Settings page either via the Main Menu or the quick access panel on the left hand side of the page.
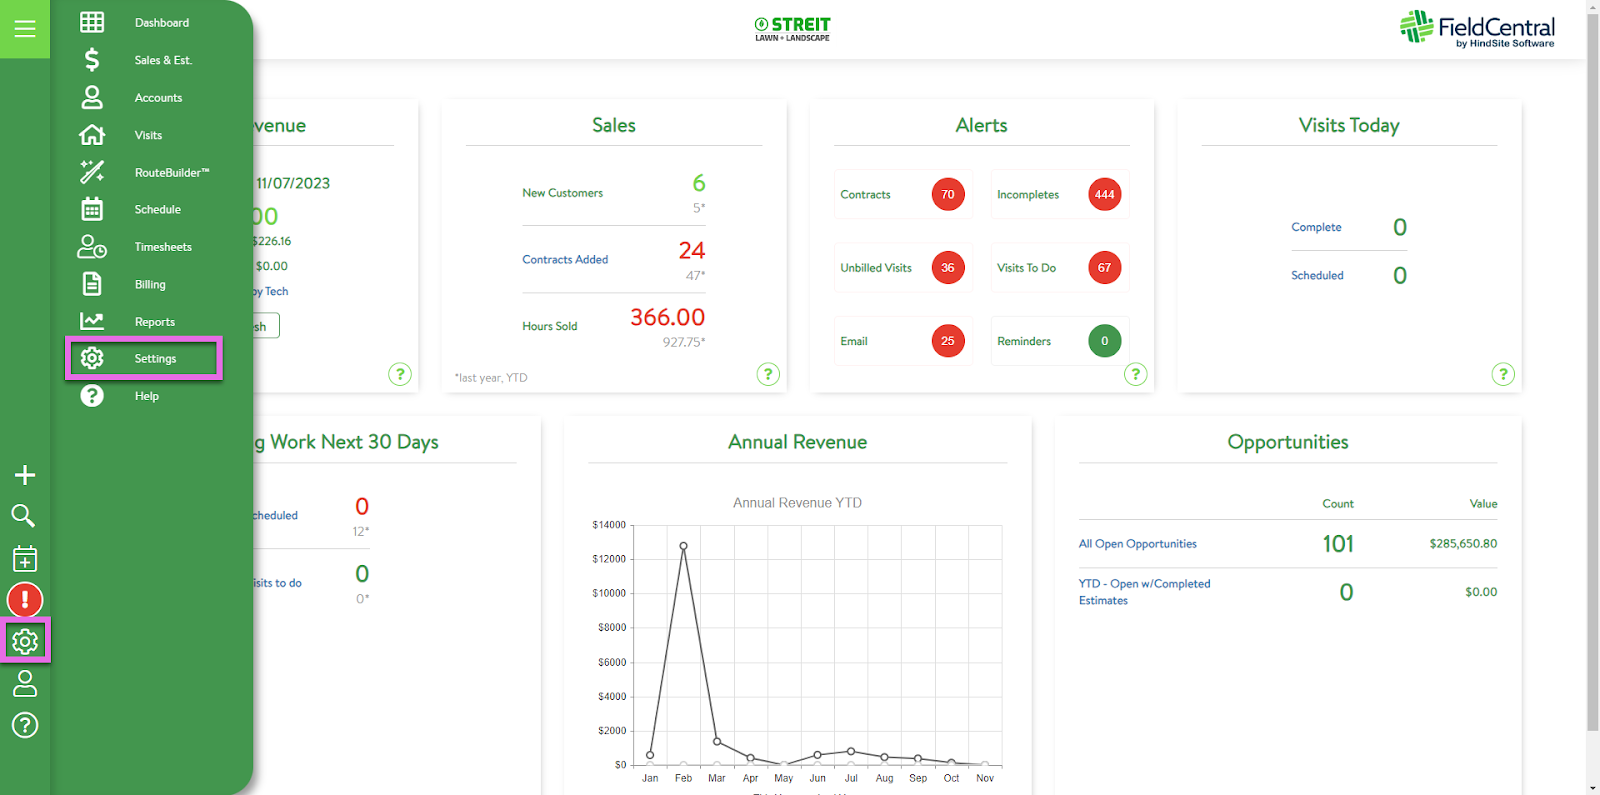
Select “People”.
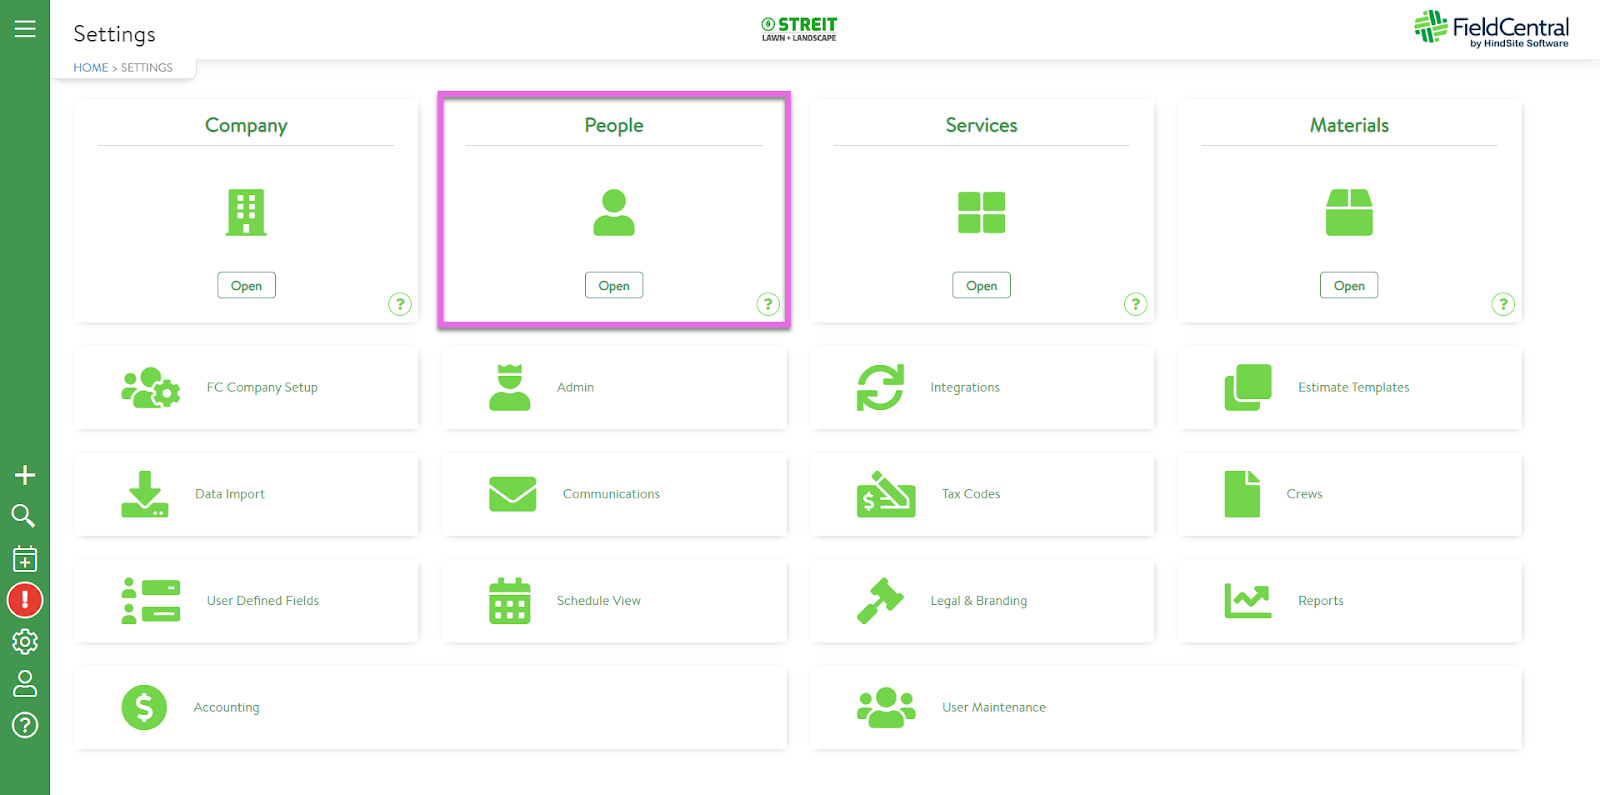
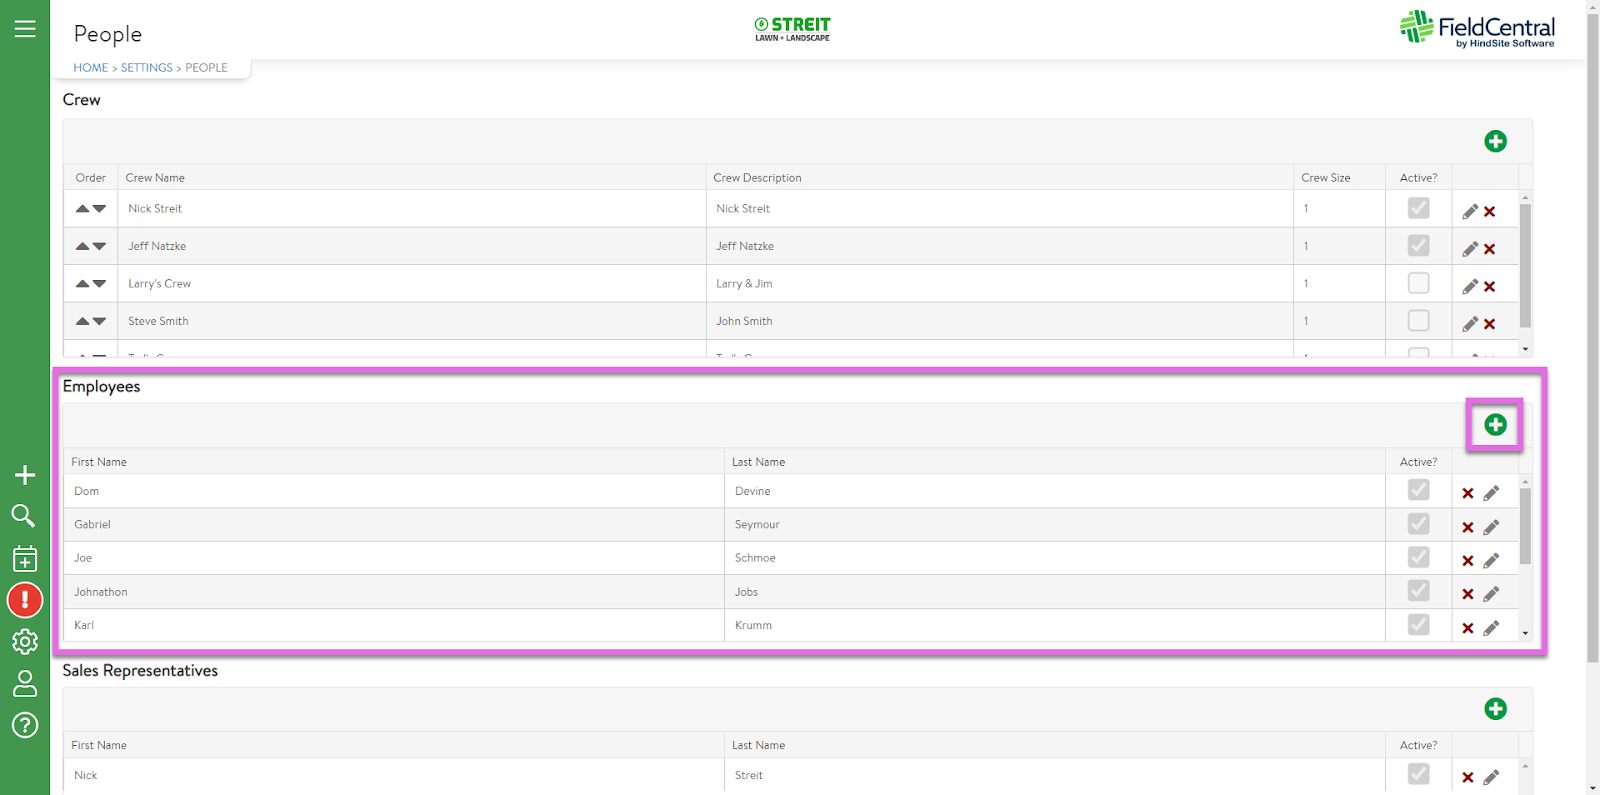
Within People settings, we will be focused on the Employee section.
Here is where users will create the list of employees available within the field.
To add an employee, click the green plus button within the Employees Section.
To add a primary employee, choose from the list of users available in the drop down.
FieldCentral determines if the employee is a primary employee based on if they are listed as a user in the user maintenance section of the program. If added as a user, then the employee should be able to be linked to that user, and would be treated as a primary employee.
**Note: If the first name and last name entered for the employee matches the first and last name of a user, FieldCentral will automatically link the user to the employee.
To add a helper employee, simply enter in the first name and last name for the employee.
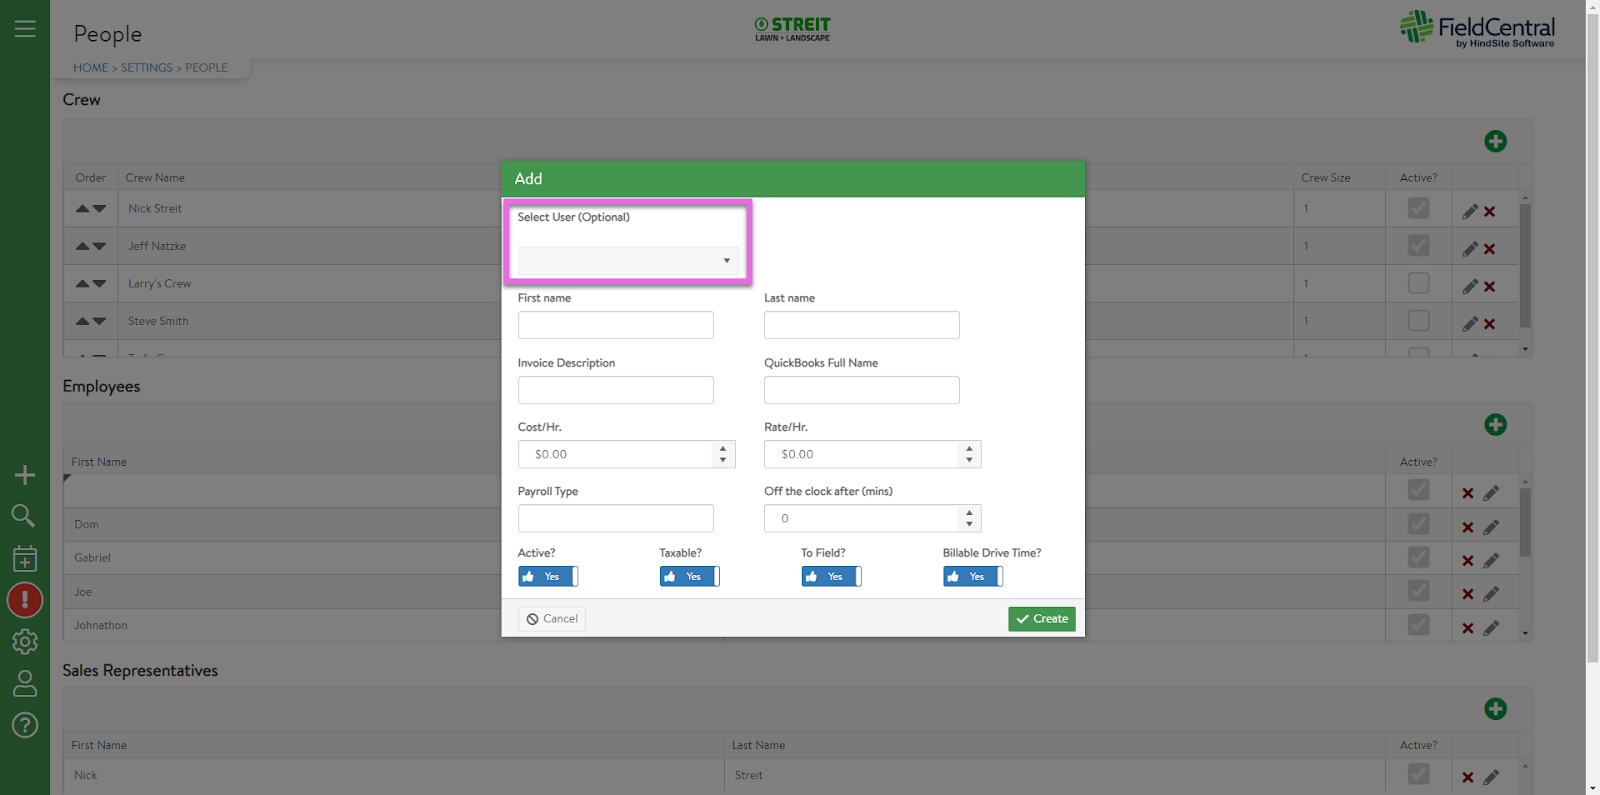
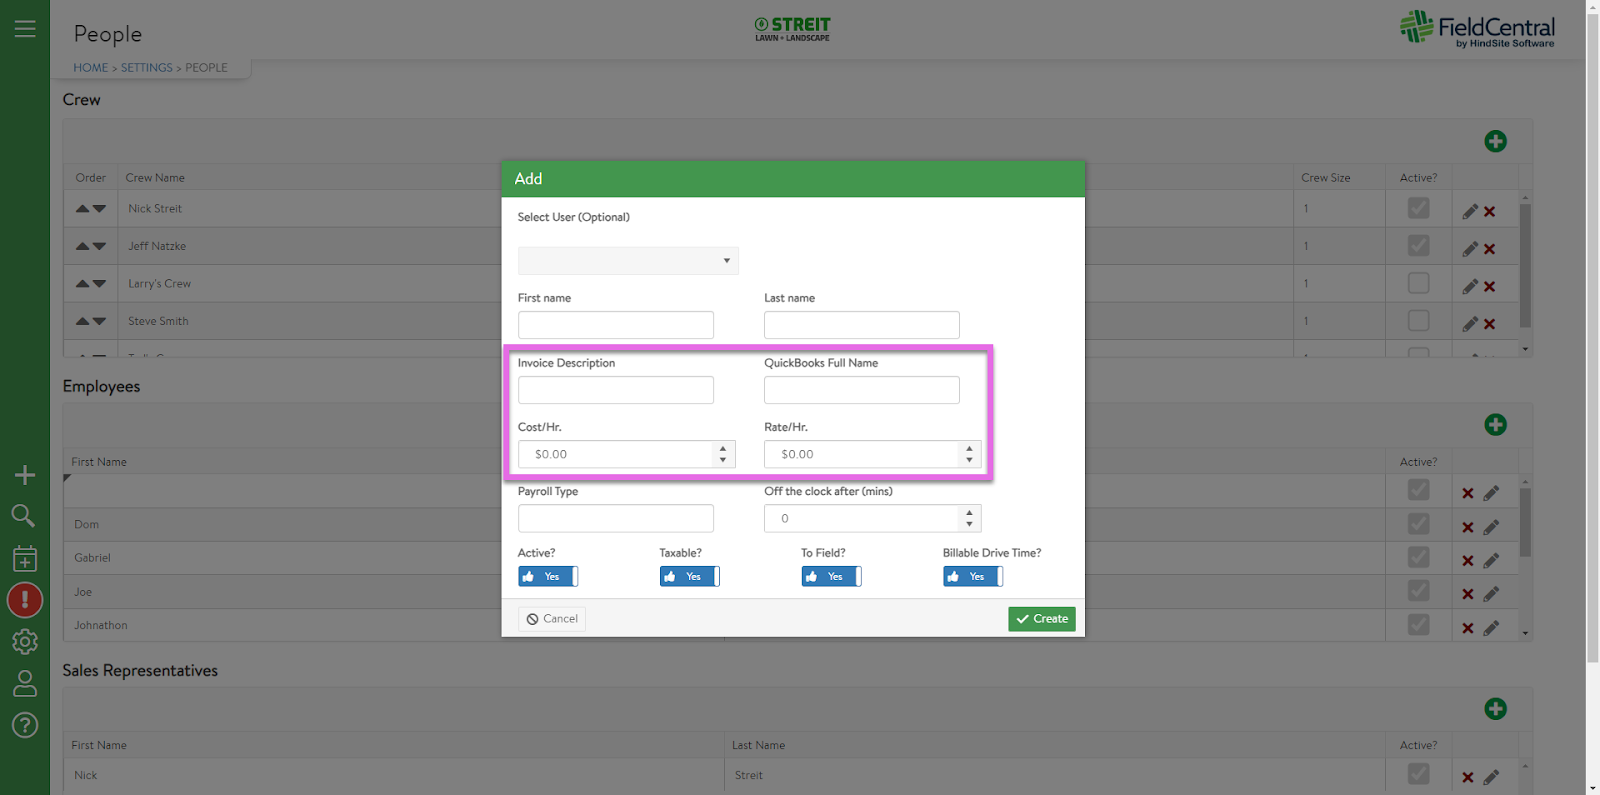
Once the selection is made or the name is entered, continue to fill in the following information.
If connecting to QuickBooks for timesheets/payroll, the employees full name as it appears in QuickBooks will need to be provided within the “QuickBooks FullName” field.
Cost per hour is how much the employee costs the company per hour.
Rate per hour is how much you would charge the customer for an hour of the employee's labor.
Both of the values above are used for some of the financial reporting in FieldCentral.
*”Invoice Description” field is a placeholder for a future functionality.
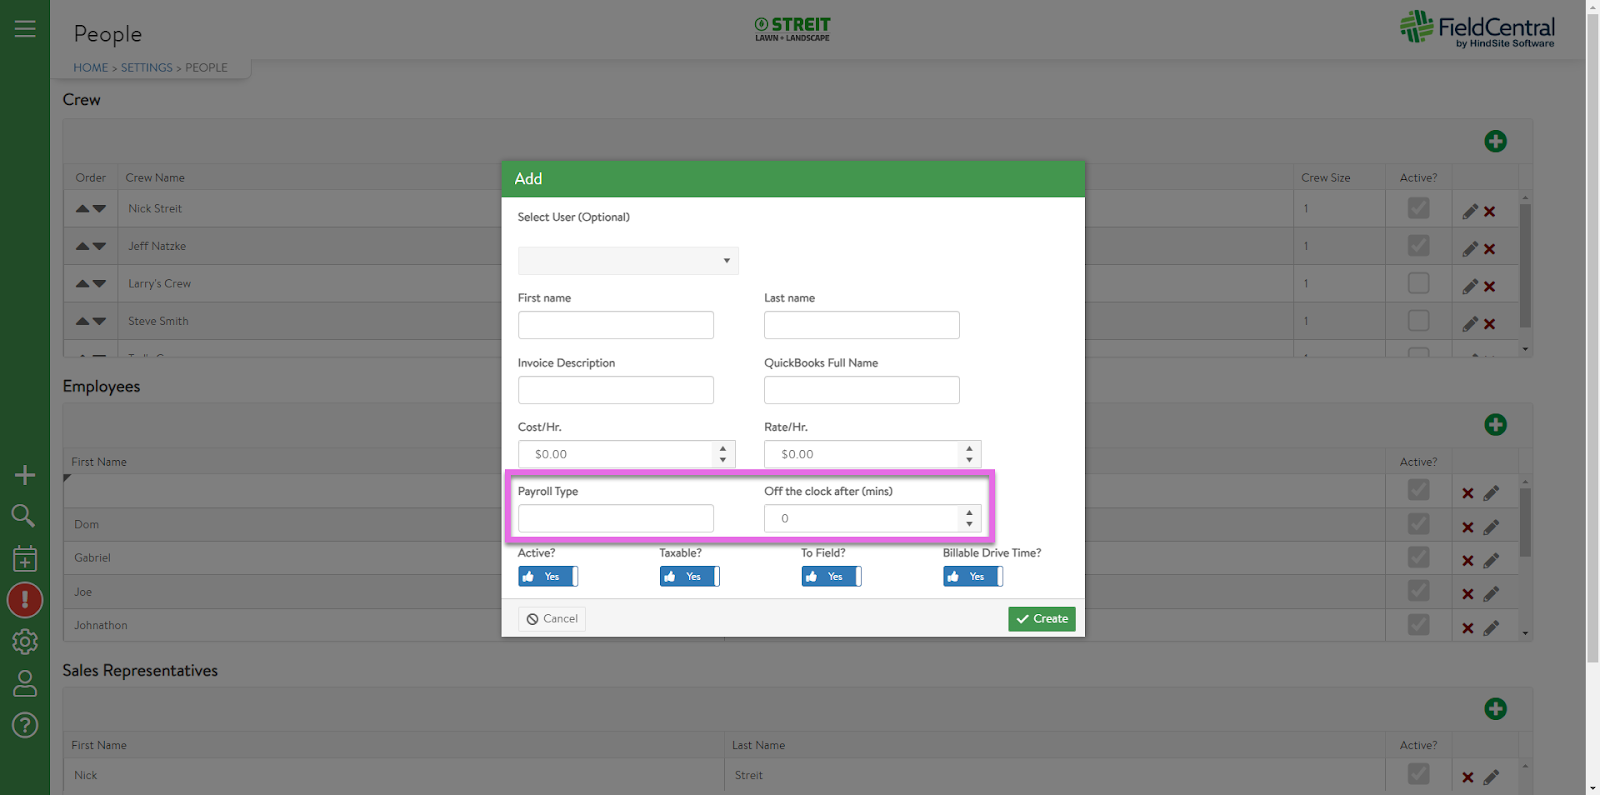
Payroll Type ties into the payroll Item as defined within QuickBooks to determine how much the employee is paid per hour.
To prevent unaccounted for time, you are able to set up “Off the clock after (minutes)”. Meaning if an employees/crews time is not being calculated by any function (drive time, visit, lunch, etc) they will automatically be clocked out after this number of minutes.
- Use the Active/Inactive toggle to determine the employees status.
- “Taxable” should be left on if the company changes sales tax.
- “To Field” allows this employee to be seen in the crew options within the field app.
- “Billable drive time” should be left on if the company changes for drive time. Commonly, this is turned on for primary technicians and kept off for any helpers.

Once all appropriate information has been entered, the user will click “Create”.
It is important to stay on top of your current employee list with those who are active/inactive and those that should be available in the field to add to a crew to ensure accurate data of employee time and costs associated with a visit.