ADVANCED MAPPING AN ESTIMATE
In this article we will cover how a FieldCentral user would use the Advanced Mapping feature to determine area square footage, linear line length, or quantities. We will also cover how these measurements would be leveraged to produce an estimate via an existing price matrix. If you still need to create your price matrix, please refer to our PRICE MATRIX SETUP article. For the purposes of this article we will pick up after the estimate has been created and now the user is working to refine the details before sending it to the property for approval.
Advanced Mapping allows users to effortlessly take key measurements using a satellite map to better calculate the scope of work needed depending on the service for a property. In turn the user is able to take these measurements to provide an accurate estimate to the property for the requested services.
Once users have logged into their FieldCentral web account, navigate to the “Sales & Est” page via the Main Menu.
Then “Estimates & Opportunities”
Search for the desired property using the filter fields on the left hand side of the page. Then select “View Estimate” via the appropriate icon.
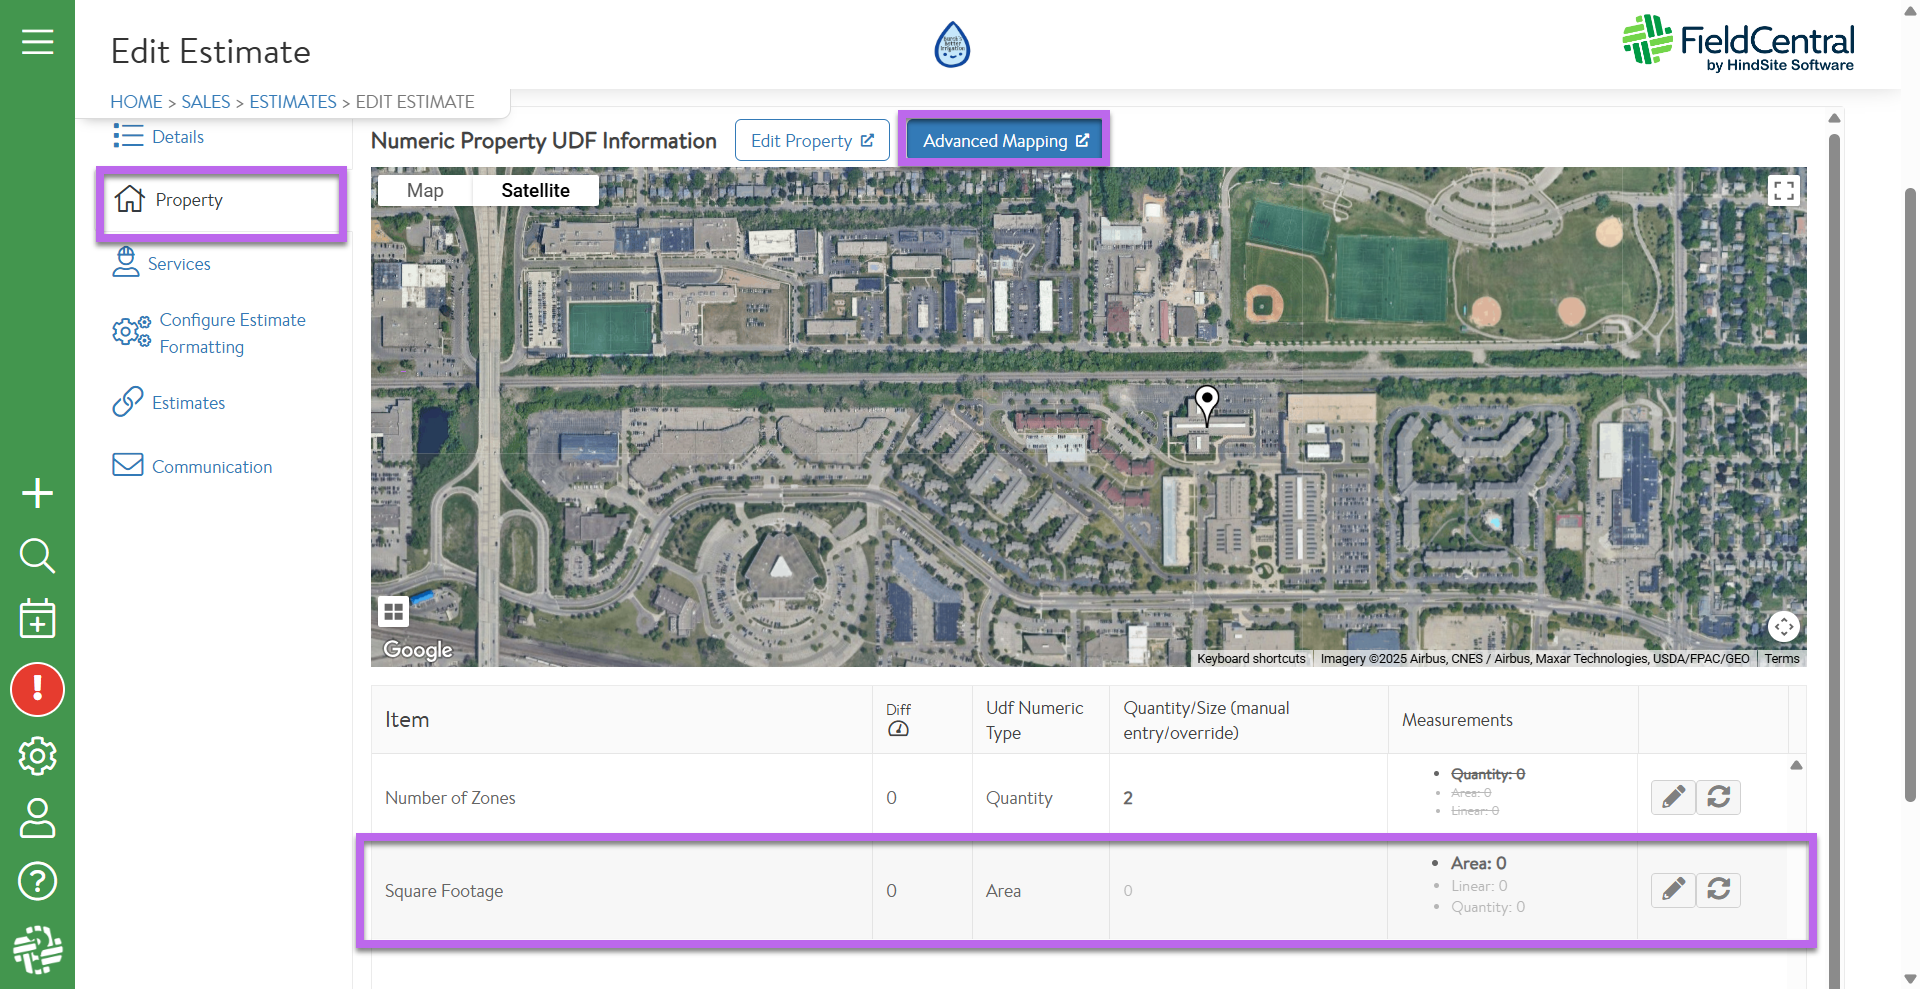
This will bring the user to “Edit Estimate” where they will navigate to the “Property” tab on the left hand side.
Here the user will see the property from the satellite map view and the bold “Area” measurement which is tied to the “Lawn Sq Footage” UDF that informs our price matrix.
**Note that all UDF's for Advanced Mapping must be a Numeric Only Text field, the type selection for that UDF will determine which calculation from the mapping will be used with the price matrix to determine pricing. For more information on setting up UDF, please refer to our UDF Setup Article**
To measure the area for mowing, users would click the blue “Advanced Mapping” button above the satellite view.

This will bring the user to the “Advanced Mapping” page.
On the left hand side the user will see the property information in addition to the UDFs that can be calculated from this view.
The user will also see several buttons within the map that will be used to calculate the desired measurements.
The first options can be found in the top left corner of the map where the user can select if they would prefer the default satellite or map view.
In the bottom right corner, the user is able to use the +/- buttons to zoom in and out as needed (or their mouse scroll wheel).
- The remainder of the icons on the bottom right and the top center are the same.
- The pointer or hand icon will be used to “Select or Pan Control”
- The square icon will be used to “Bulk Select”
- The Polygon icon will be used to draw “Polygons” (measure area sq footage)
- The Pin icon will be used to select “Points” (measure quantity)
- The Line icon will be used to measure “Lines” (measure linear length)
For our example, we will be using the polygon tool to capture the square footage of the property to calculate the price and time to mow this property. This will inform values on our estimate downstream.
To begin, click the + button within the “Lawn Sq Footage” card and then click to “add/save” the subsection.
The user will then select the Polygon icon which will allow them to begin measuring the property.
With the Polygon tool selected click within the map to begin creating the desired parameters of the measurement until it is an enclosed shape.
Tip: when drawing the polygon, on the 3rd point creation the user can double click for the polygon to automatically connect back to point 1.
The measurement will be displayed in the bottom center of the map and on the left hand panel. The user will see warning icons that the measurement has been calculated but it is not yet saved.
In order to save the user will need to click the red save icon in the bottom center of the map.
If measuring more than one sub-section, each subsection will need to be saved before moving onto the next in order to not lose the information calculated.
Once the save button is clicked, the red warning messages will disappear, confirming that the measurement has been saved.
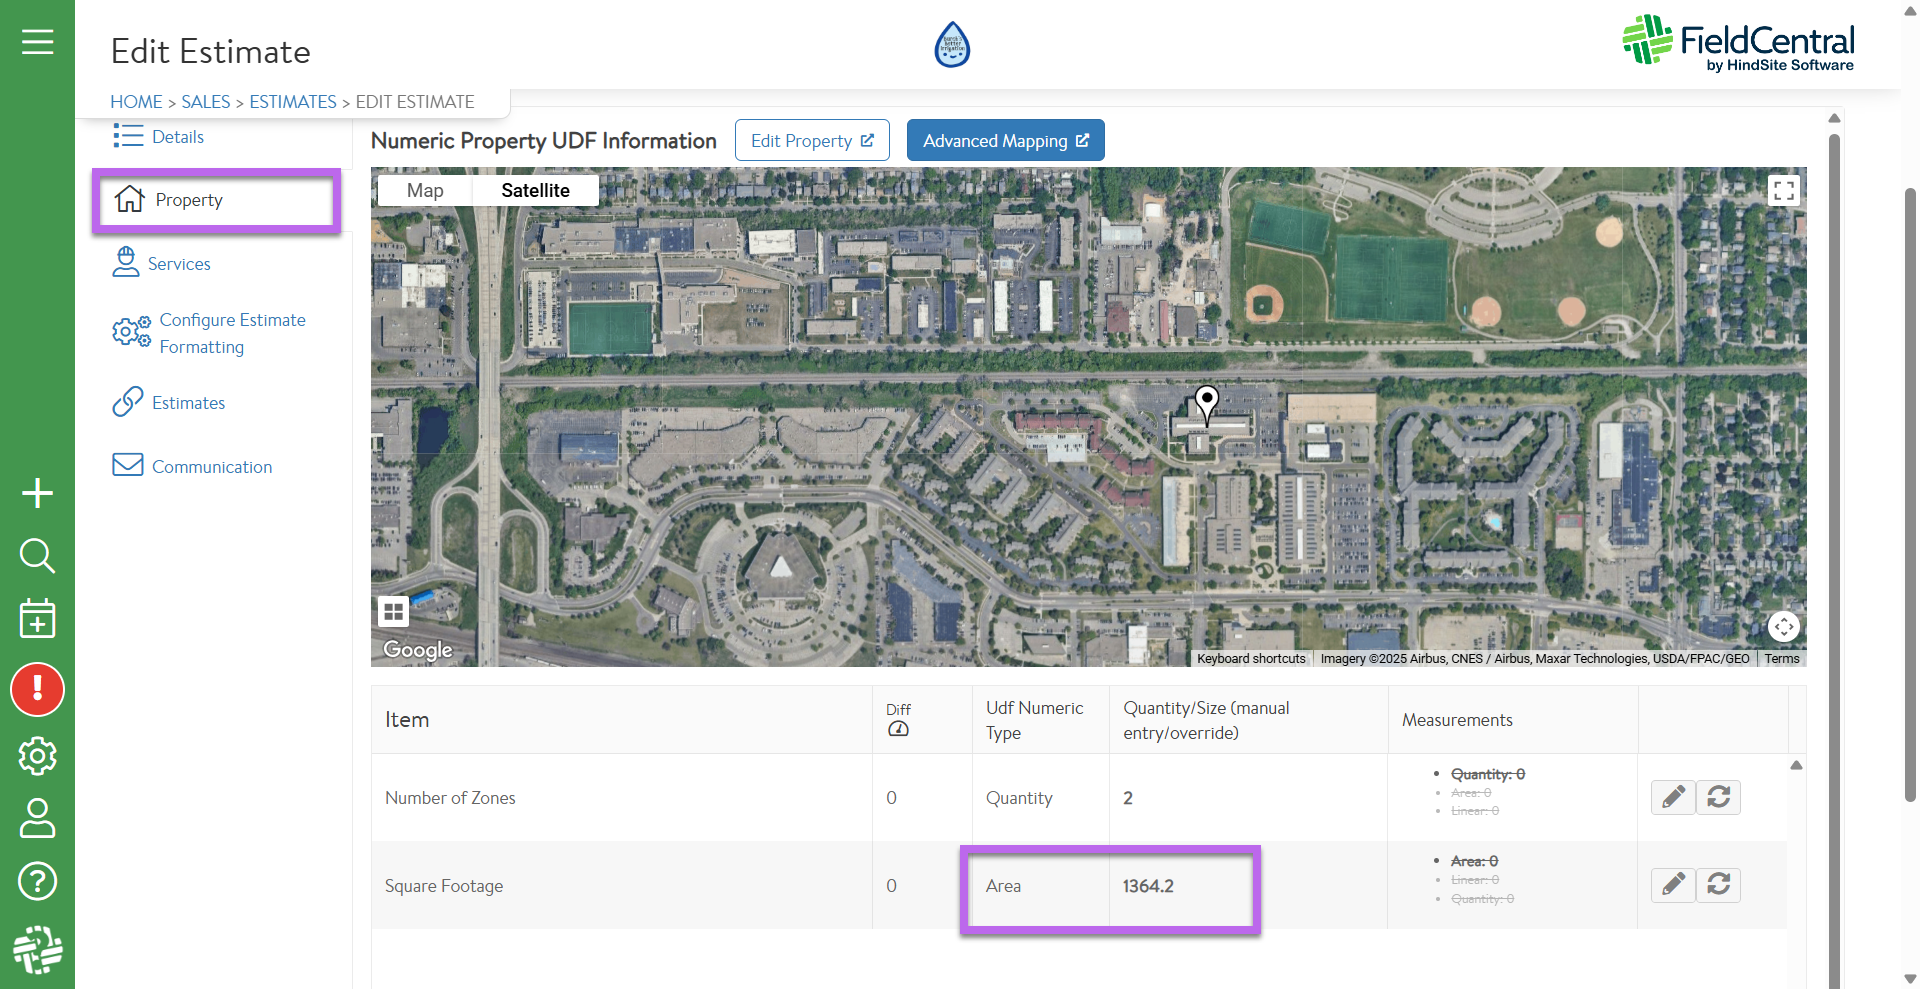
The user will now be able to navigate back to “Edit Estimate” under the “Property” tab and click the “Refresh” icon just to the right of the measurement.
The user will be prompted to confirm they want to update and then the user will refresh their web browser page.
If the user would like to edit the measurement and override with a manual calculation they would utilize the edit icon and enter a measurement manually. The user would see the original polygon measurement crossed out and the manual entry would become the measurement in which the estimate was calculated from.

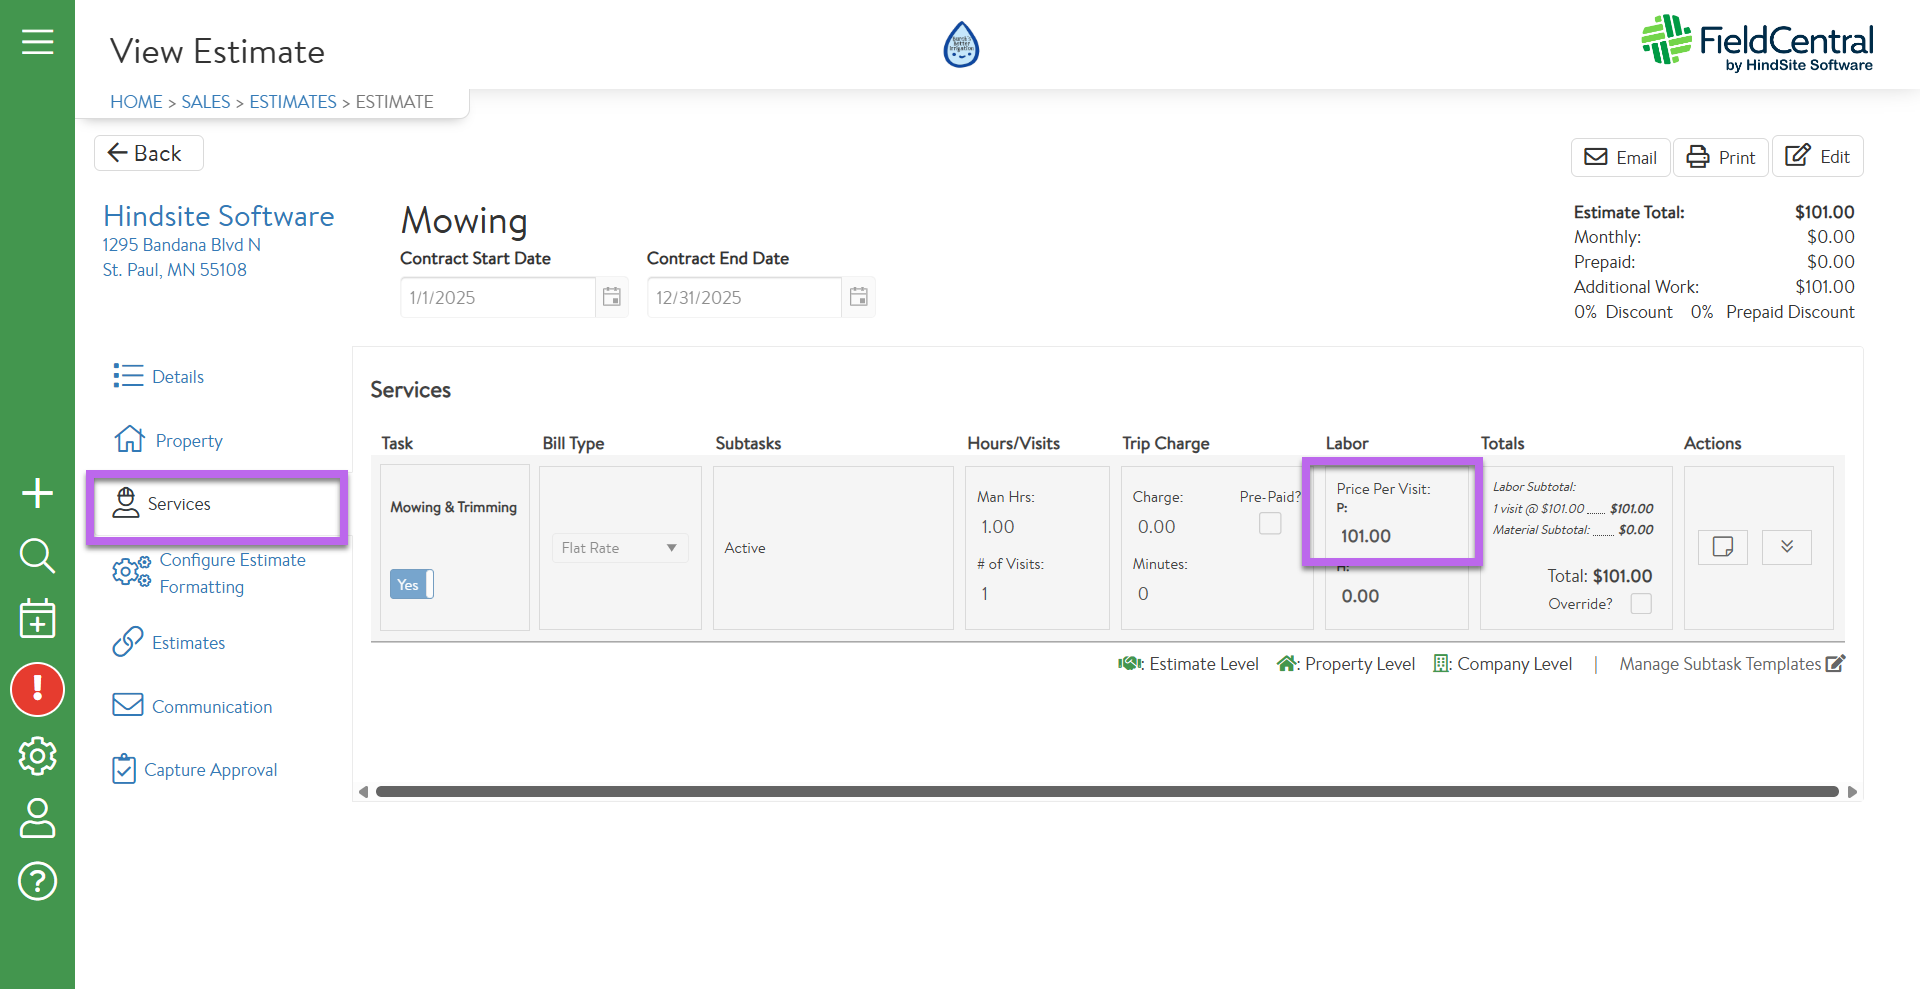
Once the measurement and the web browser have both been refreshed, the user will navigate back to the “Services” tab and see the relevant work with updated price and man hours based on the calculation between Price Matrix and the User Defined Field value.
To override the calculated price and man hours, the user is able to edit and manually input values into the relevant fields.

As shown below, the price matrix is set for this square footage range to price services at $101.00 for 60 mins which is the information calculated in the estimate.
Advanced Mapping takes the guesswork out of estimating. Allowing more accurate estimates, faster, without spending the windshield time on a visit.
Used in conjunction with Price Matrix, estimates can be quickly calculated and distributed.
More estimates, more quickly, more accurate.