BILLING - EXAMPLES OF INVOICING
In this article we’ll be covering a few different scenarios on how we can setup billing for customers on the Service level.
In this article we’ll be covering a few different scenarios on how we can setup billing for customers on the Service level.
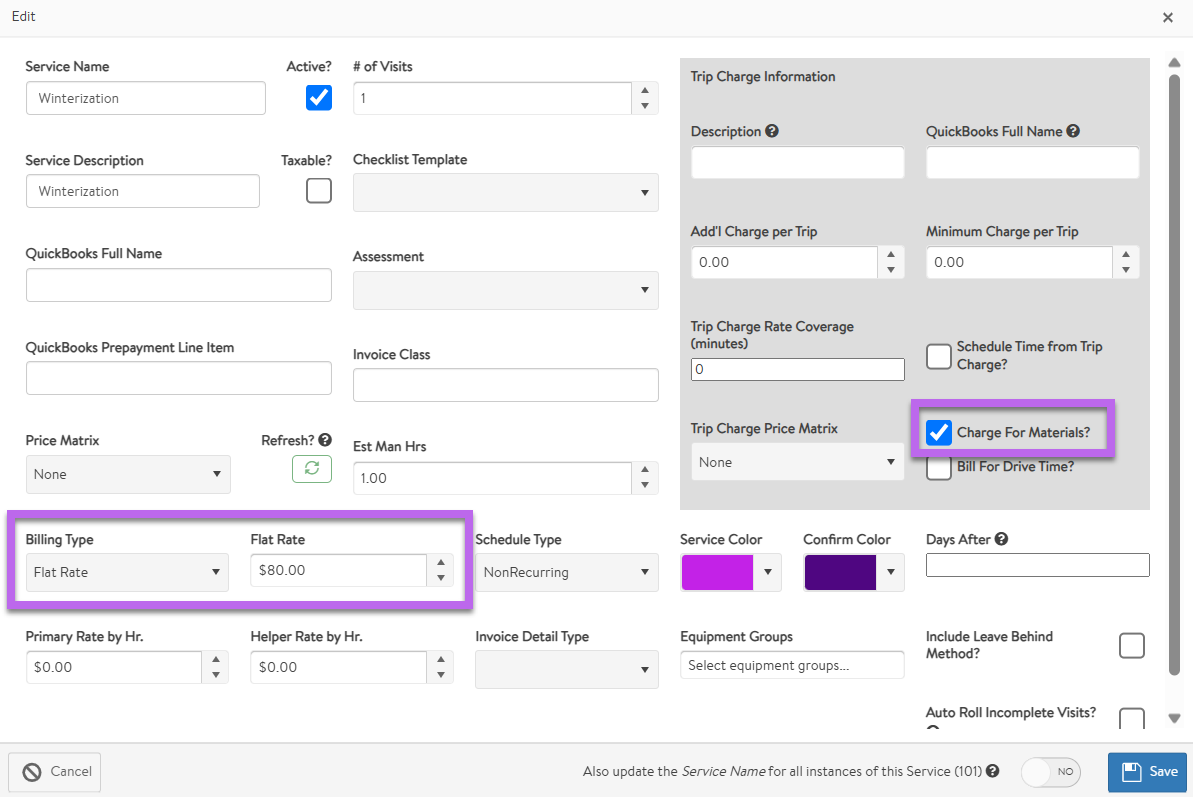
One of the most common and simple scenarios is with Flat Rate billing. For this case we’ll use the Winterization Service I have setup which will look like this:

With Billing Type set to Flat Rate you’re essentially stating that there is no hourly billing and you’re only charging for the exact rate that’s entered in.
Another thing to mention is you also have the ability to choose if you want to Charge for Materials on each individual Service, so if there’s any jobs you don’t want materials to be billed simply make sure the ‘Charge for materials’ option is unchecked
If we were to pull this setup up in an actual bill it would look like this:

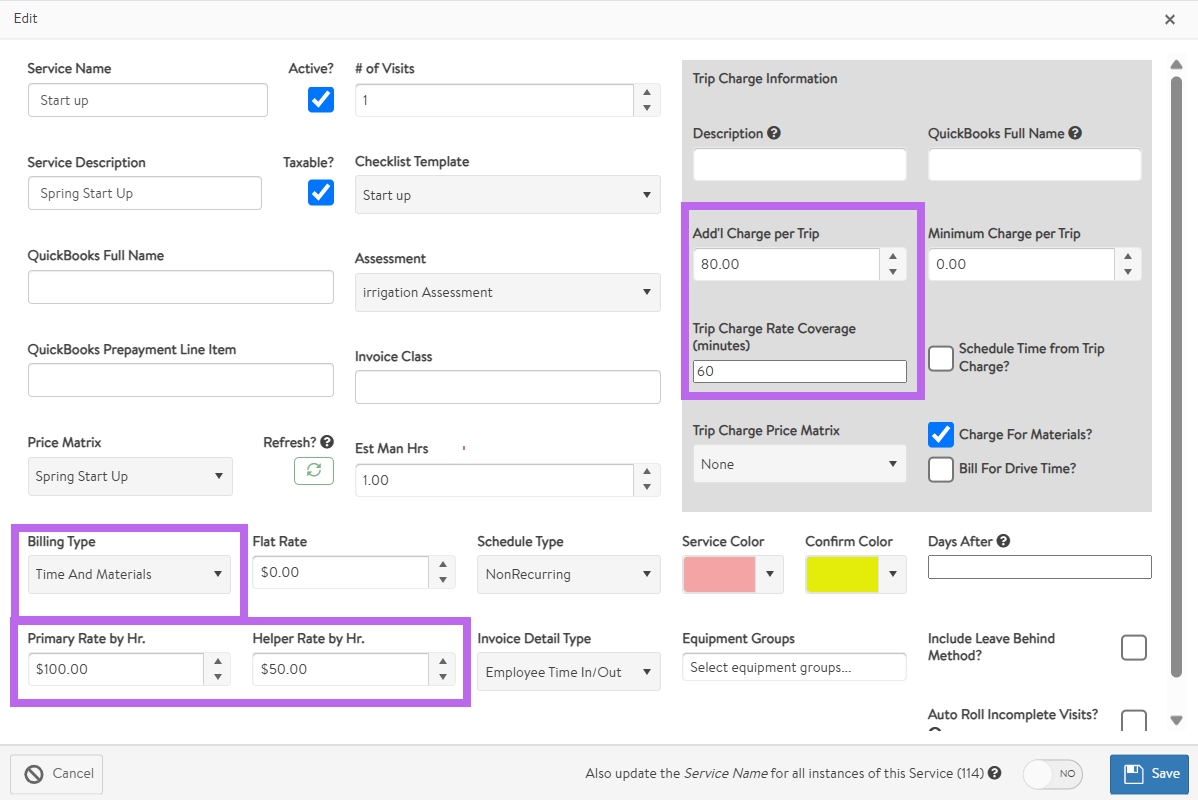
The next scenario we’ll cover is to use a Trip charge to essentially bill a flat rate charge that’s covered by a set amount of time. If we go over the set amount of time it will then roll over into the other bill type you have setup, which generally would be set to Time & Materials like so:

If I were to now have an appointment where a tech timed into this Services for 1.5 hrs the bill will look like this:

Because I have the helper rate entered in, it could also look like this if I added the helper’s times:

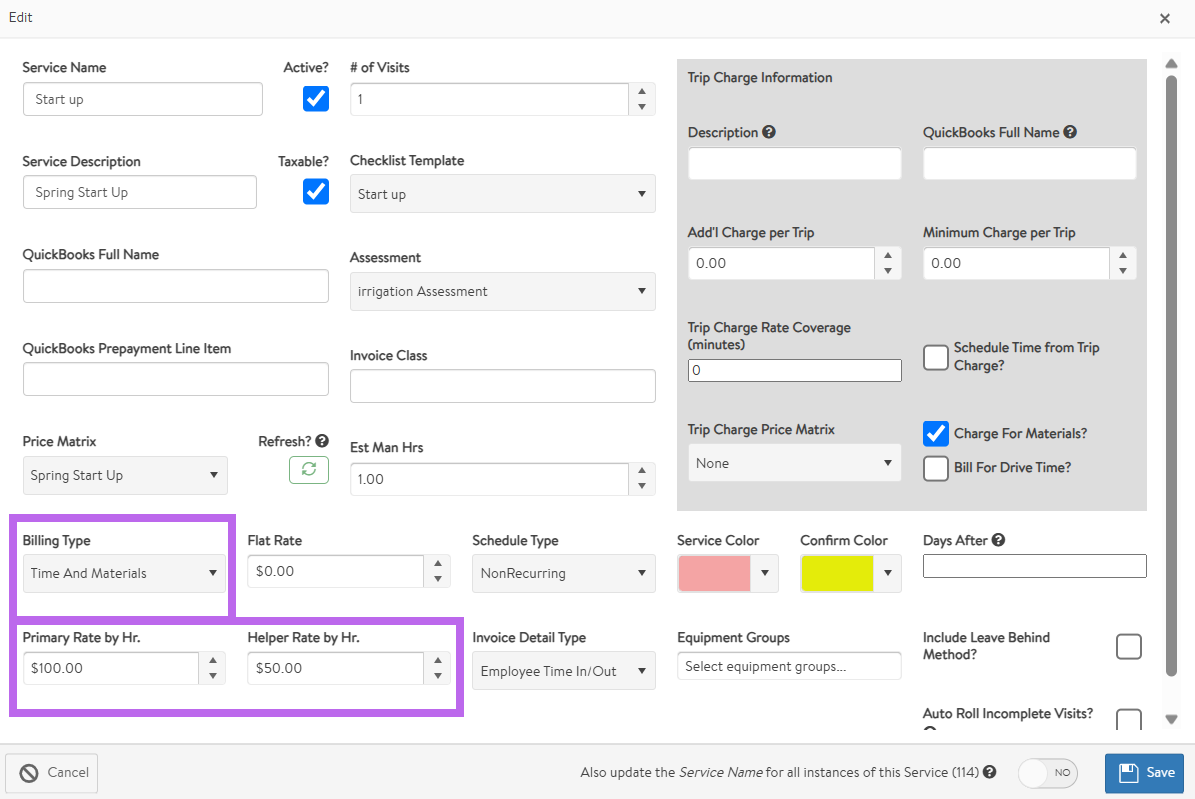
Another scenario would be to just use the Time and Materials option with no Trip charge applied, such as a Service call which would look like this here:

If I now go and send this to billing for a tech that was out there for 1.5 hrs it would look like this:

The next Scenario we’ll cover is the Contract Monthly Payments. To set this up you first need to have a contract where the services were marked as monthly and a monthly payment was setup in the main tab like so:

If I send the bill across it will include the name of the contract and include all of the services included in the contract as the Description. This can also be adjusted directly in the contract using the Monthly Contract QuickBooks Full Name and Monthly Contract Billing Description boxes respectively:

Finally we'll be covering another common billing type which is Prepaid Visits. Much like the Contract Monthly Payments you first need to have a contract where the Services are marked as Prepaid.

Now there's also 2 ways of handling prepaid visits which can be changed in the Accounting section. One of the more simplistic options would be to set them as $0 line items. This means you would simply manually manage the customers payment in QB and once the jobs is done you simply send across a $0 invoice like so:

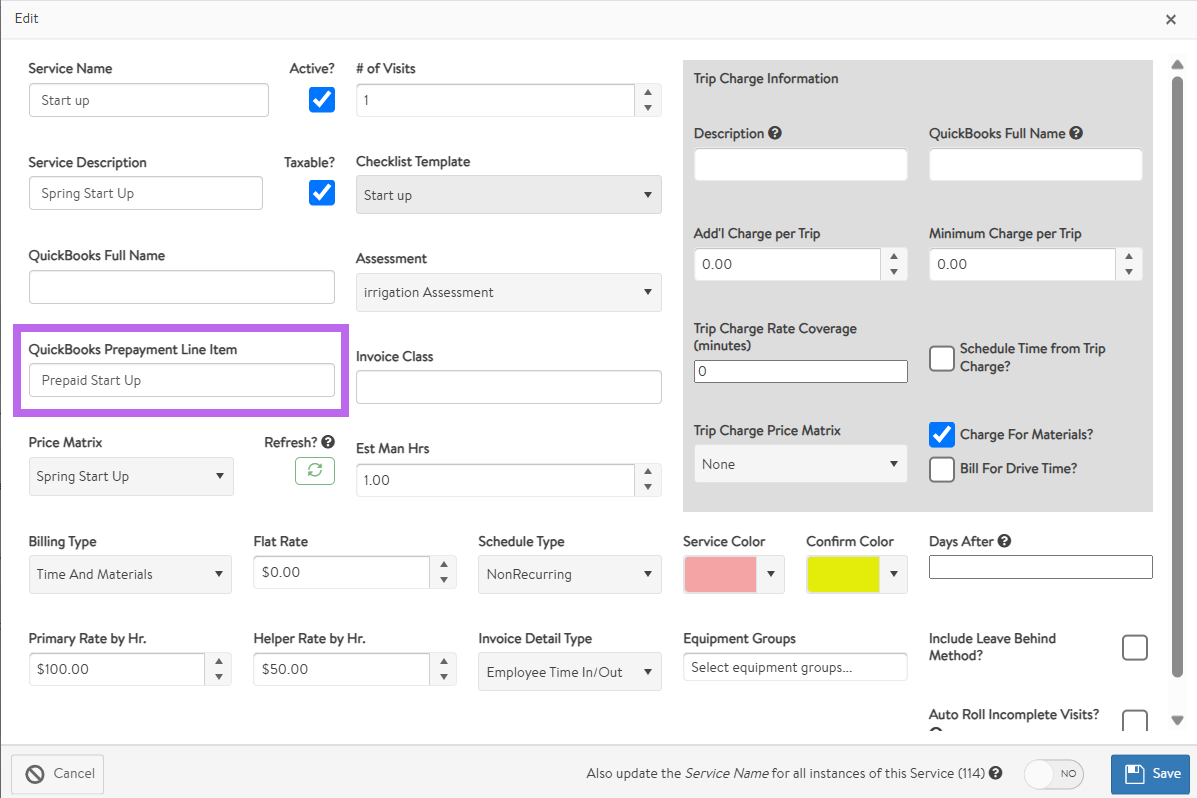
Otherwise if you track the service prepayments through to QB as sales receipts, you can use the Liability account option, which is also found under the Accounting settings. The Service also has to have the QuickBooks Prepayment Line Item filled in to tie the prepayment to the correct liability account you'd have setup in QB.

Once setup correctly, an invoice may look like this where the invoice is comprised of two lines. The first line shows the charge for the visit where the second represents the prepayment. When sent to QB, the invoice will move the prepaid funds from the liability account to your income account now that the prepaid work has been completed.
