This article will cover two paths users can create a Visit to Do (VTD) within FieldCentral.
Once the user has logged into their FieldCentral account, they will utilize the quick action panel and click the “+” icon and then select “Create Visit To Do” from the menu options.
This is the first method a user can adopt in order to create a VTD.

In the “Add Visit To Do” modal, the user will first search for the desired property, followed by the desired service category.
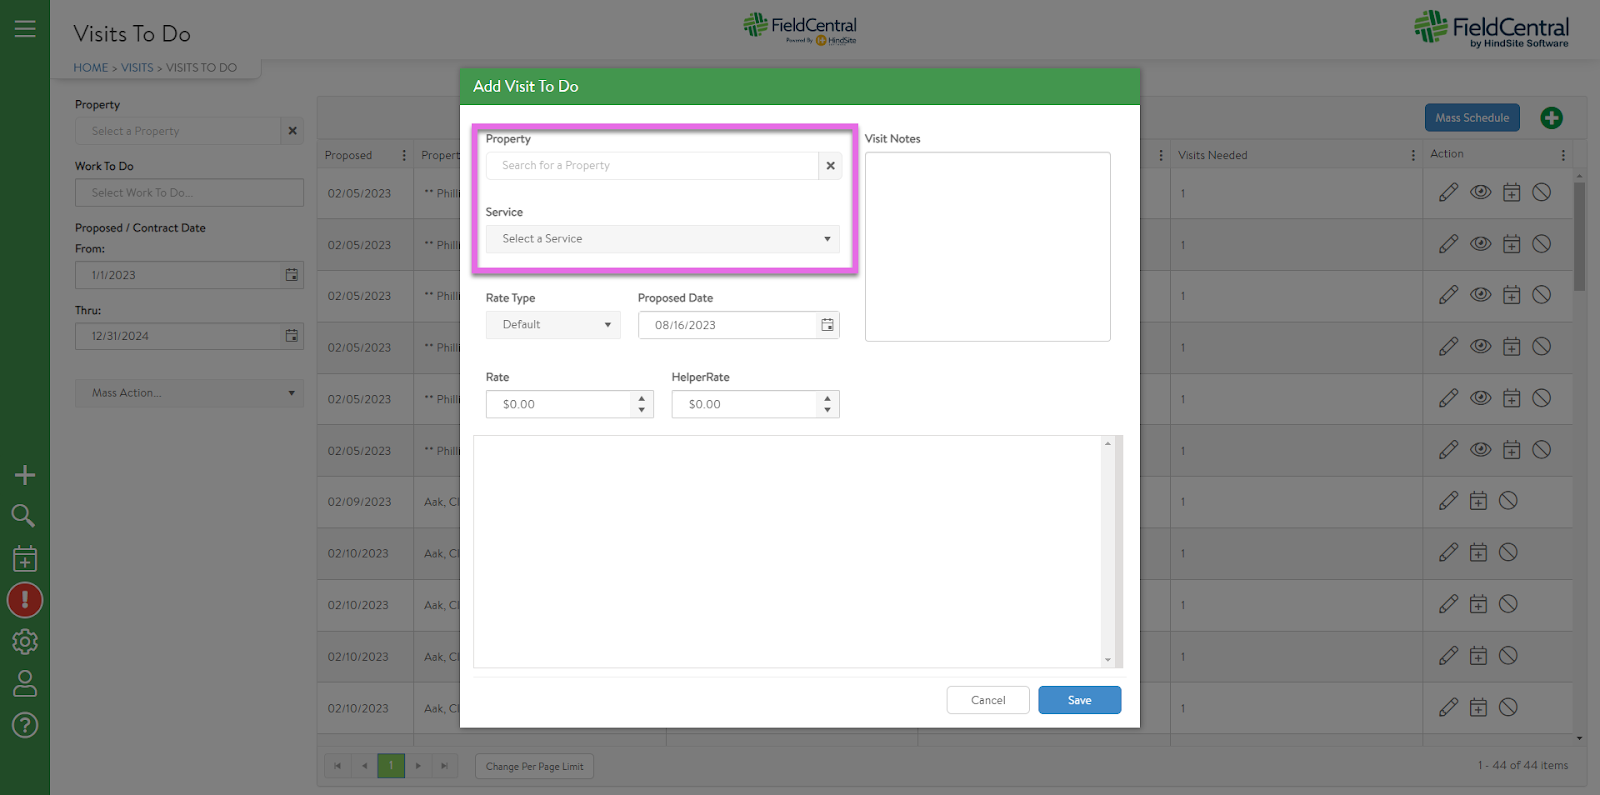
The user will then select the Proposed Date and desired Service by using the toggles. Lastly, the user will provide any relevant notes within the “Visit Notes” field. Once information is complete, the user will click “Save” to create the Visit to Do.

Once you have saved the VTD, if the user wishes to add more VTD, they can utilize the green “+” button in the upper right corner of the screen. This will open a new modal where the user can add another VTD.

If, however, the user is already on the Schedule page they can add a VTD directly from there to optimize their time.

The user will search for the desired property and then click the “Schedule” button.

This will open a side panel towards the bottom right hand part of the screen. Here the user will first select the service category and then utilize the toggles to select the specific VTD. If the user would like to include any visit notes they will navigate to the notes tab of the panel. To save as a VTD, the user will click the “+ Visit to Do” button. 
This will pop open the “Add Visit To Do” modal with the information already selected and ask the user to enter the proposed date. The user has the option to add visit notes or adjust rates here if needed. When the user is ready, they will click “Save” to create the VTD. 
Ready to give it a go? Try these methods the next time you are ready to add a Visit to Do!