In this article we will cover how to provide user access to the FieldCentral Field App and the steps the user would take within the Field App upon initial setup.
Knowing these basic user steps within the Field app will be key for anyone using the app from day to day to help ensure they are communicating with those managing the schedules in the office.
In order for a crew's schedule to be available within the Field Application, the FieldCentral admin will first need to connect the user to the desired crew.
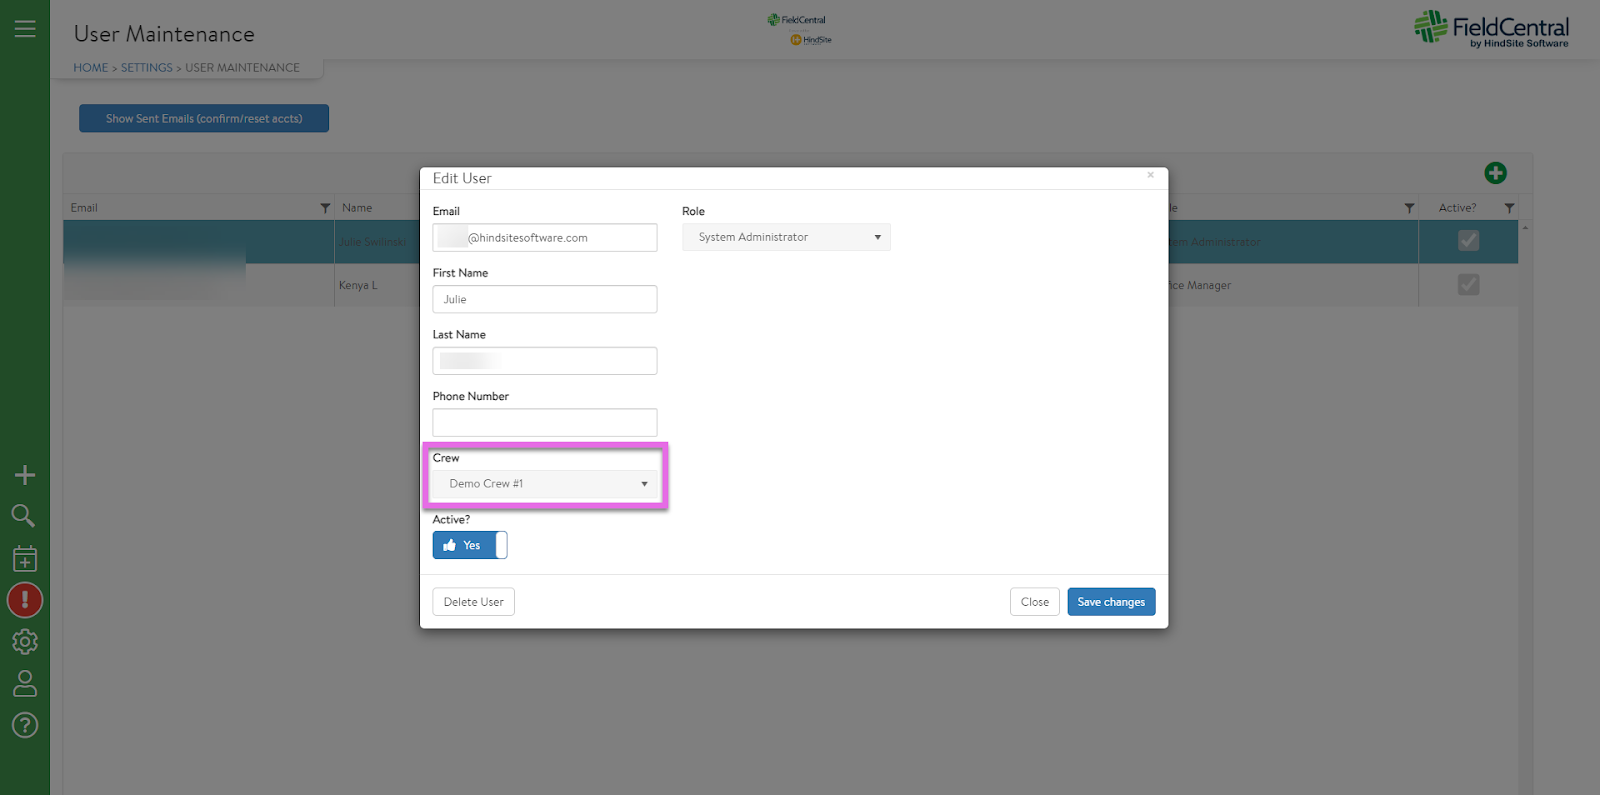
Within FieldCentral, the user will first navigate to Settings > User Maintenance.
When creating a new user or editing an existing one, be sure to click the “Crew” dropdown to assign the proper crew to the user credentials.
Once the crew is assigned, the user would be able to sync the Field Application using their credentials, and anything placed on the associated crew's schedule for the day would be visible on the field application.
Once the crew has downloaded the FieldCentral Field App from the app store, they will tap to open the app which will bring them to a screen that looks like this.

Users will first tap on the menu button in the top left corner and then select “Settings”.

Within settings they will have the following options and adjust as needed:
- Use Sandbox Url : Allows you to set up the device to sign into the Sandbox instead of the live version (Generally used for demo’s or customers just testing FC out).
- Use Service Address: Use service address instead of Lat/Long for mapping
- Upload Device Data: Uploads the devices data so we can try to recover information from the backup (Usually done if device is stuck timed in or just having issues)
- Rebuilding: If you tap the Briefcase icon in the top right of the settings page you can use the rebuild tables function (Usually done after uploading device data or to fix being stuck timed in)

Once satisfied with the settings, click the arrow in the top left to navigate back to the main screen where the daily schedule is displayed.
To complete the app setup, users will need to tap on the cloud icon on the top right of the screen in order to Web Sync.

If setting up the device for the first time, the user will click the sync settings button at the bottom left of the screen.

Once in the sync settings, the user would enter their user email, choose to remember login info, and enter their password into the password and confirm section. Once complete, the user can click done to be brought back to the websyncing screen.

Once the user credentials have been entered, the user can tap the “Web Sync” button to have the assigned crew schedule pulled to the device.

After websyncing, the user would be navigated back to the daily schedule screen with an updated schedule from the time of websyncing.