In this article we will cover how a Field Crew will manage a visit within the Field App while they are onsite.
It is important to know where to go in order to find certain information, take notes and add materials as you go throughout the visit. Knowing how to manage these aspects of a visit will ensure the visit information is accurate and can be billed correctly once it's been completed.
If you havent already, please review Field App: Setup & Field App: Start of Day/Dispatching.
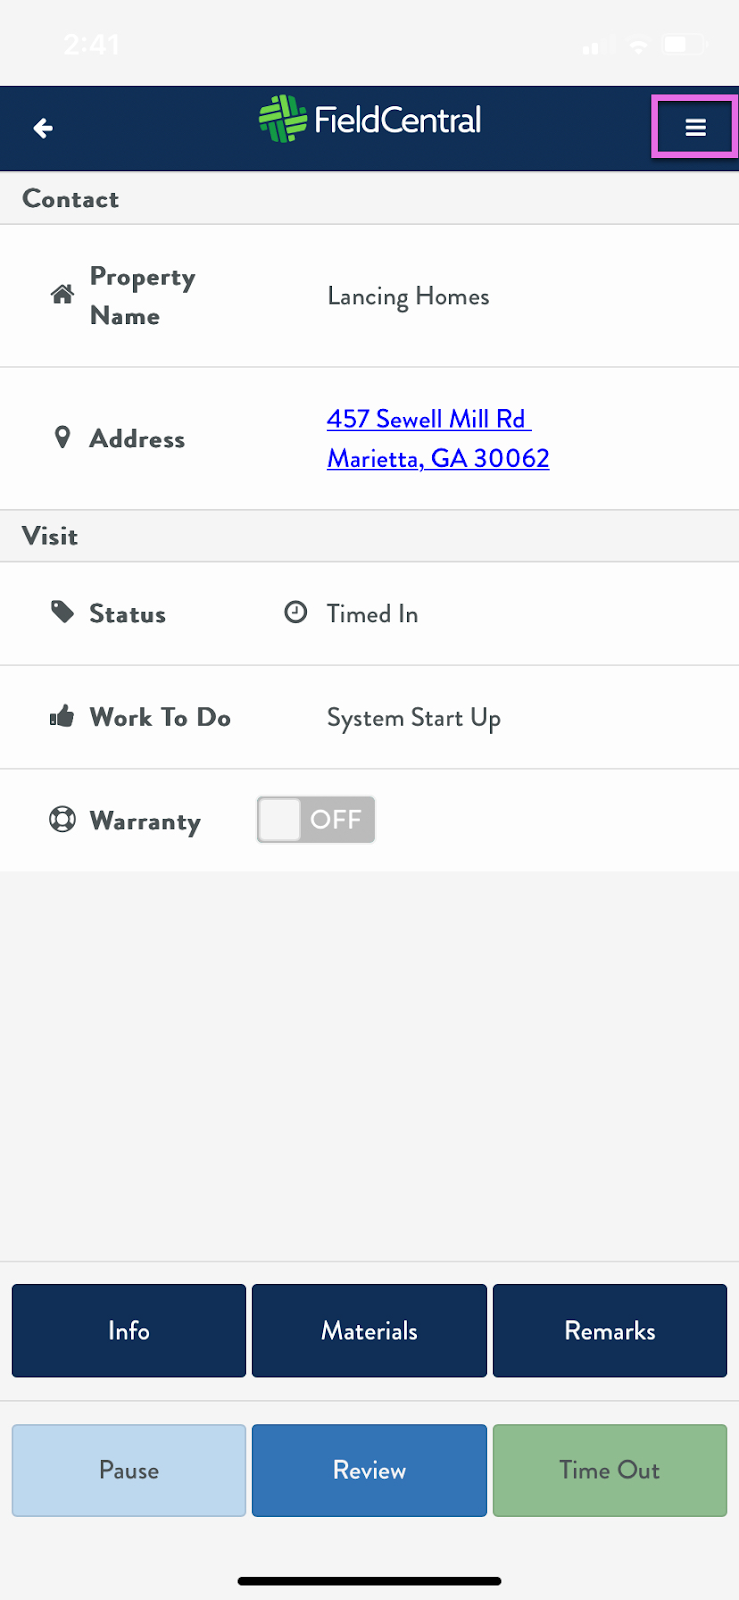
Once the crew has arrived onsite, tap “Arrive” to begin tracking your time on site.

To review additional information regarding the visit or property, tap the “Info” button
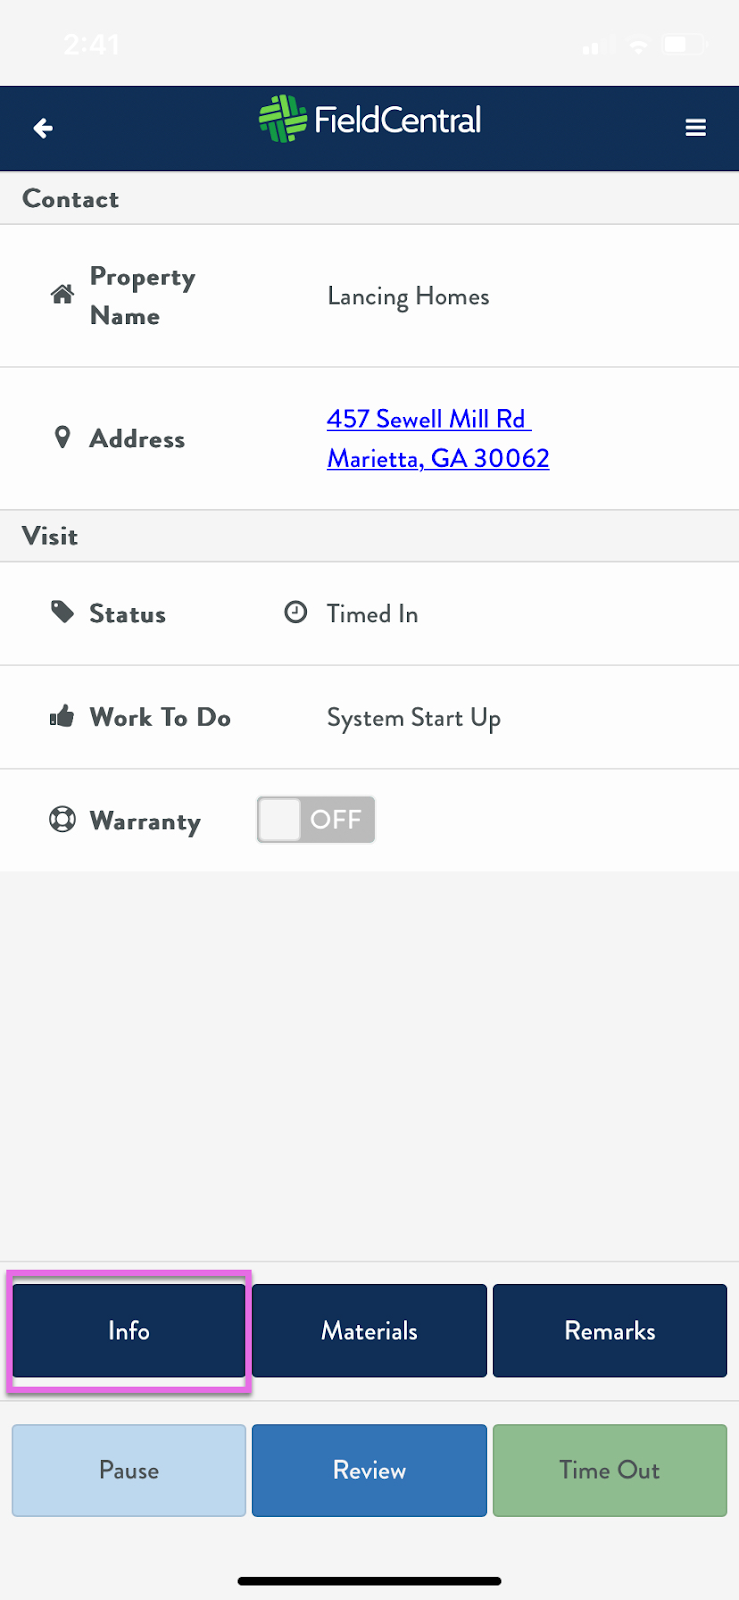
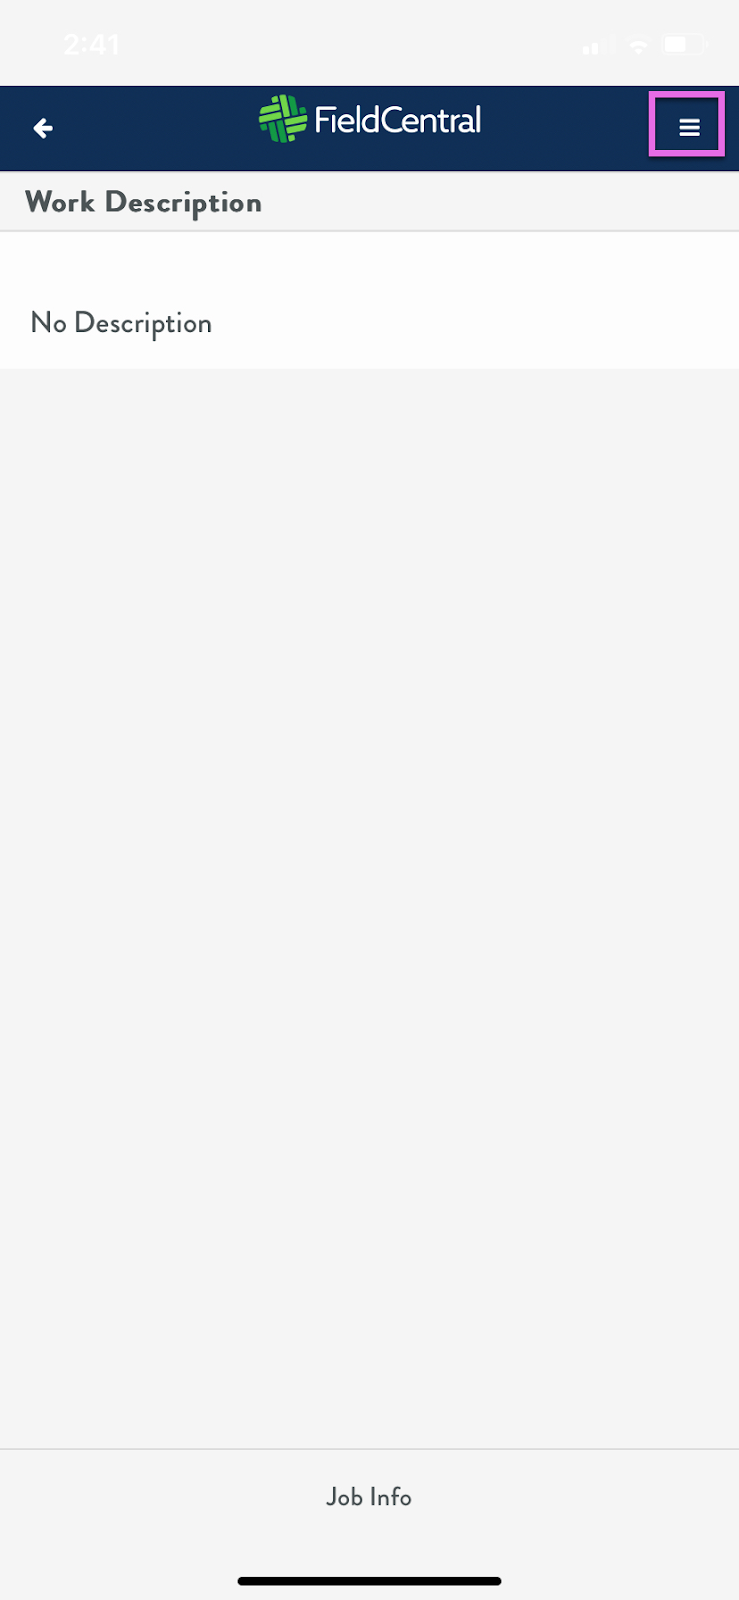
Within “Info”, the work order description will be displayed which will give the crew additional information about what they need to do while onsite.
The user can tap on the top right corner to open up another menu within the “Info” section. Once selected, more information will be displayed.
- Work Description: Description of work needed for the visit
- Site notes: Additional notes regarding the site
- These notes are entered into the Property from the office
- Security: Notes regarding how to access the site
- Could be garage or gate access codes, etc.
- Special Notes: These are the notes that would have automatically popped up when initially going into the job
- Could be notes like BEWARE OF DOG! Close gate behind you, etc.
- History: Displays basic history info of previous jobs at this property
- User Defined: Shows a list of all the user defined information
- Starts out with the categories and once selected you will see all the fields under that category
Once the user is finished viewing the information, tap the back arrow on the top left until you get back to the visit details screen with the property address.
While the crew is completing the work, they will need to keep track of the various parts/materials they are using in order for the customer to be billed accurately and inventory to be accounted for.
From the visit details page, tap on the “Materials” button where they will see a list of material categories to select from.
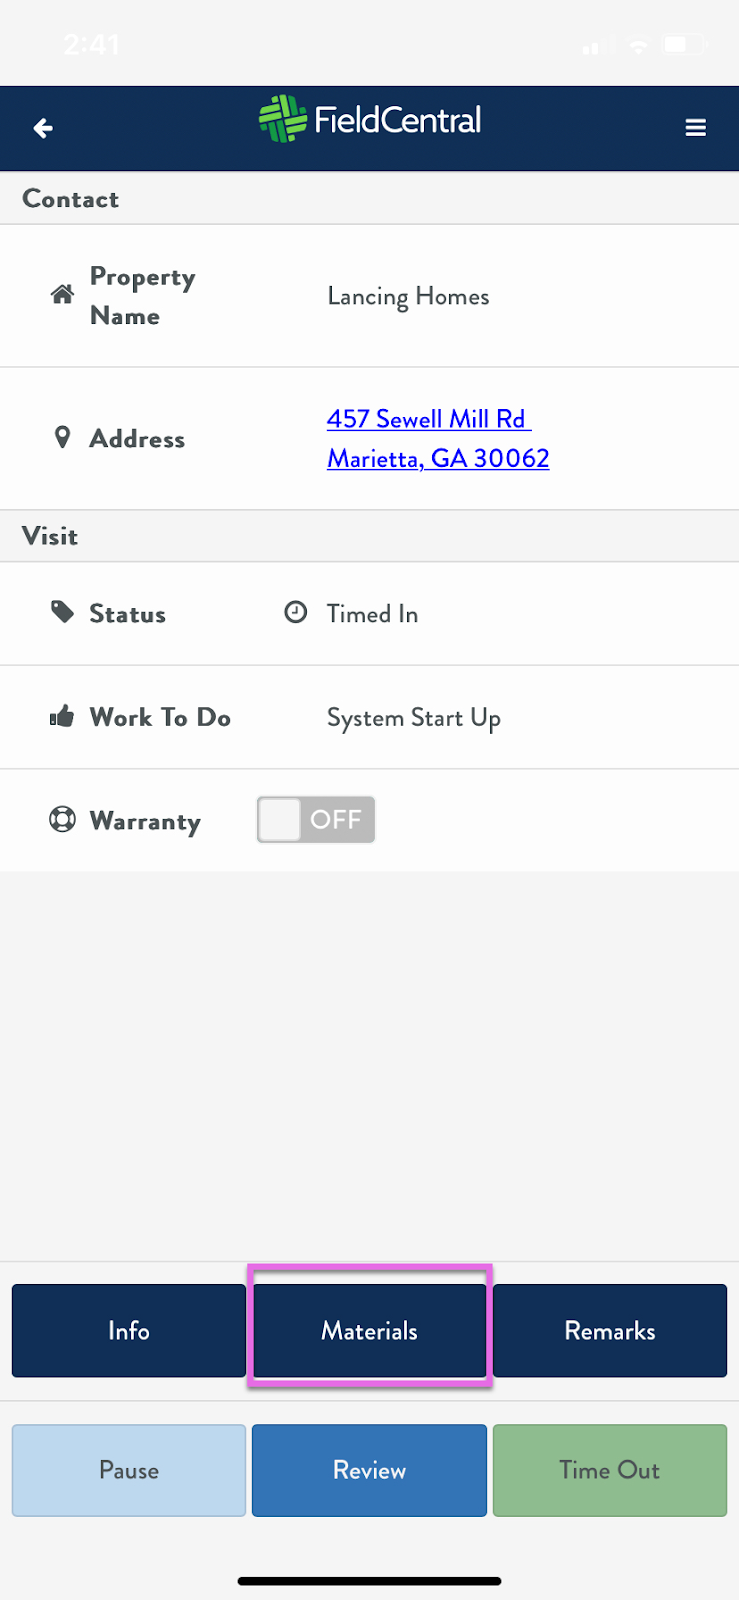

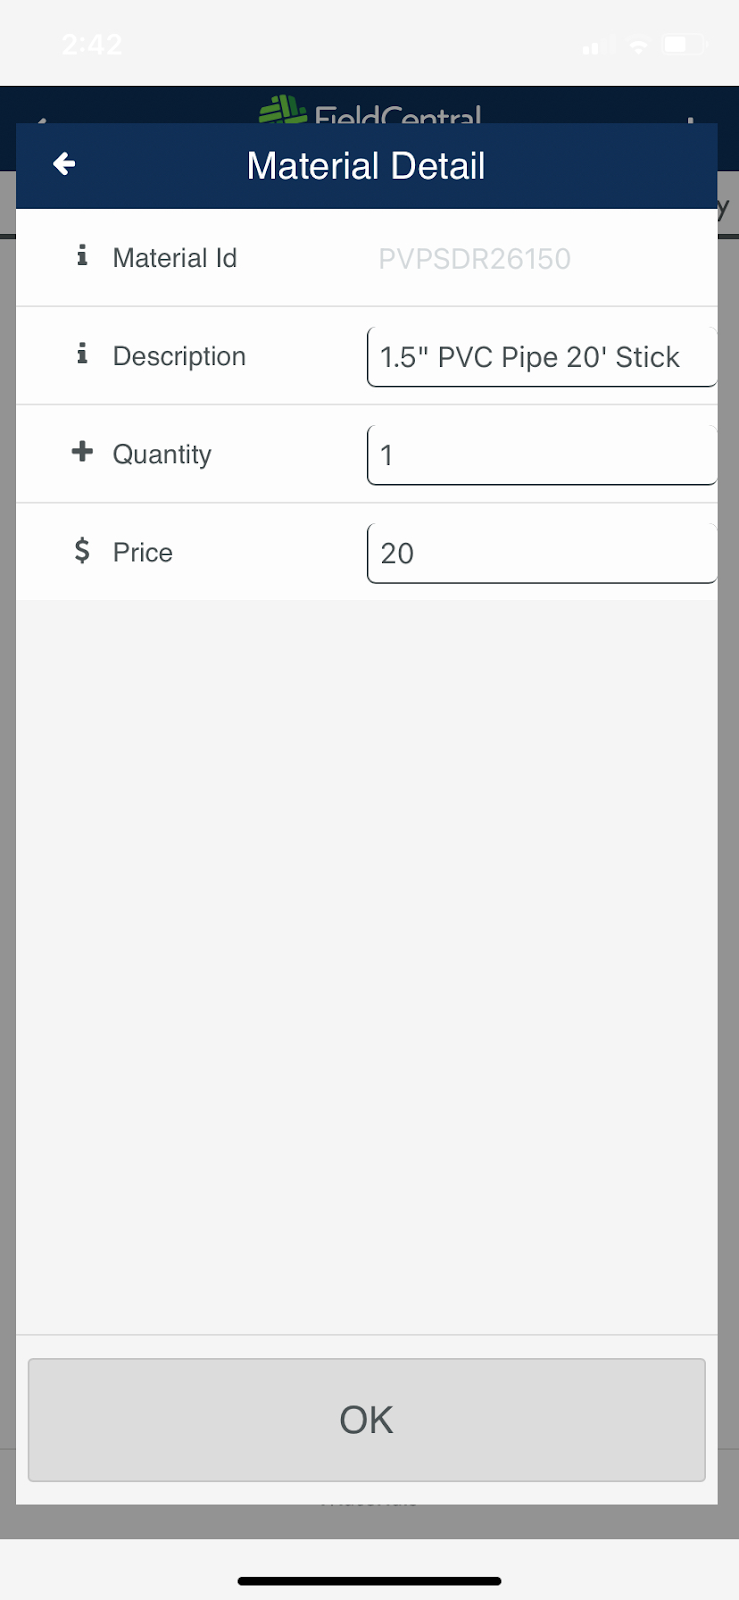
Once within the appropriate category, then select the specific part/material the visit requires.
Once a material is selected the user can adjust the Qty of how much of the material they used and then tap “Ok”.
- If they can see Pricing they can also see that from here as well and potentially adjust if they have the price override option
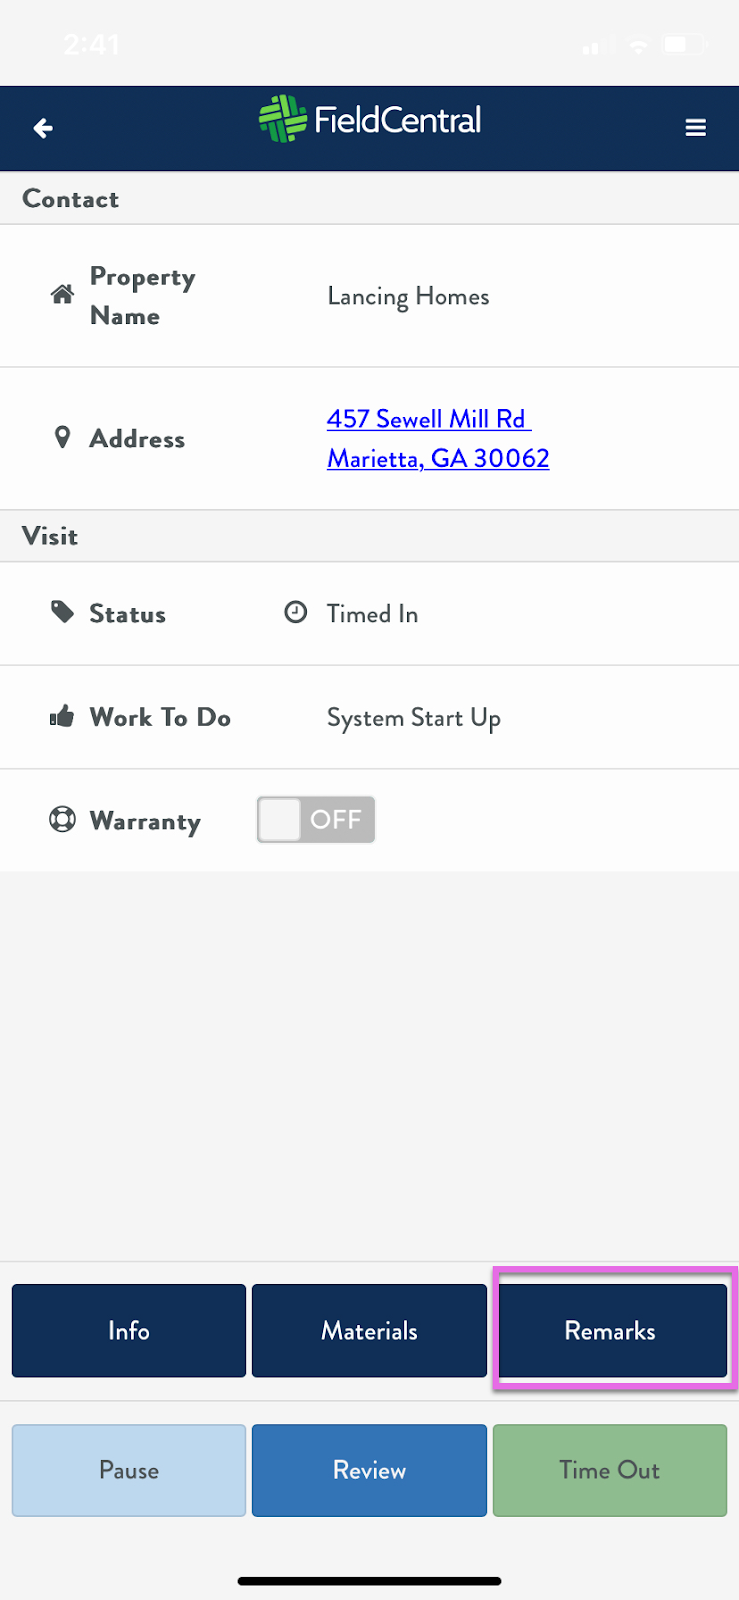
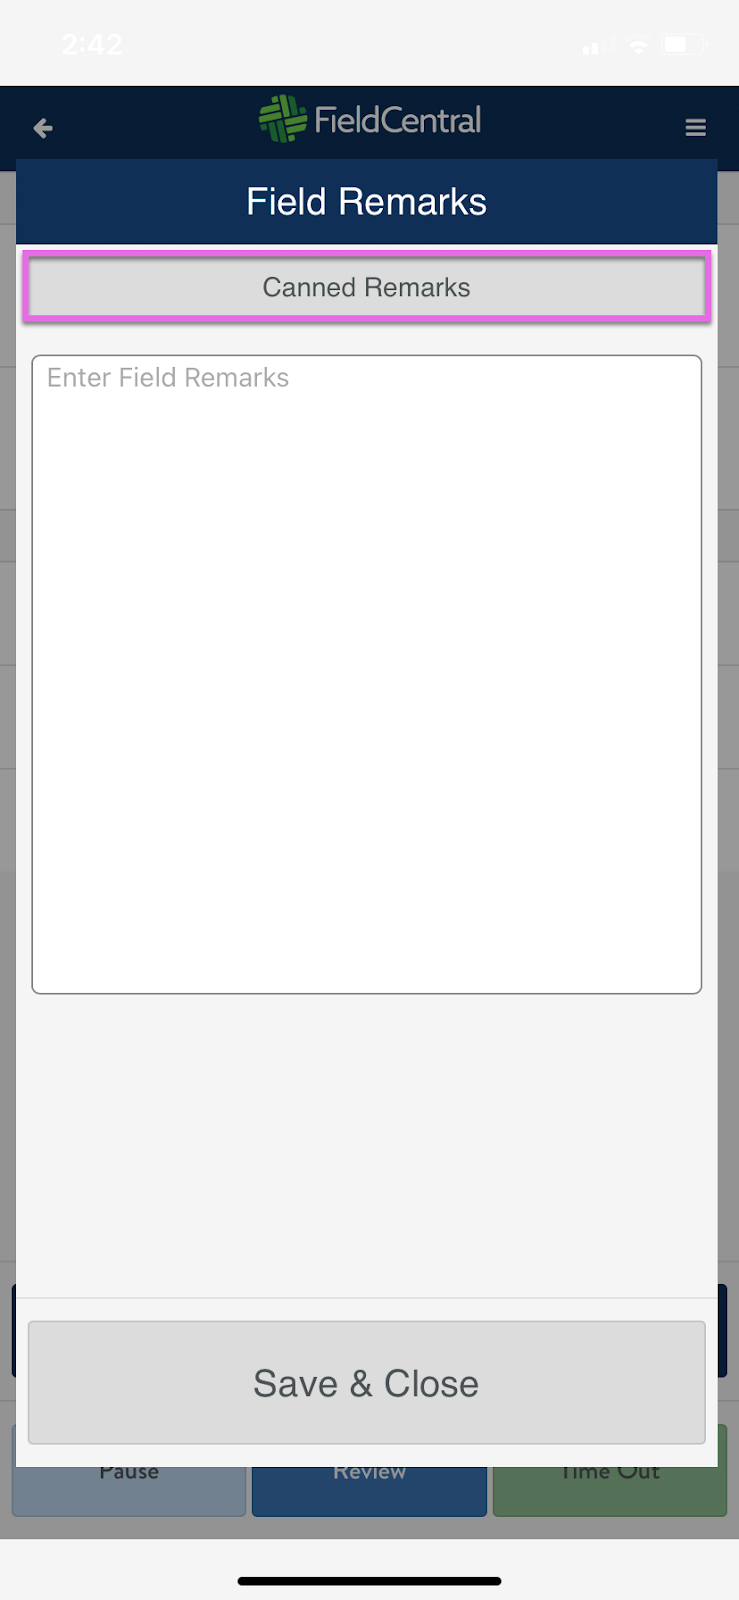
As the crew onsite, you may need to add notes/remarks throughout the visit, to do so, tap “Remarks” from the visit details page.
Users are provided the option to either add their own note manually or select from a list of pre created common remarks by tapping “Canned Remarks”.
If the crew needs to pause the visit for any reason, they may do so via the visit details screen by tapping “Pause”. This function might be used to allow for bathroom breaks or grabbing missing parts, etc.

When ready, the user will simply tap “Resume” to continue the visit.

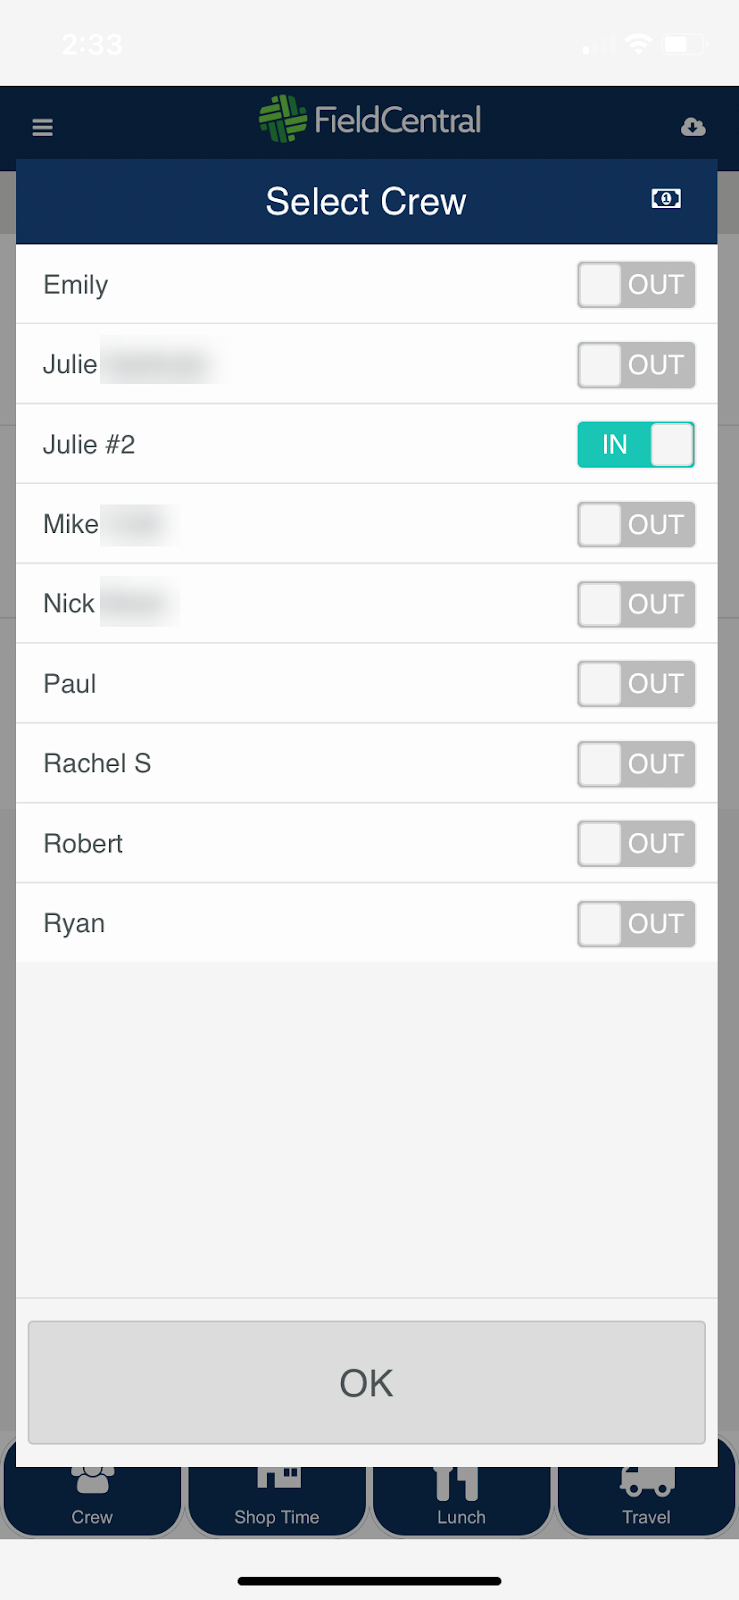
To adjust the crew, you would need to click out of the visit and click the crew button on the initial screen. If removing a crew member, an out record would be generated for the employee upon removal. If adding a crew member, an in record would be generated for the employee once added to the crew.
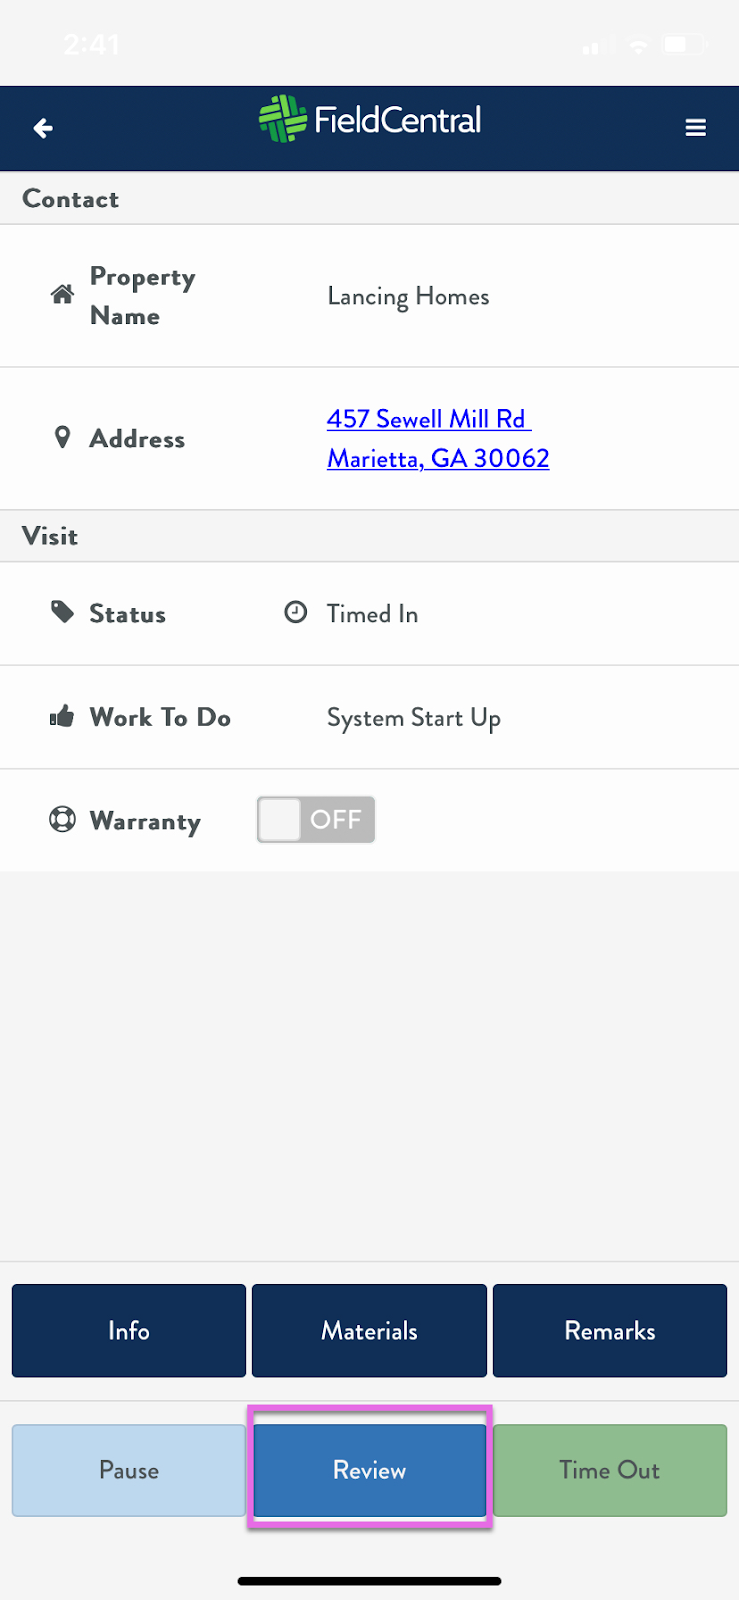
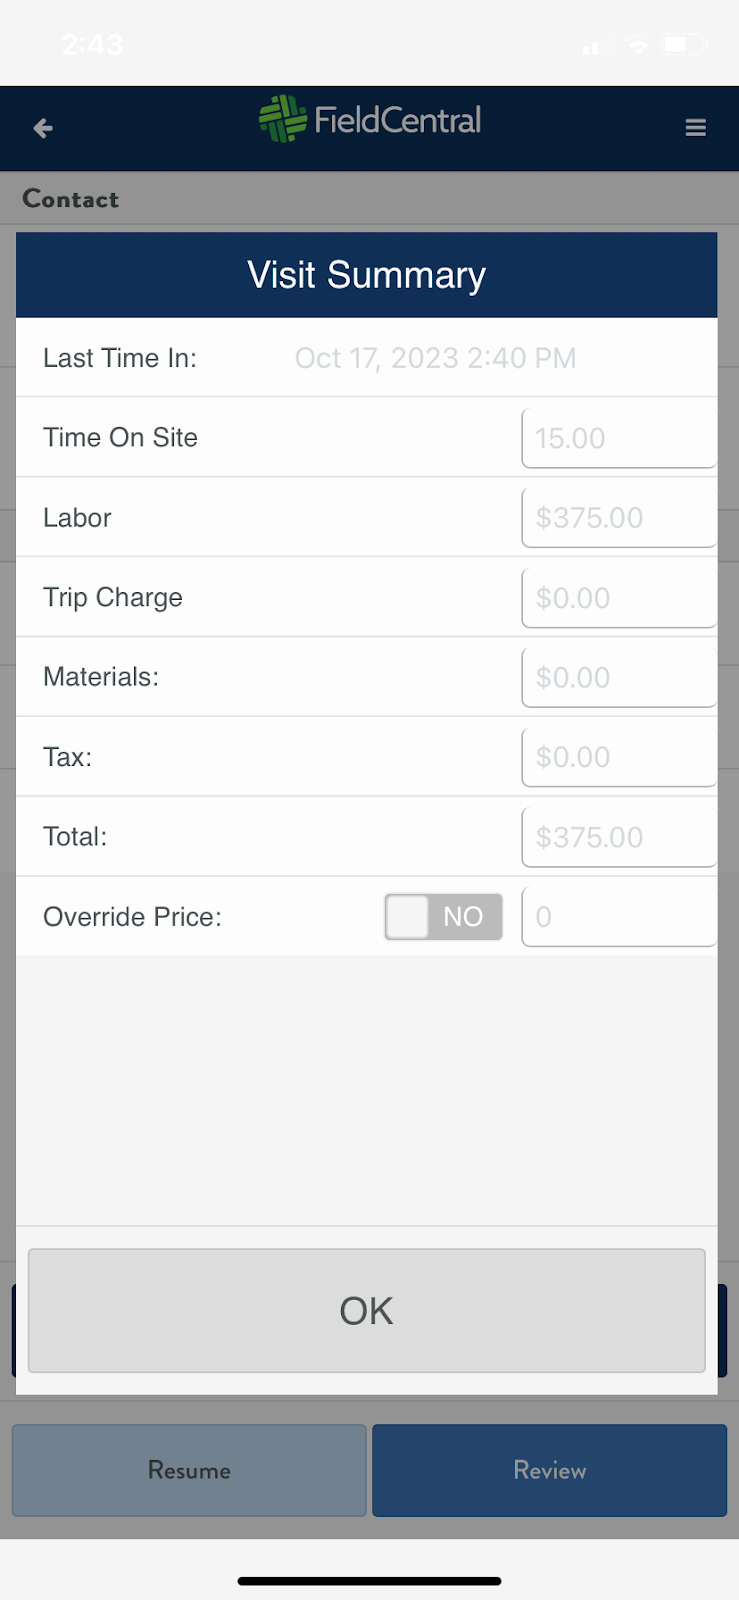
The user is also able to tap “Review” at any time to see their time on site.
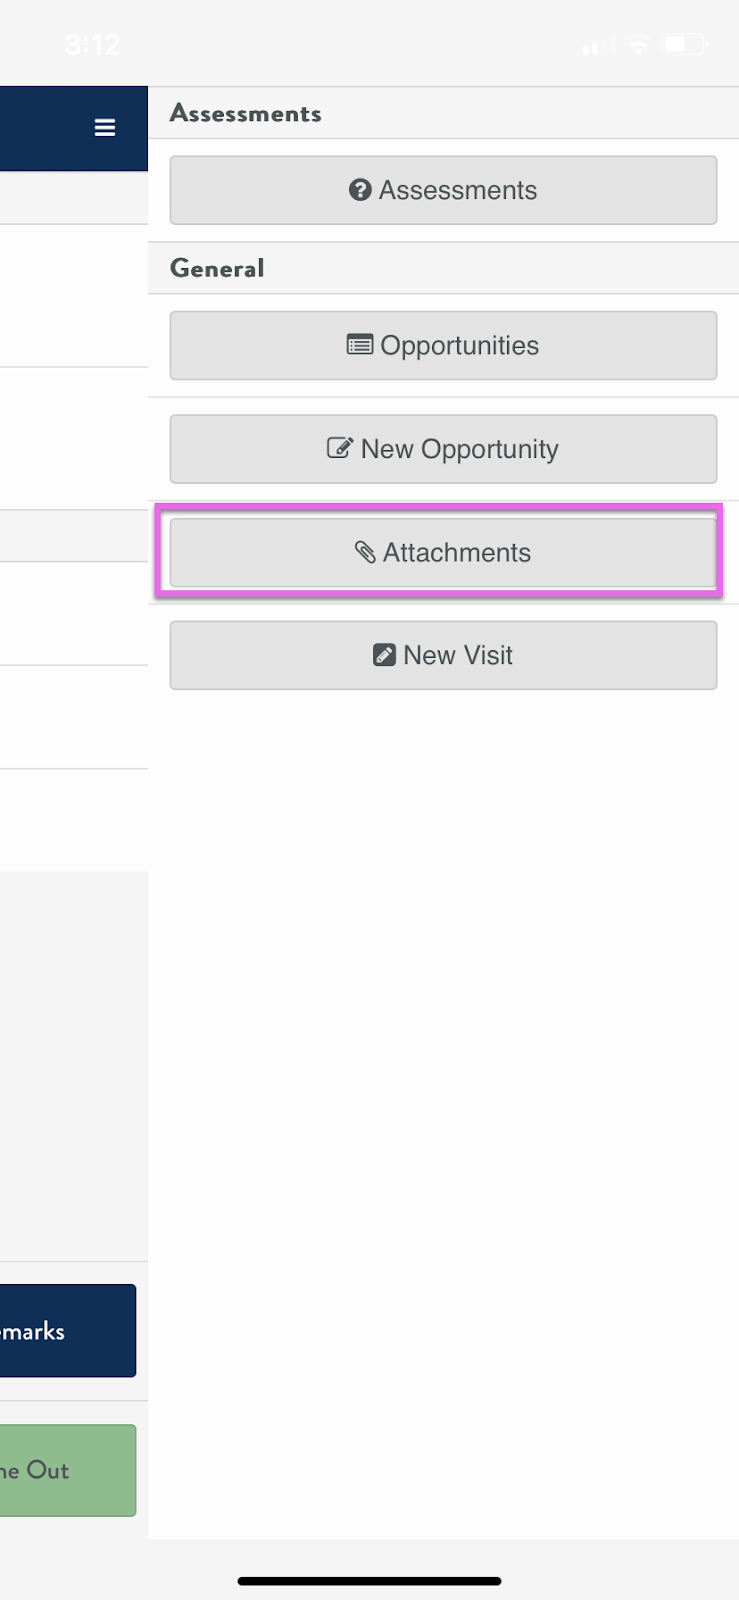
From the visit details screen, users can also access the menu on the top right.
To complete the assessment, answer the list of questions and then tap “Done” once all information is correct.

Within this menu, the user is also able to view or add any attachments associated with the property by tapping “Attachments”.
Any attachments will be displayed or the user can tap the + icon to take a picture from the field and add as an attachment.
Next we will cover the steps the crew will need to take in order to finish a visit.
Field App: Finishing a Visit
SPANISH DEMO VIDEO