People are your company personnel, i.e. Employees and Sales Representatives.
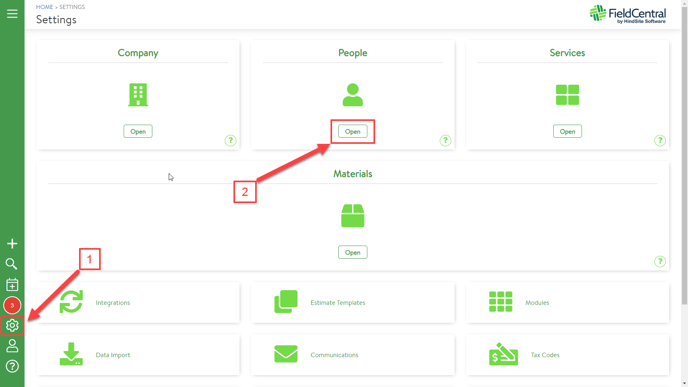
To add and edit your company's people go to Settings \ People \ Open
1) Settings
2) Open (People)
Crews is a unique label used to identify a slot on the schedule. The actual members of the crews, and the crew leaders, are set up separately.
To add a crew, click on the plus symbol (Add New Crew is displayed when the mouse is hovered over the plus symbol).
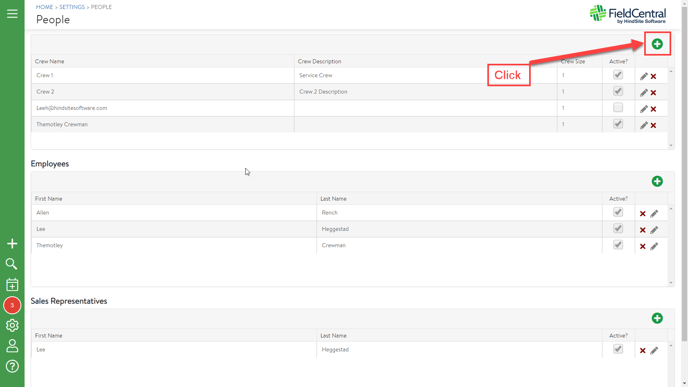
A Crew is a slot on the schedule. Whatever you name the crew is what you will see on the schedule. It can be a technician's name, or the type of crew, or a piece of equipment, etc. Enter the following information accordingly.
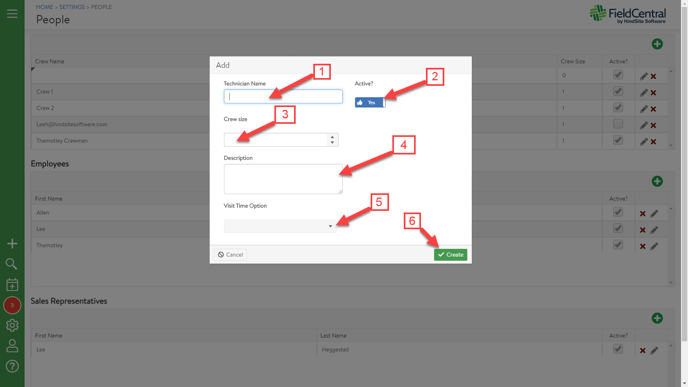
Fill in the Crew fields:
1) Technician Name: The name used to identify the crew.
2) Active: The availability of the crew. Only active crews appear on the schedule.
3) Crew size: The number of people, including the crew leader, on the crew. A one-man crew (just the technician by himself) is 1.
4) Description: A descriptive phrase identifying the crew.
5) Visit Time Option: Options for recording time.
- By Crew - Records time and materials for invoicing, payroll, and reports; and to prove legal disputes. Options include
- Drive Time - Records driving to the visit location.
- Show Dollars - Allows viewing the bill amount.
- Allow Price Override - Allows overriding the bill amount.
- Prompt to Sync After Every Time Out - Prompts the tech to web-sync after a time out.
- Admin Time Options - Records administrative, i.e., non-productive time.
- Shop Time
- Travel Time
- Lunch Time
- Complete/Incomplete does not record time or materials and is used only when time records are not needed. That is, when invoicing, payroll, reports and legal records are either not needed, not wanted, or handled separately. Complete/Incomplete allows crews to move quickly from one job to another without stopping, but sacrifices the collection of time data.
Always select By Crew Options. Select Complete/Incomplete only after careful consideration.
6) Click on Create when done.
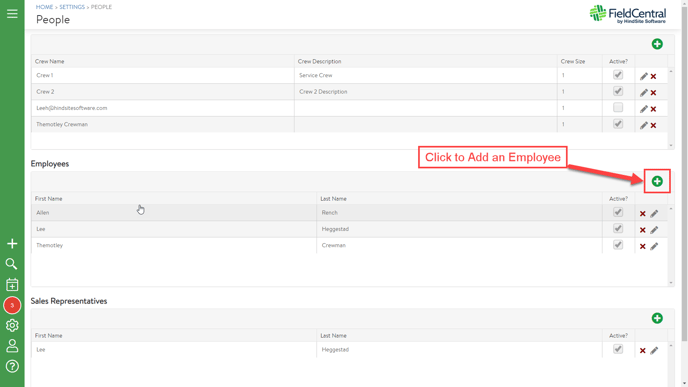
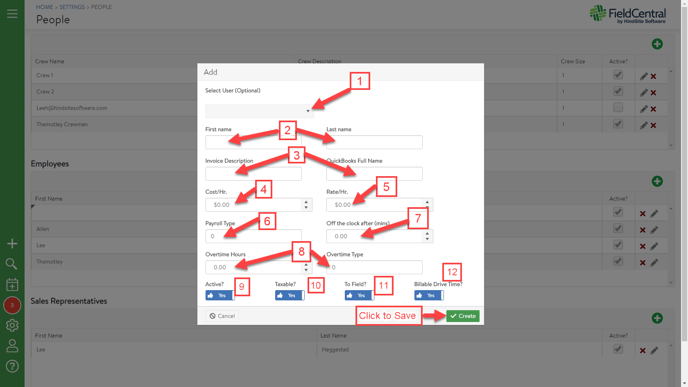
To add an Employee, click on the plus symbol on the right. (Add New Employee is displayed when the mouse is hovered over the plus symbol).
1) Select User (Optional) This only selects a user if one is created in the User Maintenance section. If this is an employee only, this option can be selected as <Employee Only> or simply ignored.
2) First Name and Last Name
3) Invoice Description and QuickBooks Full Name Optional. Used only for making the employee a line item on invoices.
4) Cost/Hr. Optional. The employee's hourly wage or salary plus tax and benefits for job costing.
5) Rate/Hr. Optional. The default hourly rate charged on invoices.
6) Payroll Type Optional. Used for sending payroll to QuickBooks.
7) Off the clock after (mins) Used for time records and payroll. The amount of time an employee is still on the clock in-between visits or at the end of the day.
8) Overtime Hours and Overtime Type Optional. Used when sending payroll to QuickBooks.
9) Active? Is this a current employee? Ex-employees are not active.
10) Taxable? For invoices. Is this employee's labor taxable?
11) To Field? Available to be on a crew. Only employees available to the field can be timed in as crew members.
12) Billable Drive Time? Is drive time billable?
Click on Create to save.
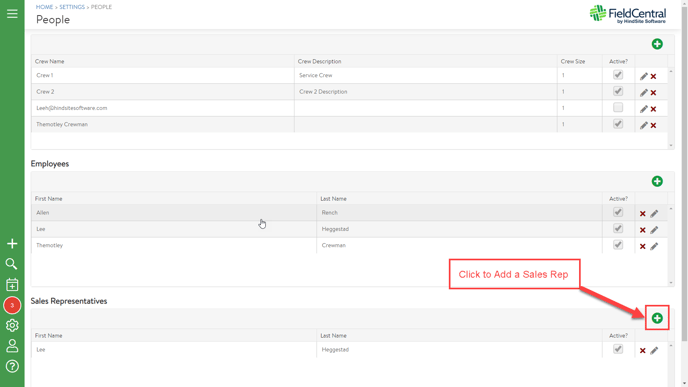
To add a Sales Representative go to Settings \ People \ Open and click on the plus symbol to the right of Sales Representative. (Add New Sales Rep is displayed when the mouse is hovered over the plus symbol)
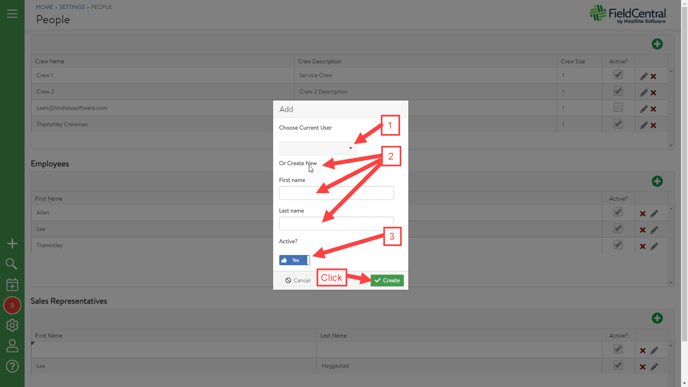
1) Choose Current User Choose from users already created in User Maintenance.
2) Or Create New Create a new sales representative by entering the First and Last names.
3) Select Active.
Click on Create.
All Crews, Employees, and Sales Representatives can be edited by clicking on the pen symbols, or deleted by clicking on the red Xs on the right.
