In this article we will cover how a FieldCentral user would utilize RouteBuilder for scheduling recurring services.
Do you have properties with regular recurring contracted Services that need to be scheduled on a regular cadence? RouteBuilder allows you to schedule those Services and assign to desired crews. It also allows you to quickly see where the closest crew will be on any given day when you need to add a stop to an existing route.
*Note Only contracted visits will show in Routebuilder
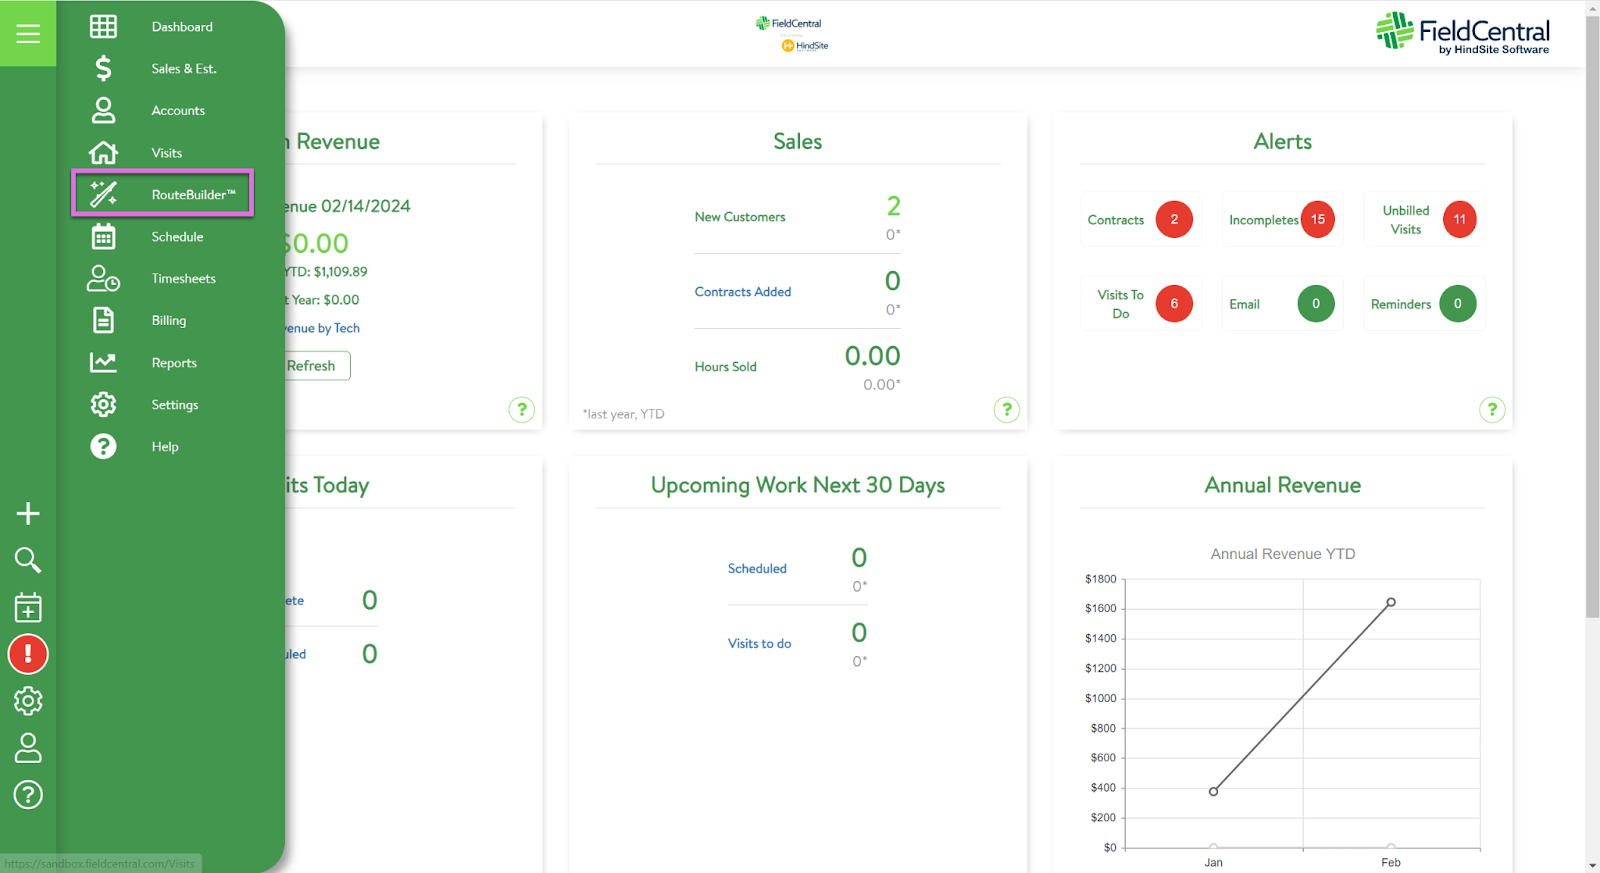
Once you have logged into your FieldCentral web account, navigate to RouteBuilder via the Main Menu.
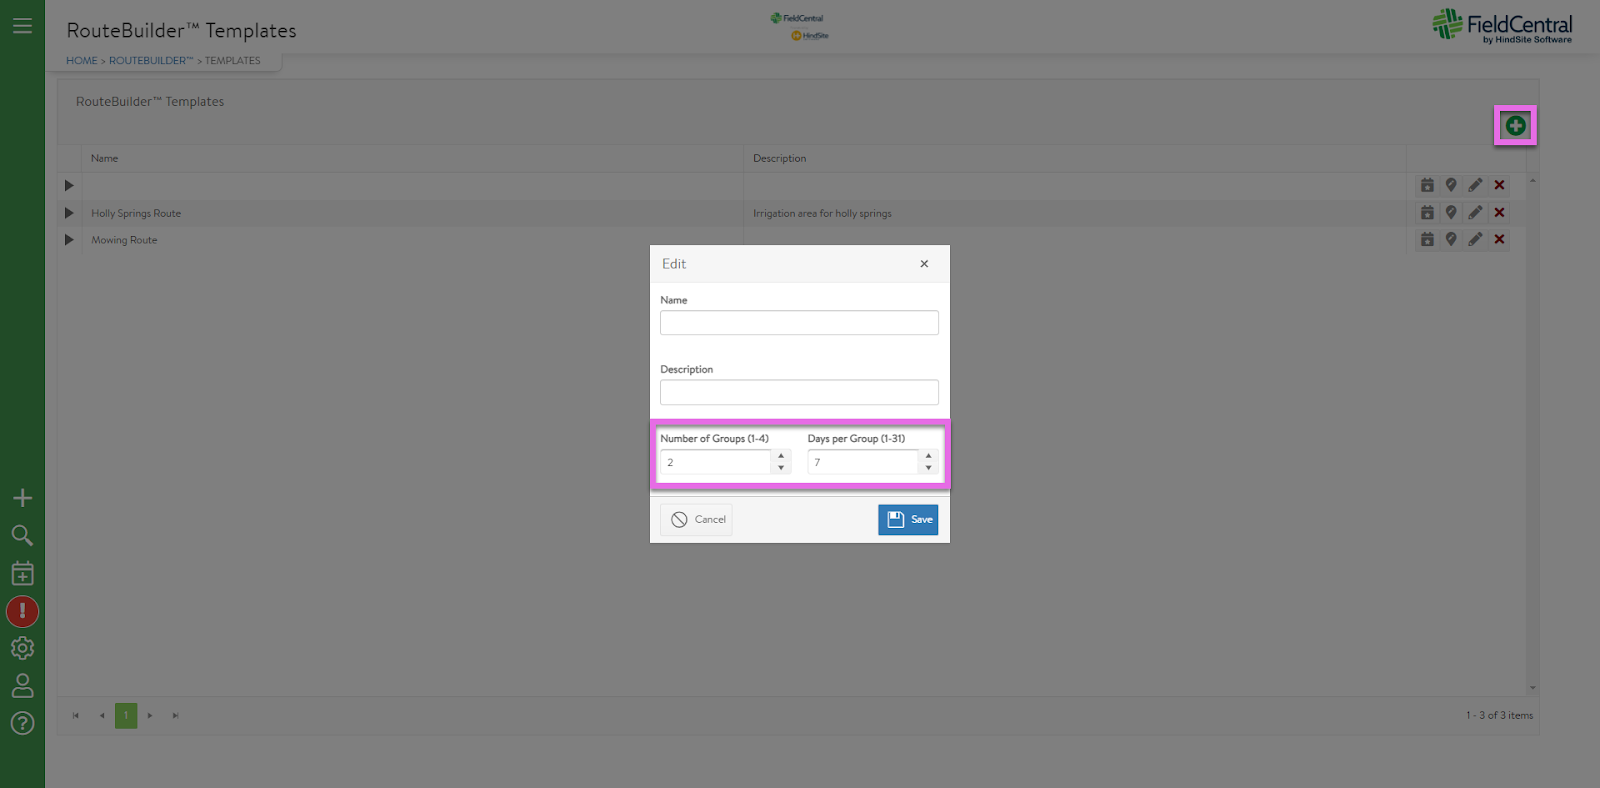
Click the green + button on the top right to create “A New Schedule Template”.

Provide the schedule/route template with a name, description & select how many groups you would like to include in this template & the number of days per group. When complete, click save, then click the location icon to begin creating your template.
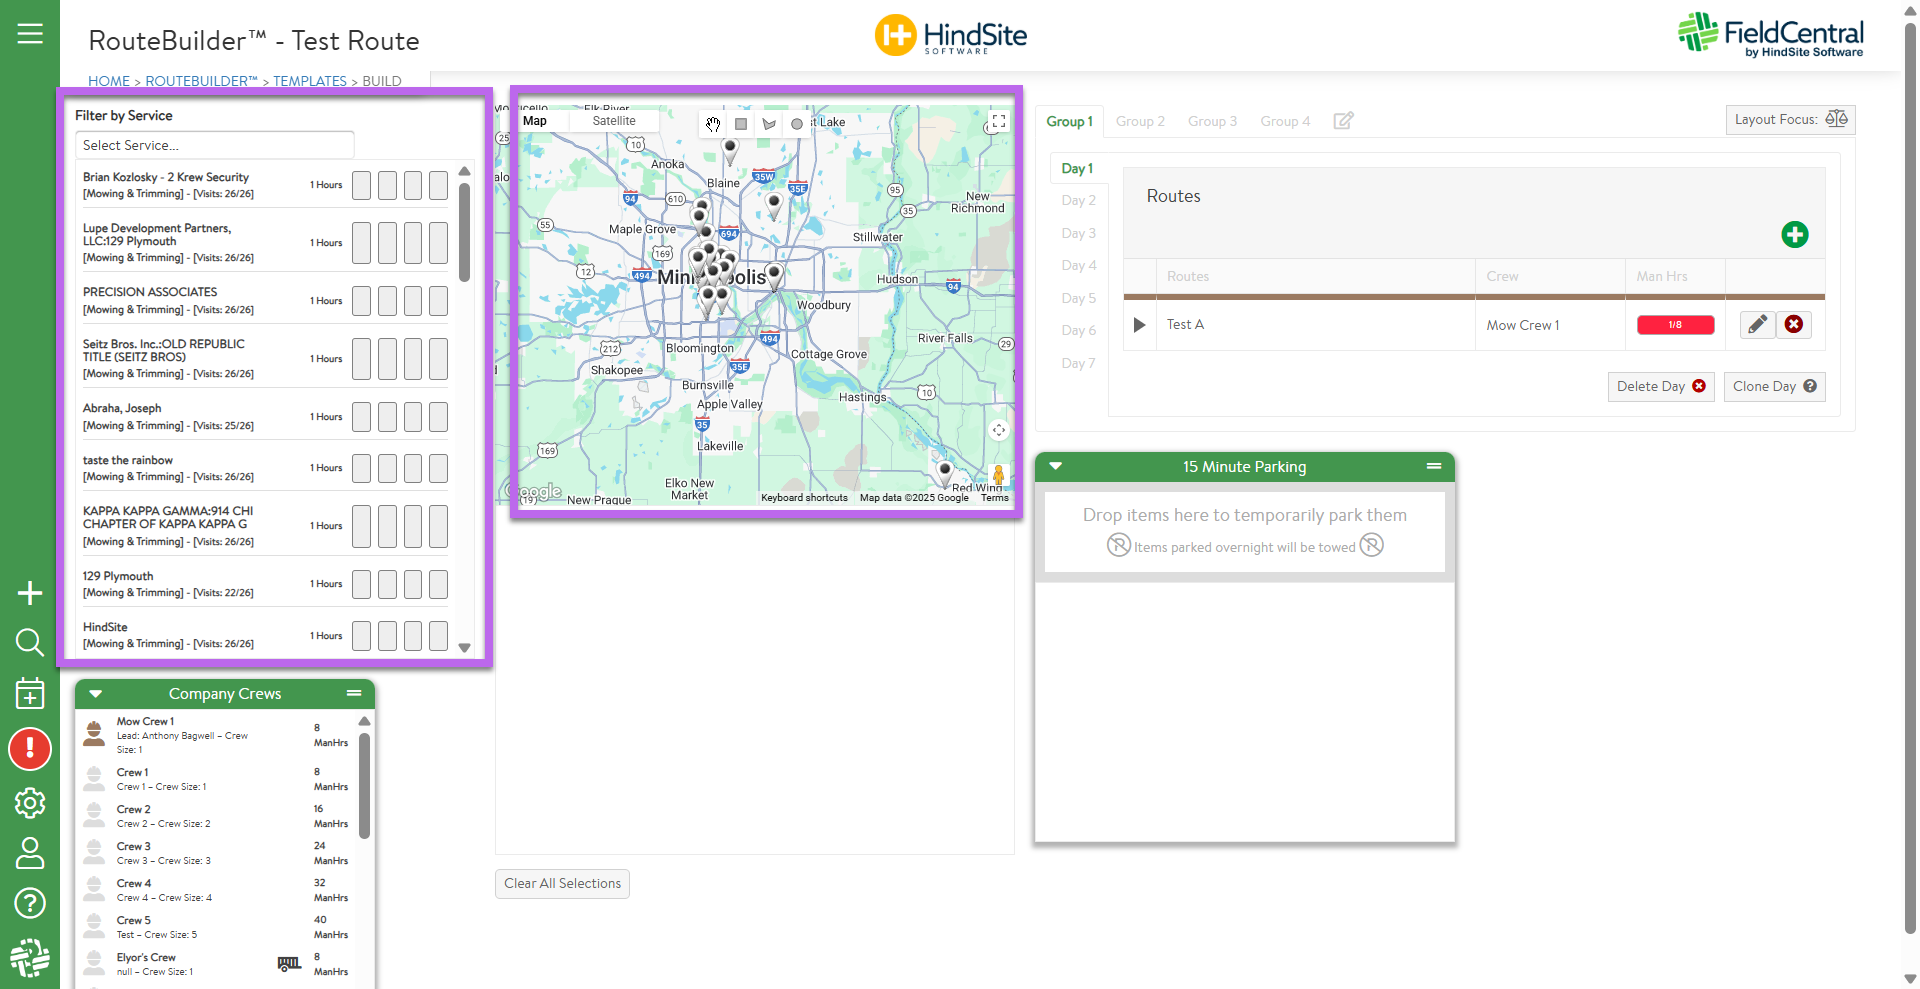
The user will notice a list of available reoccurring Services located on the left hand side of the page. These are also displayed within the map view.
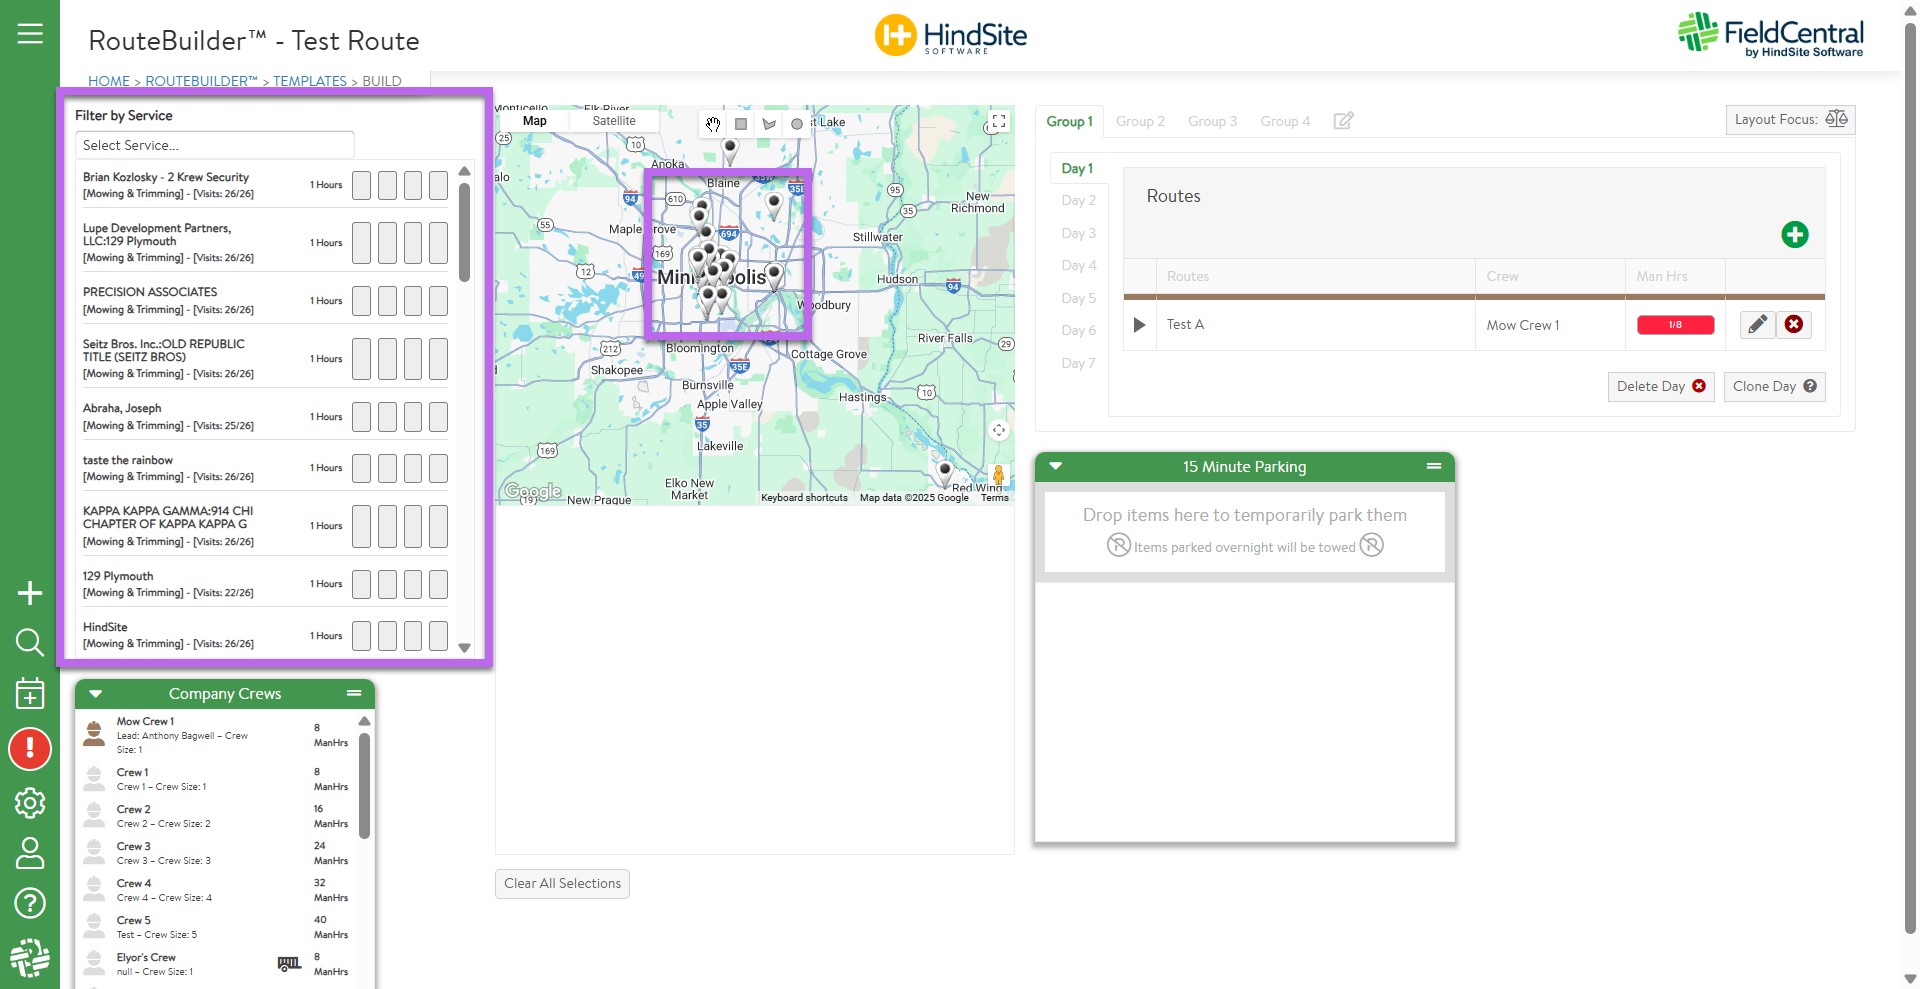
When the user zooms in and navigates through the map, the list of Services on the left will also adjust to only list those that are currently viewable on the map.
When the user is ready to begin routing these Services they will use the drawing tools to select the desired group of Services or click on them one by one.
Tip: selecting them one by one will place them in that same order underneath the map.
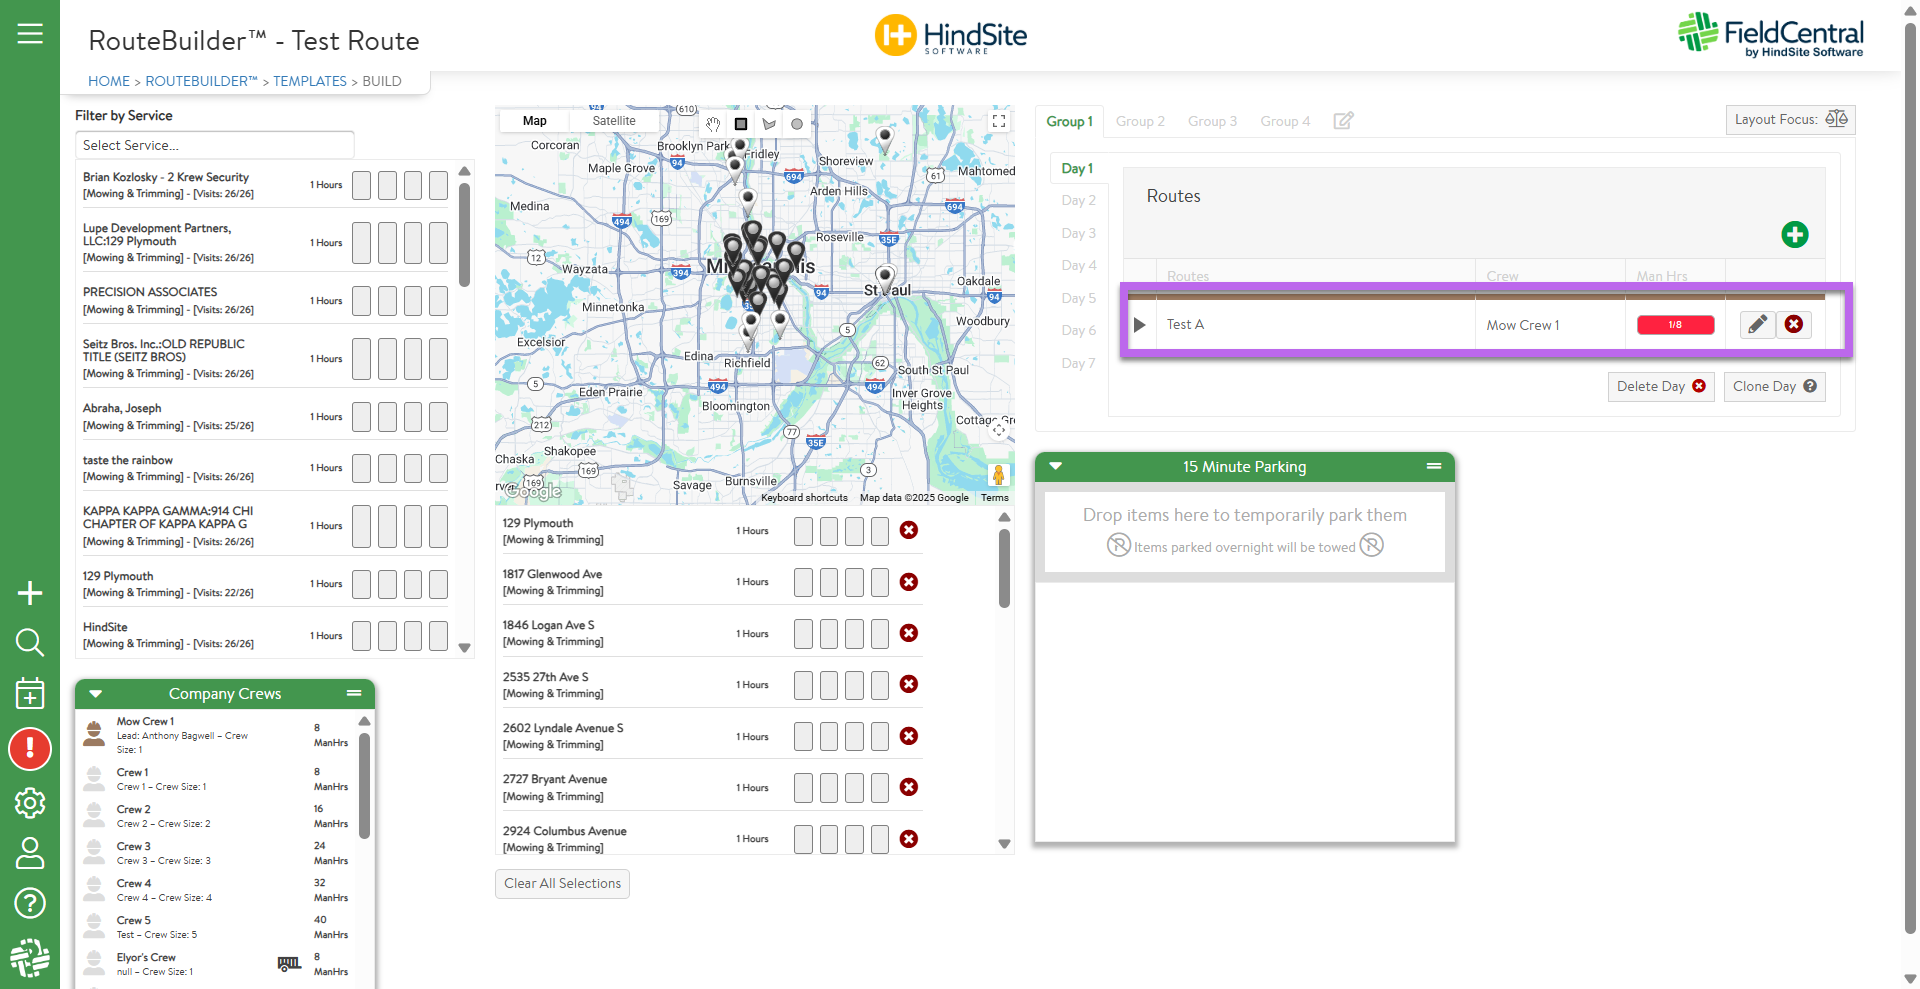
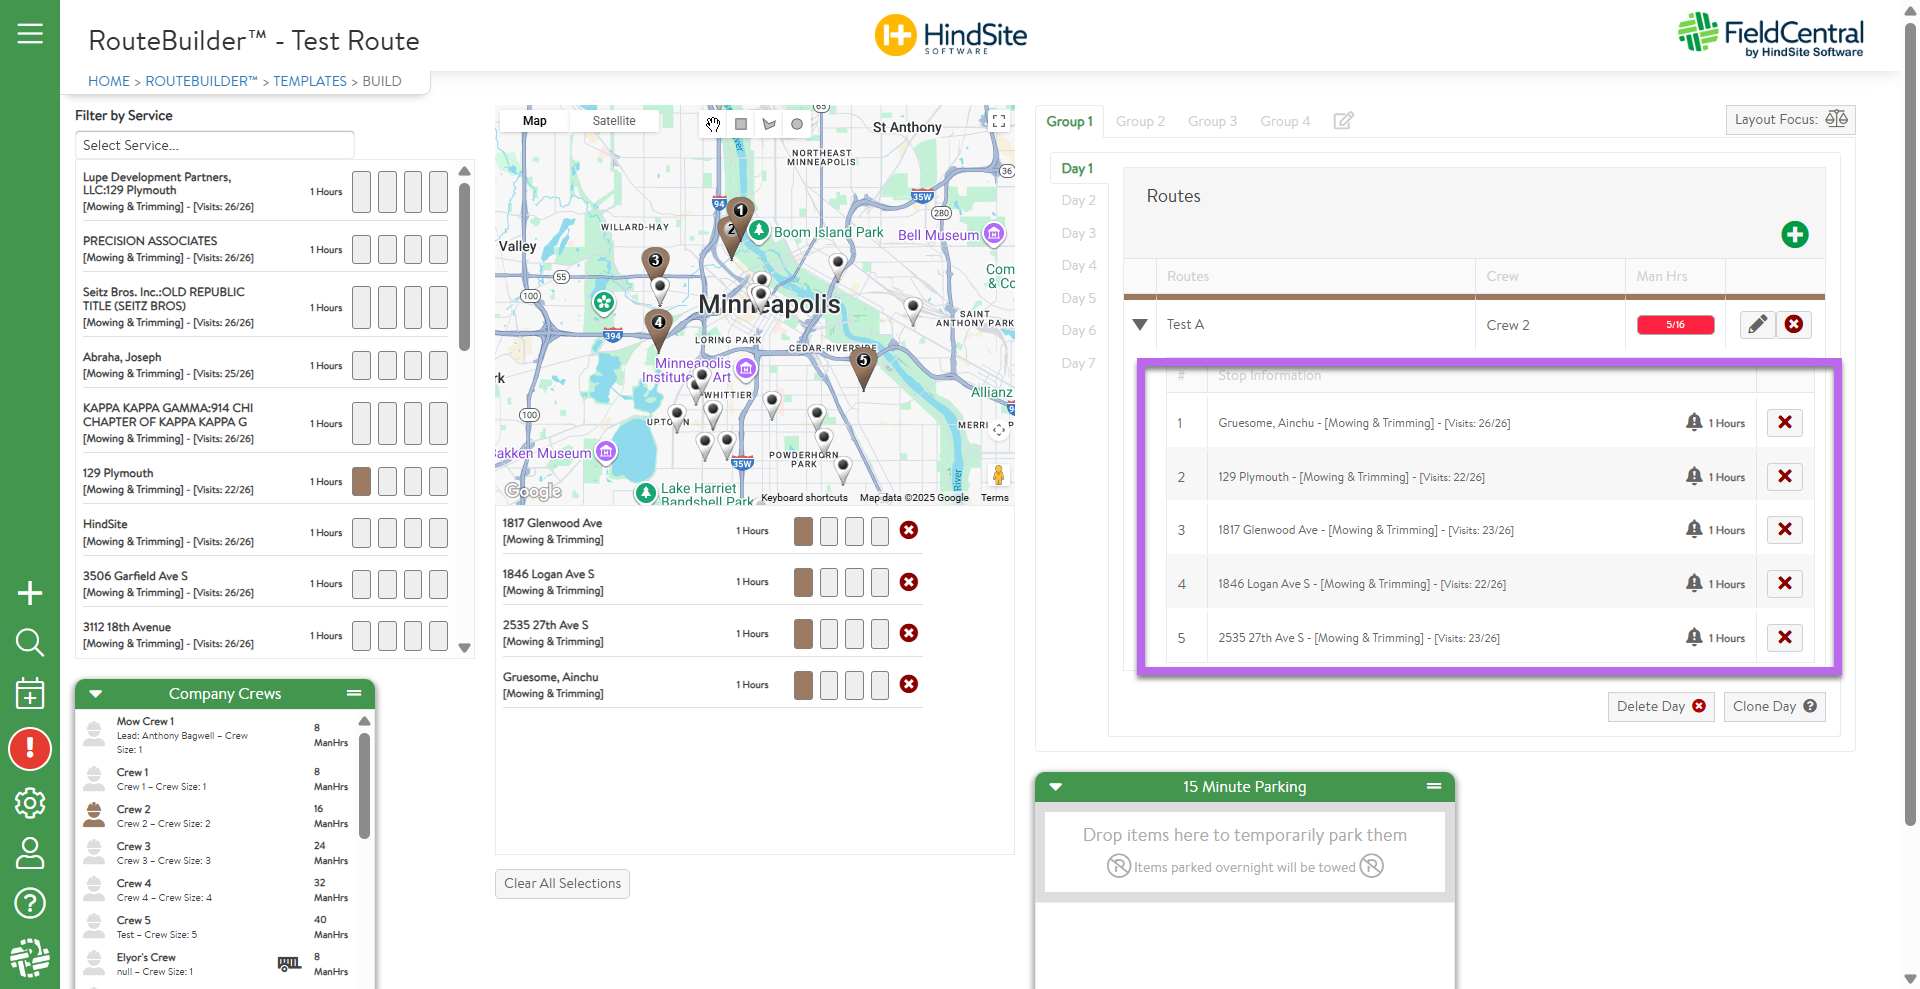
When the user is ready to add to a schedule/route, they will click the green + button within the Routes section.
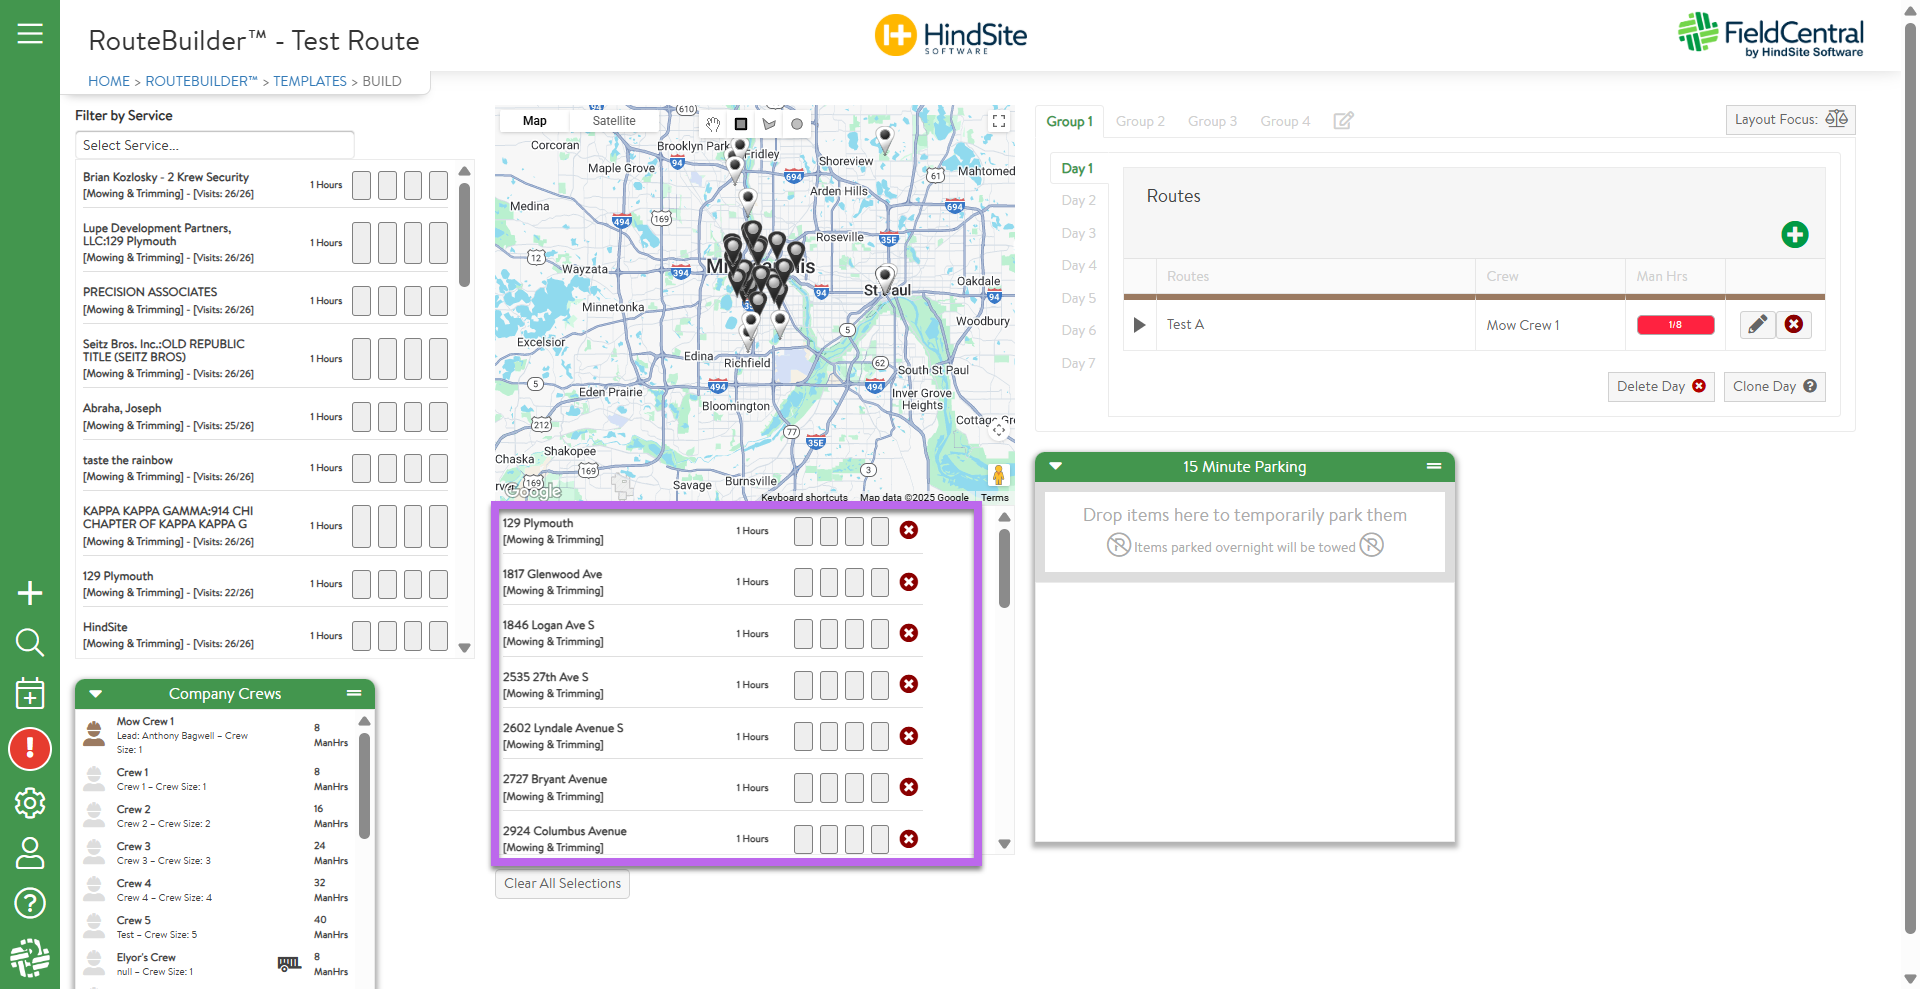
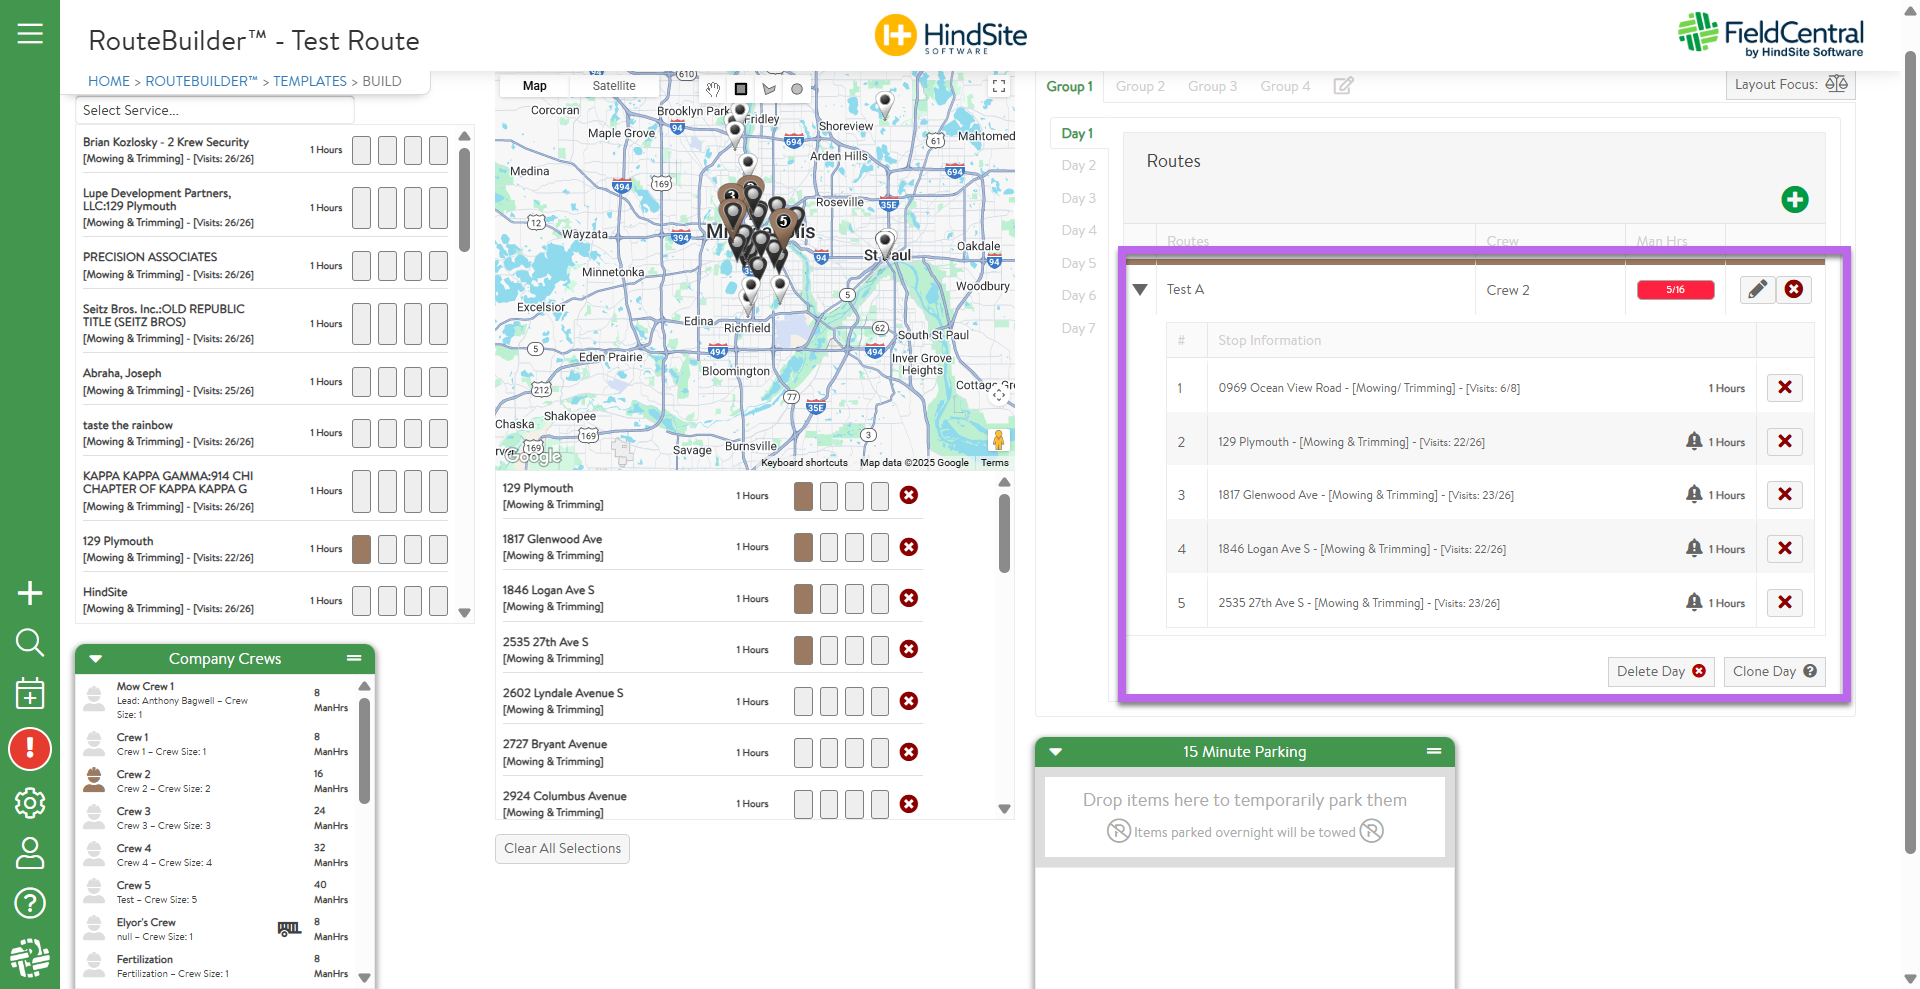
Give the route a name and assign it to a crew from the drop down menu.
Displayed will be the man hours used/available and the color ribbon above the crew will be to identify which Services are placed on this crew’s schedule.
To begin assigning the Services to the crew the user will grab the visit from under the map and drag it underneath the crew.
Once a work to do is assigned, the corresponding crew color will update in all areas the Service is displayed.
Each Service will have color blocks available, one for each available group in the given template.
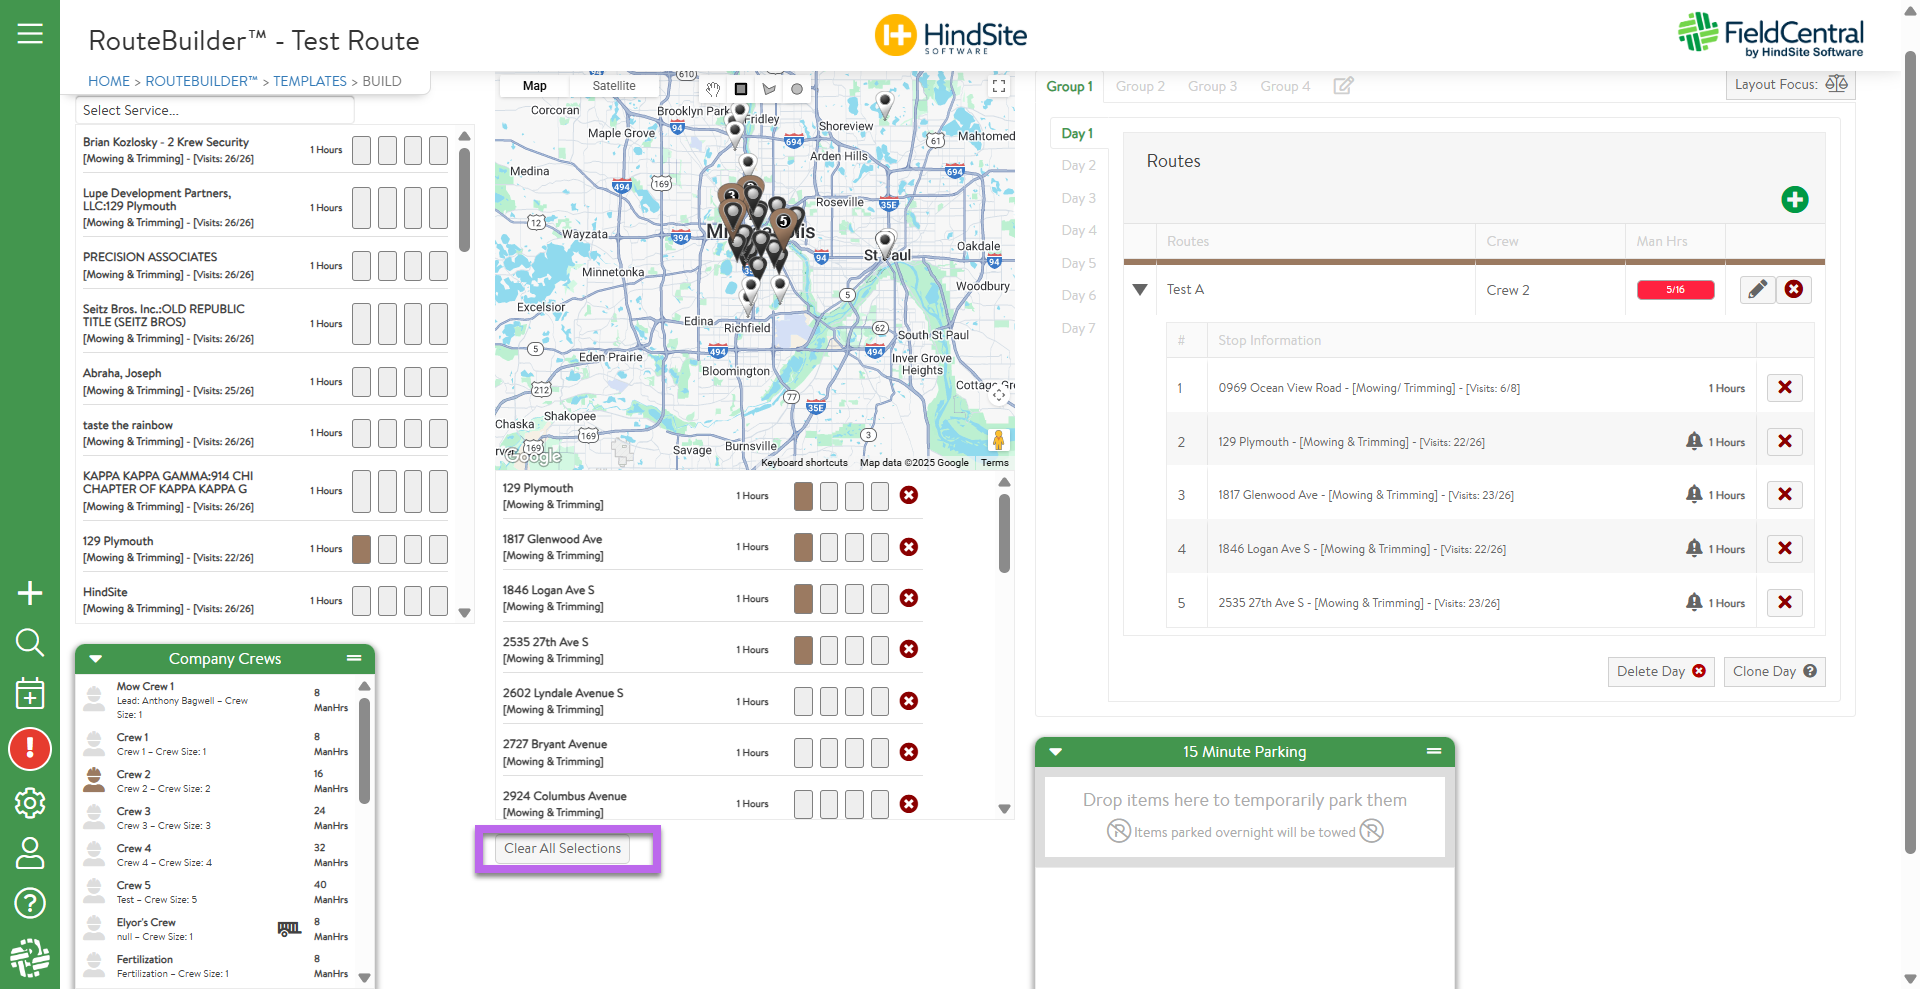
Once all the areas Services have been placed on the crews route the user can zoom out and confirm no other Services in the area need to be added.
Then click “Clear all selections” to clear the Services selected under the map view.
Continue to schedule/route Services on additional crews until all have been assigned to a crew/day.
Users will notice that Services when they are added to a crew's schedule are placed at the bottom by default and the order seen within their route can also be viewed on the map for optimal placement.
Once all Services have been routed/scheduled the user can zoom out of the map and use the color assignments of each crew to confirm all Services are assigned appropriately.
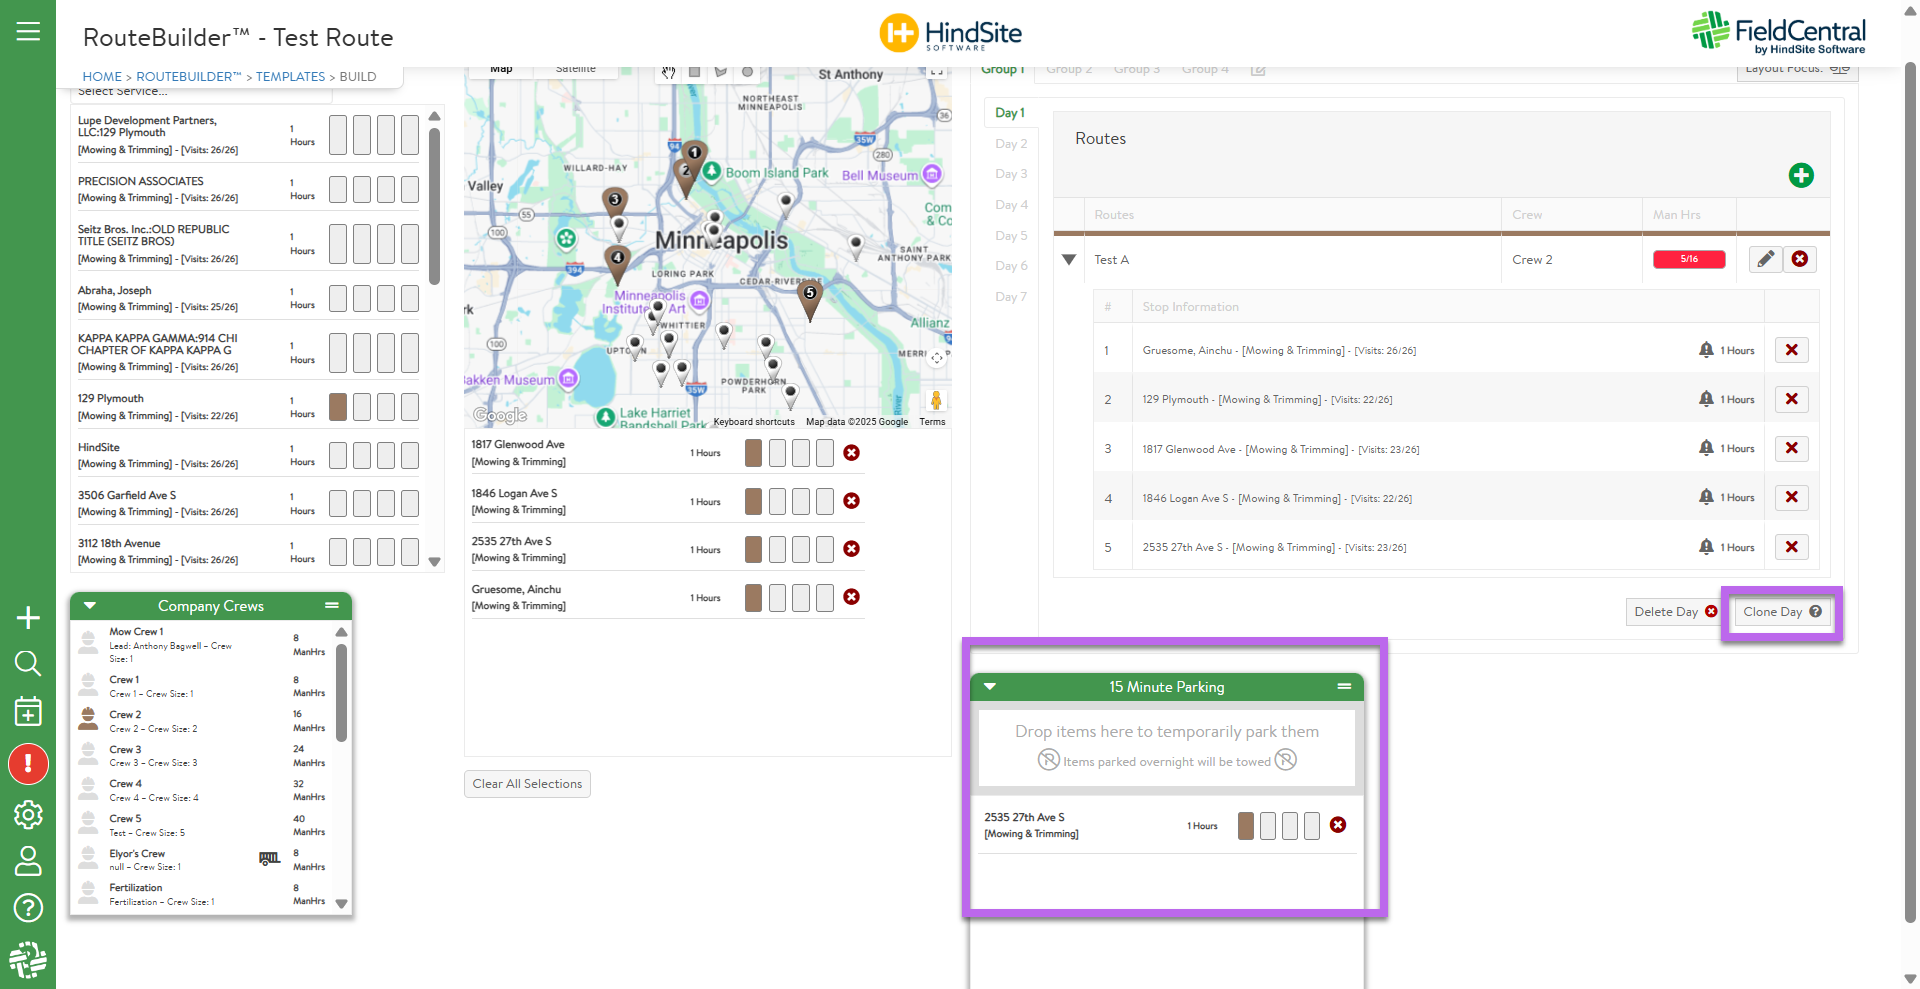
In the event the user identifies a Service that should be adjusted on the schedule they can click and drag from the crew's route to “15 min parking” and then click and drag again once they find the desired route to move the Service.
Once you have set up one group, you are able to use the “Clone Day” option which will duplicate the current group and re-create it on whichever group is selected. This prevents you from needing to duplicate efforts when setting up your routes.
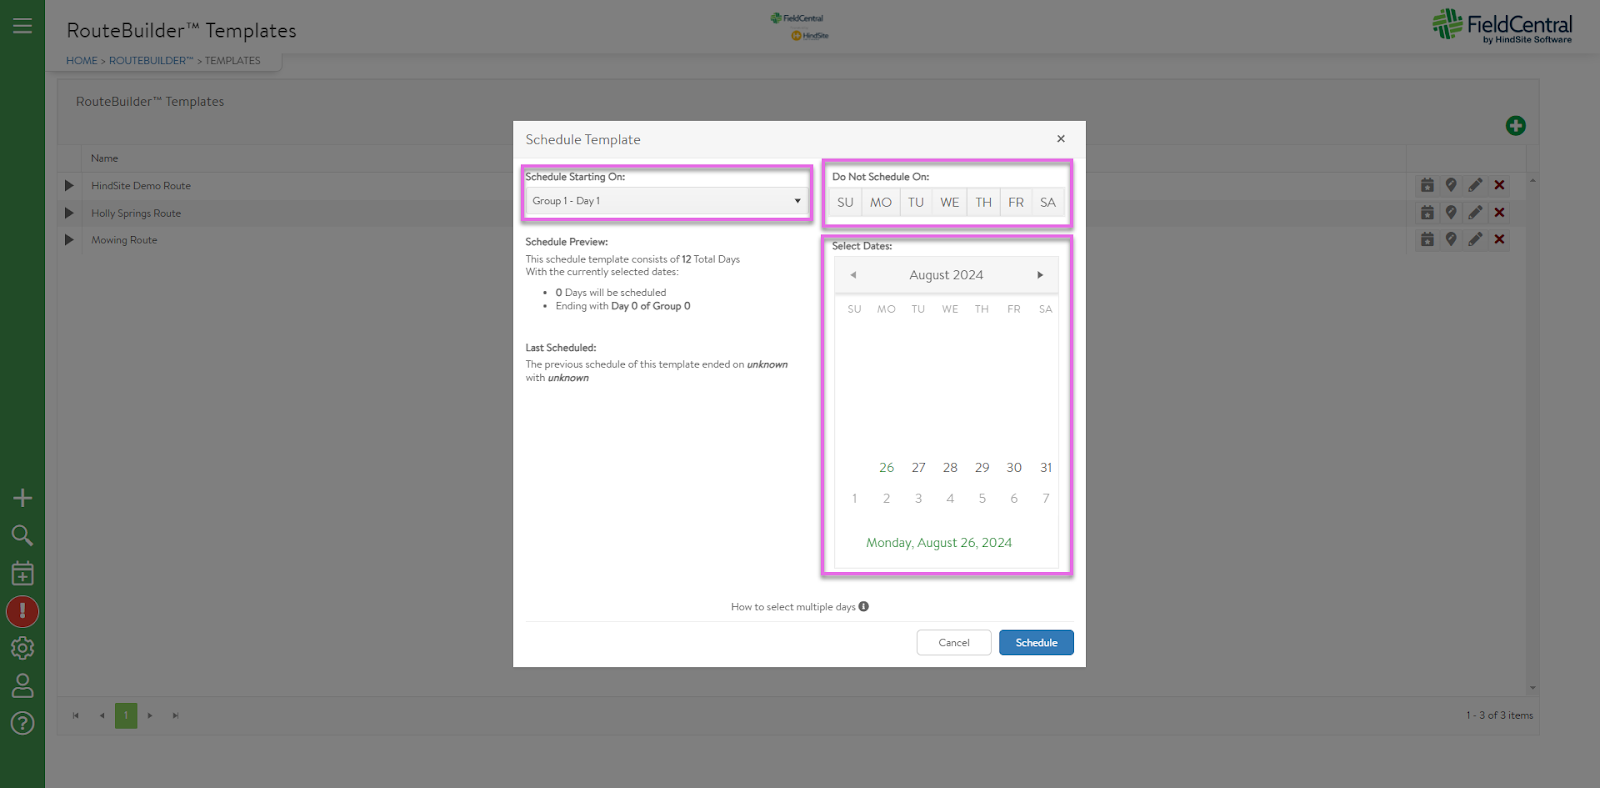
When the user is ready to place these Services on the crew's schedules they will navigate back to the templates page and click the calendar icon.
Select which Group and which day within said group you would like the route template to begin the schedule on. Select any days of the week to NOT schedule services and then select the date range from which to schedule on the calendar.

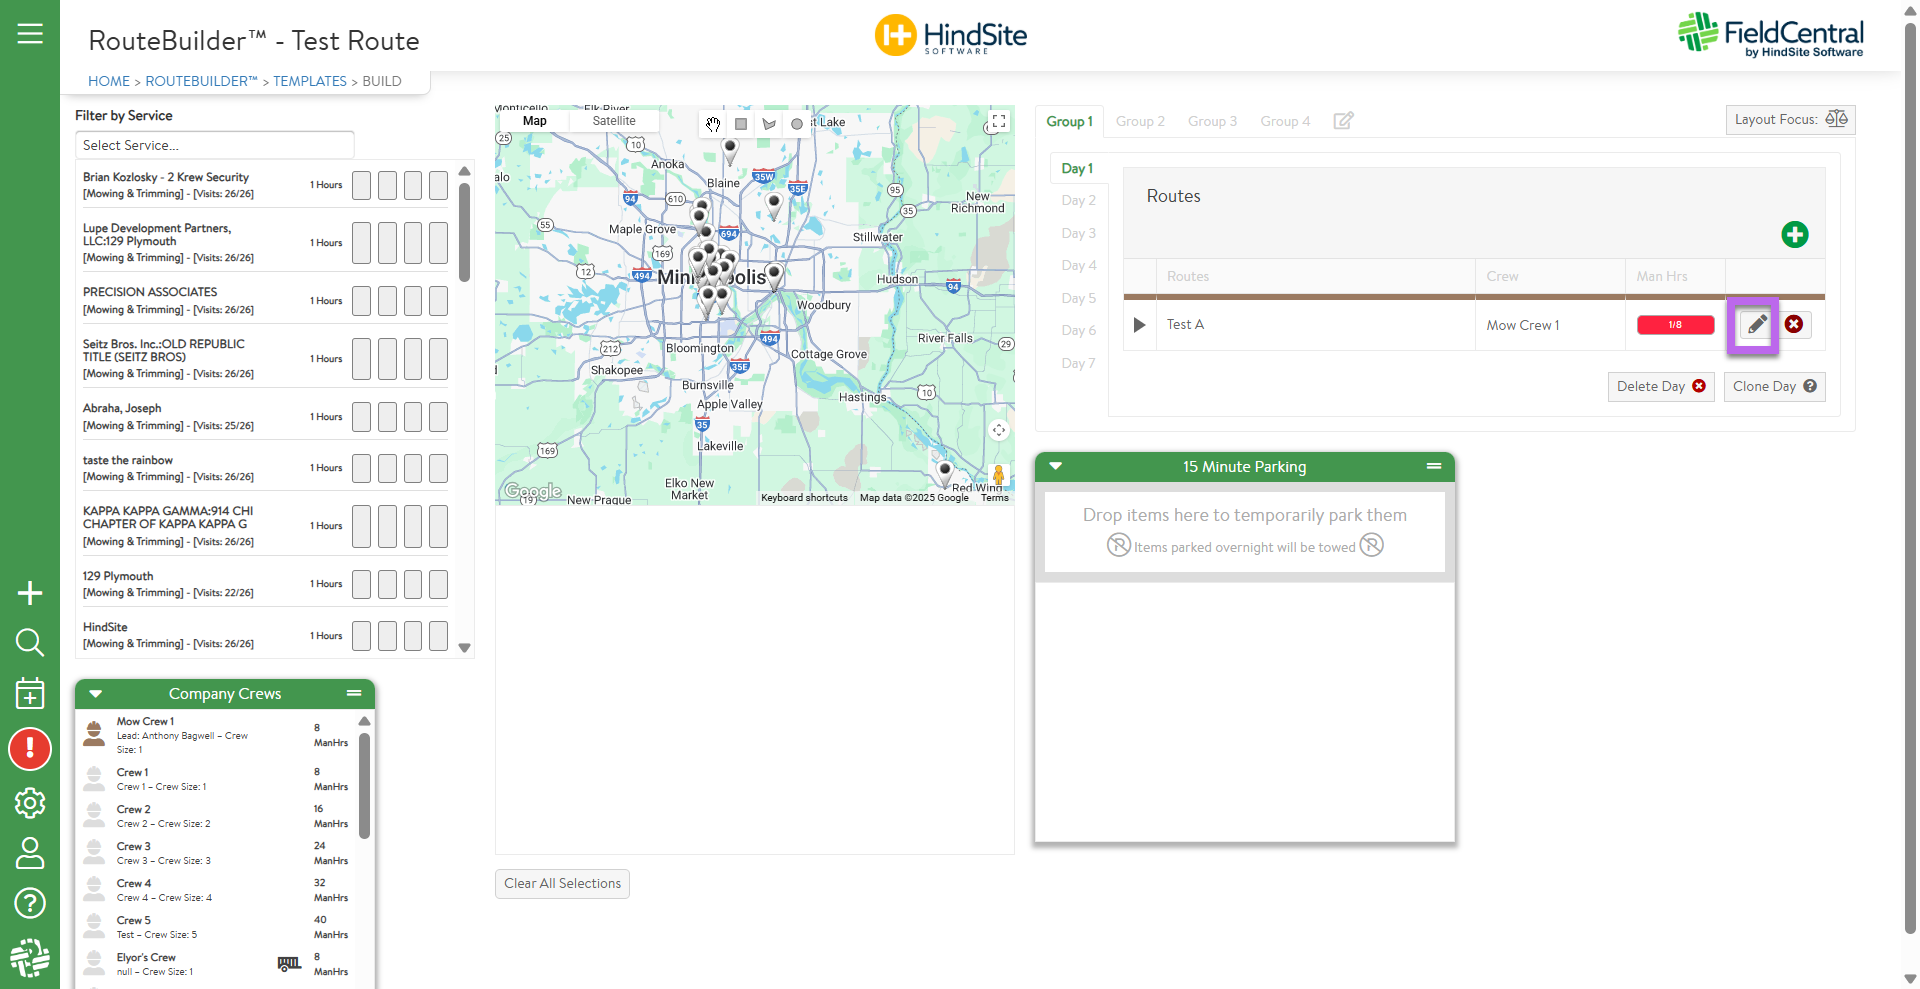
In the event a route needs to be assigned to a different crew, the user can edit by going back into the building of the route and selecting the pencil icon on the crew's route and re-assigning to another crew without needing to delete anything.
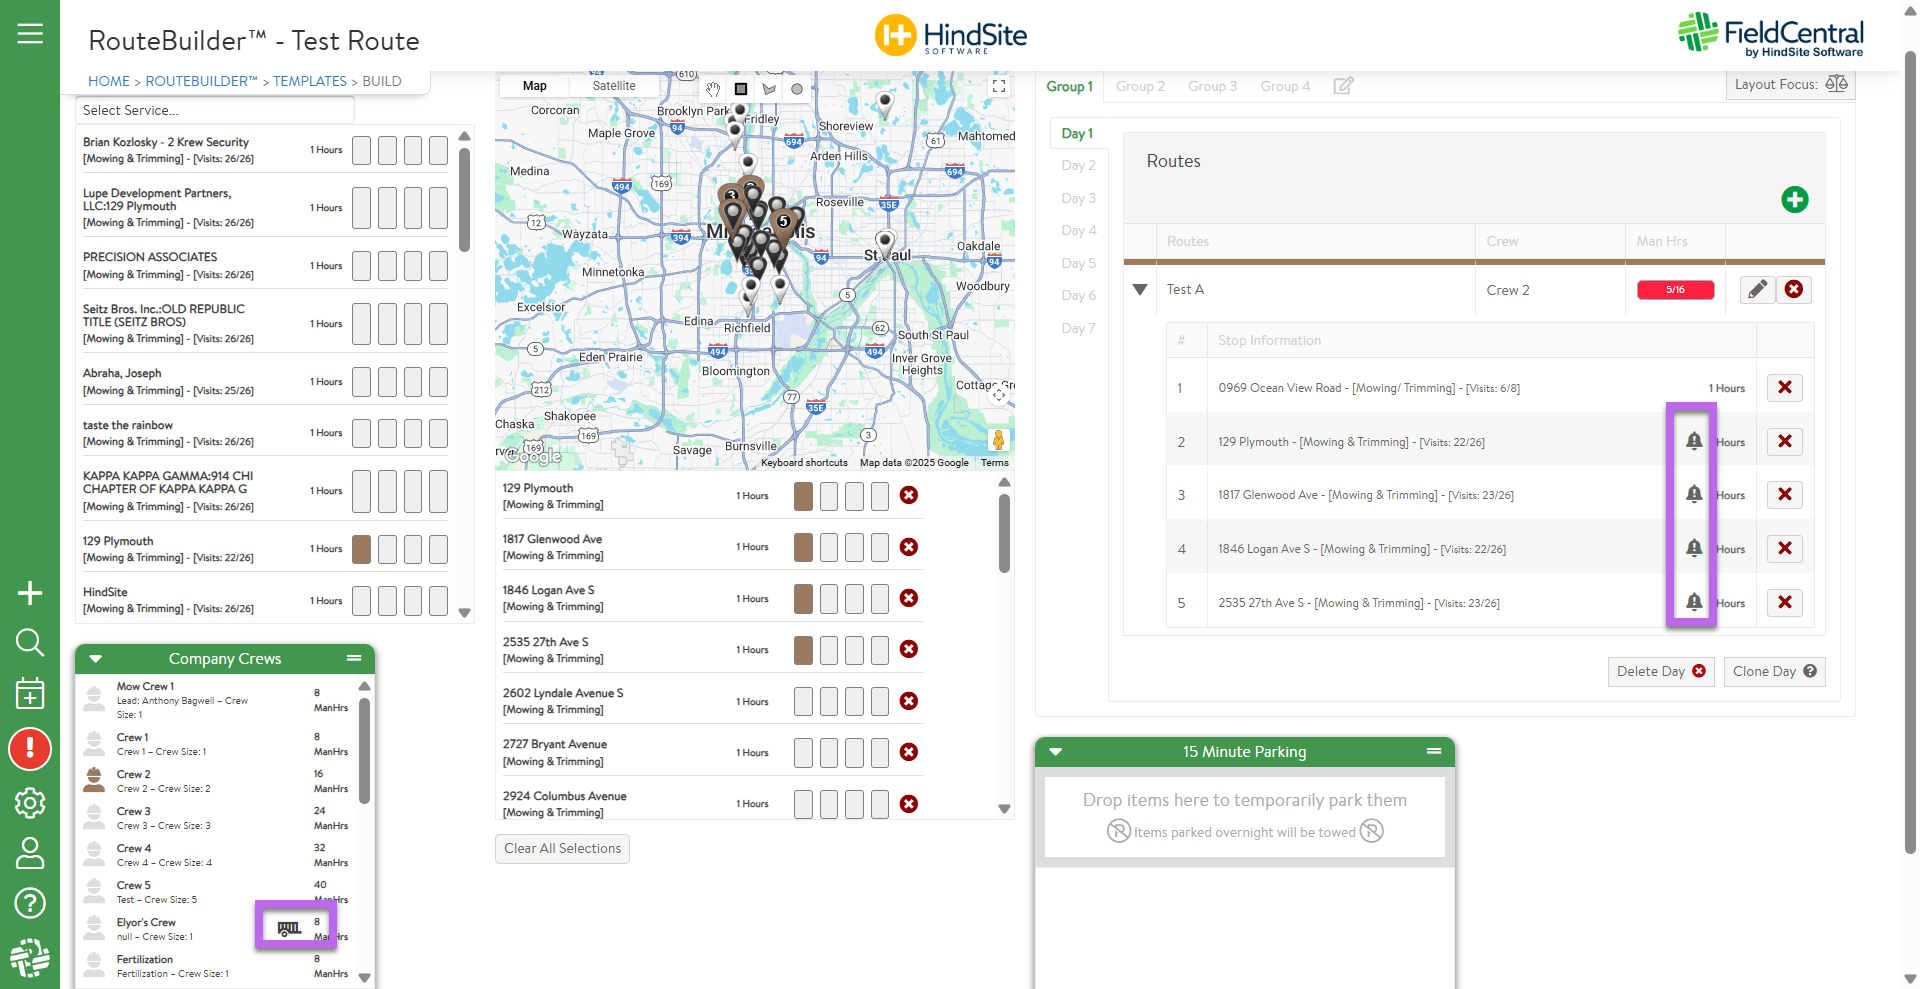
Please be advised that if you are leveraging vehicles & equipment setup then the user will see warning messages flagged in the event a property requires certain equipment or in the event a vehicle does not have the right equipment to perform the work. This will allow users to be alerted to potential route issues and reassign the property to an appropriate crew. (These warning messages will not prevent the user from scheduling, they simply notify the user)
- Exclamation icon: Property has specific equipment needs
- Bell icon: crew’s assigned vehicle does not have the right equipment to perform a service
- Trailer icon: surfaces what equipment is on that vehicle
Check out RouteBuilder the next time you login to easily route all your reoccurring Services. Use in conjunction with Vehicles & Equipment setup will allow you to better manage your routes and in a fraction of the time.