![hindiste-logo.png]](https://portal.fieldcentral.com/hs-fs/hubfs/HindSite/hindiste-logo.png?height=40&name=hindiste-logo.png)
What's happening and who should do this
Internet browsers now flag links that aren't secured, and your original link setup doesn't meet that standard. Your emails are still delivered and the links are safe, but customers may see a "Your connection is not private" warning on appointment confirmations, reminders and estimates.
The fix is a one-time setup in SendGrid plus a few records at the company that manages your domain. It's free, and SendGrid renews the certificate for you automatically.
Who does it: whoever manages your website or domain. If that's not you, forward them this page. HindSite Support can help with the SendGrid steps, but changes to your domain's DNS need to be made by you or whoever manages your domain.
Which situation are you in? In SendGrid, go to Settings > Sender Authentication and look at the domain listed under Link Branding.
- It shows connect.hindsitesoftware.com: your links use the shared address from your original setup. Complete the steps below before January 1, 2027.
- It shows your own domain: follow the steps below to add SSL.
- You don't have your own domain (your company email ends in @gmail.com or @yahoo.com): email support@hindsitesoftware.com or call 888.752.5978, and we'll go over your options.
Before you start
- Your SendGrid login. Not sure how to log in? See SendGrid First Time Login Instructions.
- Access to your domain's DNS settings. That's the account where your domain is managed, usually where you bought your domain name or where your website is hosted (for example GoDaddy, Squarespace, Wix, Namecheap or Network Solutions).
- You'll create a new branded link. An existing branded link can't be switched to SSL. Leave your old one in place until the new one is verified.
- Allow up to 48 hours for DNS changes to take effect.
Set up secure links
Open Link Branding in SendGrid
Log in to SendGrid and go to Settings > Sender Authentication. Under Link Branding, click Brand Your Links.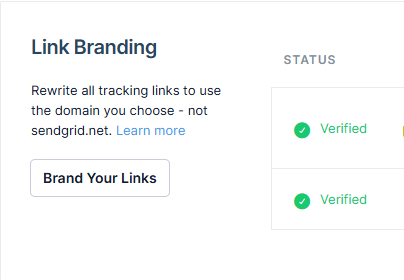
Choose your DNS host
Select your DNS host from the drop down (the company that manages your domain). If yours isn't listed, choose Other Host (Not Listed). If you don't know, choose I'm Not Sure., then click Next.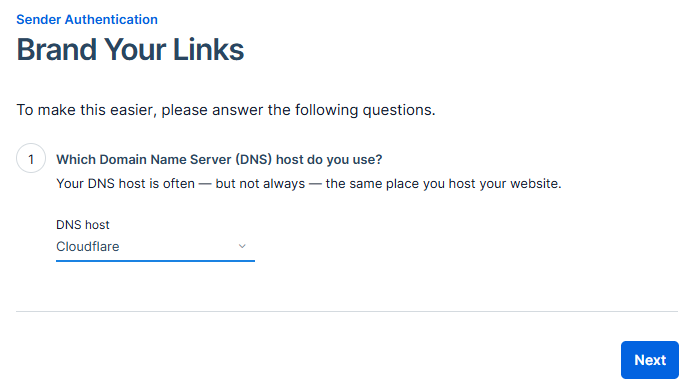
Enter your domain and check SSL
In From Domain, enter your domain, such as yourcompany.com. Open Advanced Settings and make sure Auto provision SSL certificate is checked. It usually is already, but this box is what fixes the warning, so double-check it. Then click Next.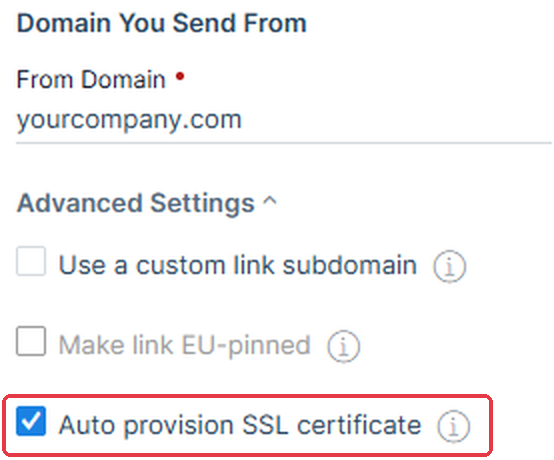
Copy your DNS records
SendGrid shows the records to add: usually three CNAME records and one TXT record. They're unique to your account. Keep this page open; you'll copy each Host and Value into your DNS provider in the next step.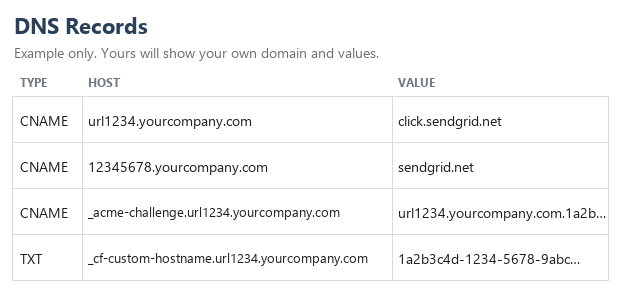
Add the records with your DNS provider
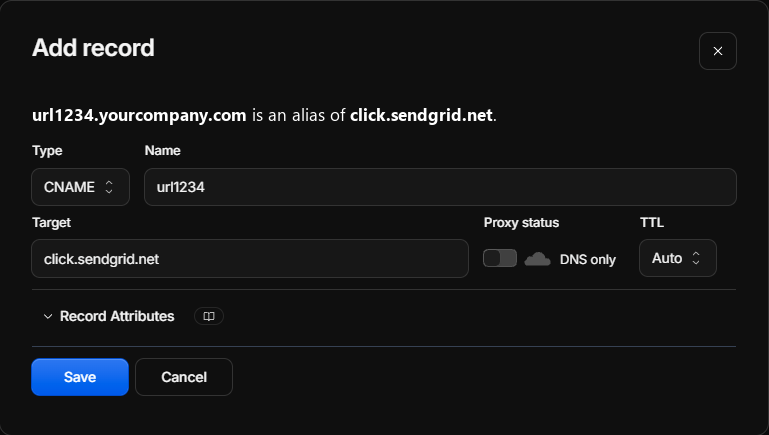
Don't delete or change any records that are already there. They often run your website and regular email.Log in to the company that manages your domain and open the DNS settings for your domain. For each record, add a new record, choose the Type, paste the Name (Host) and the Value, leave TTL as the default, and save.
In the Name box, enter only the first part of the Host (for example url1234, not url1234.yourcompany.com). Most providers add your domain automatically. If you see your domain listed twice, delete the record and add it again.
Every provider's screens look a little different, but they all ask for the same three things: Type, Name (Host) and Value. If you can't find the DNS settings, search your provider's help pages for "add a CNAME record."
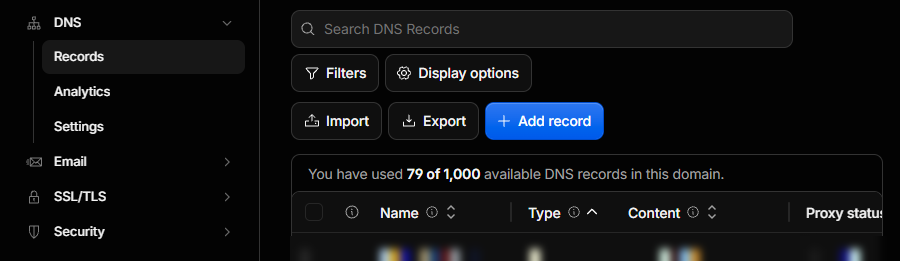
Example: in Cloudflare, select your domain, go to DNS > Records and click Add record. Cloudflare calls the Value box Target on CNAME records and Content on TXT records. Set Proxy status to DNS only (grey cloud) on every CNAME record. Records left on the orange cloud won't verify.
Verify and set as default
Back on the SendGrid records page, click Verify. DNS changes can take up to 48 hours. Once every record shows Verified, scroll to Settings at the bottom of the same page and check Use as default domain.
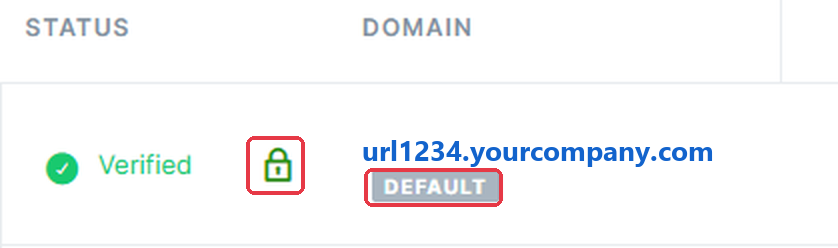
On the Sender Authentication page, your new link should now show Verified, a padlock, and DEFAULT. The padlock means the secure link is on.
Check that it worked
Send yourself an appointment confirmation and click the link. It should open with no warning.
Links in emails you sent before the change keep working as long as your old records stay in place, but they'll still show the warning. Only emails sent after the change use the secure link.